Recording Expenses
Creating an expense
Click the + icon beside Expenses module on the left sidebar.
Enter the date on which the expense incurred in the Date field.
Choose the category the expense falls under. Click Itemize if you need to record expense of various categories as a single expense.
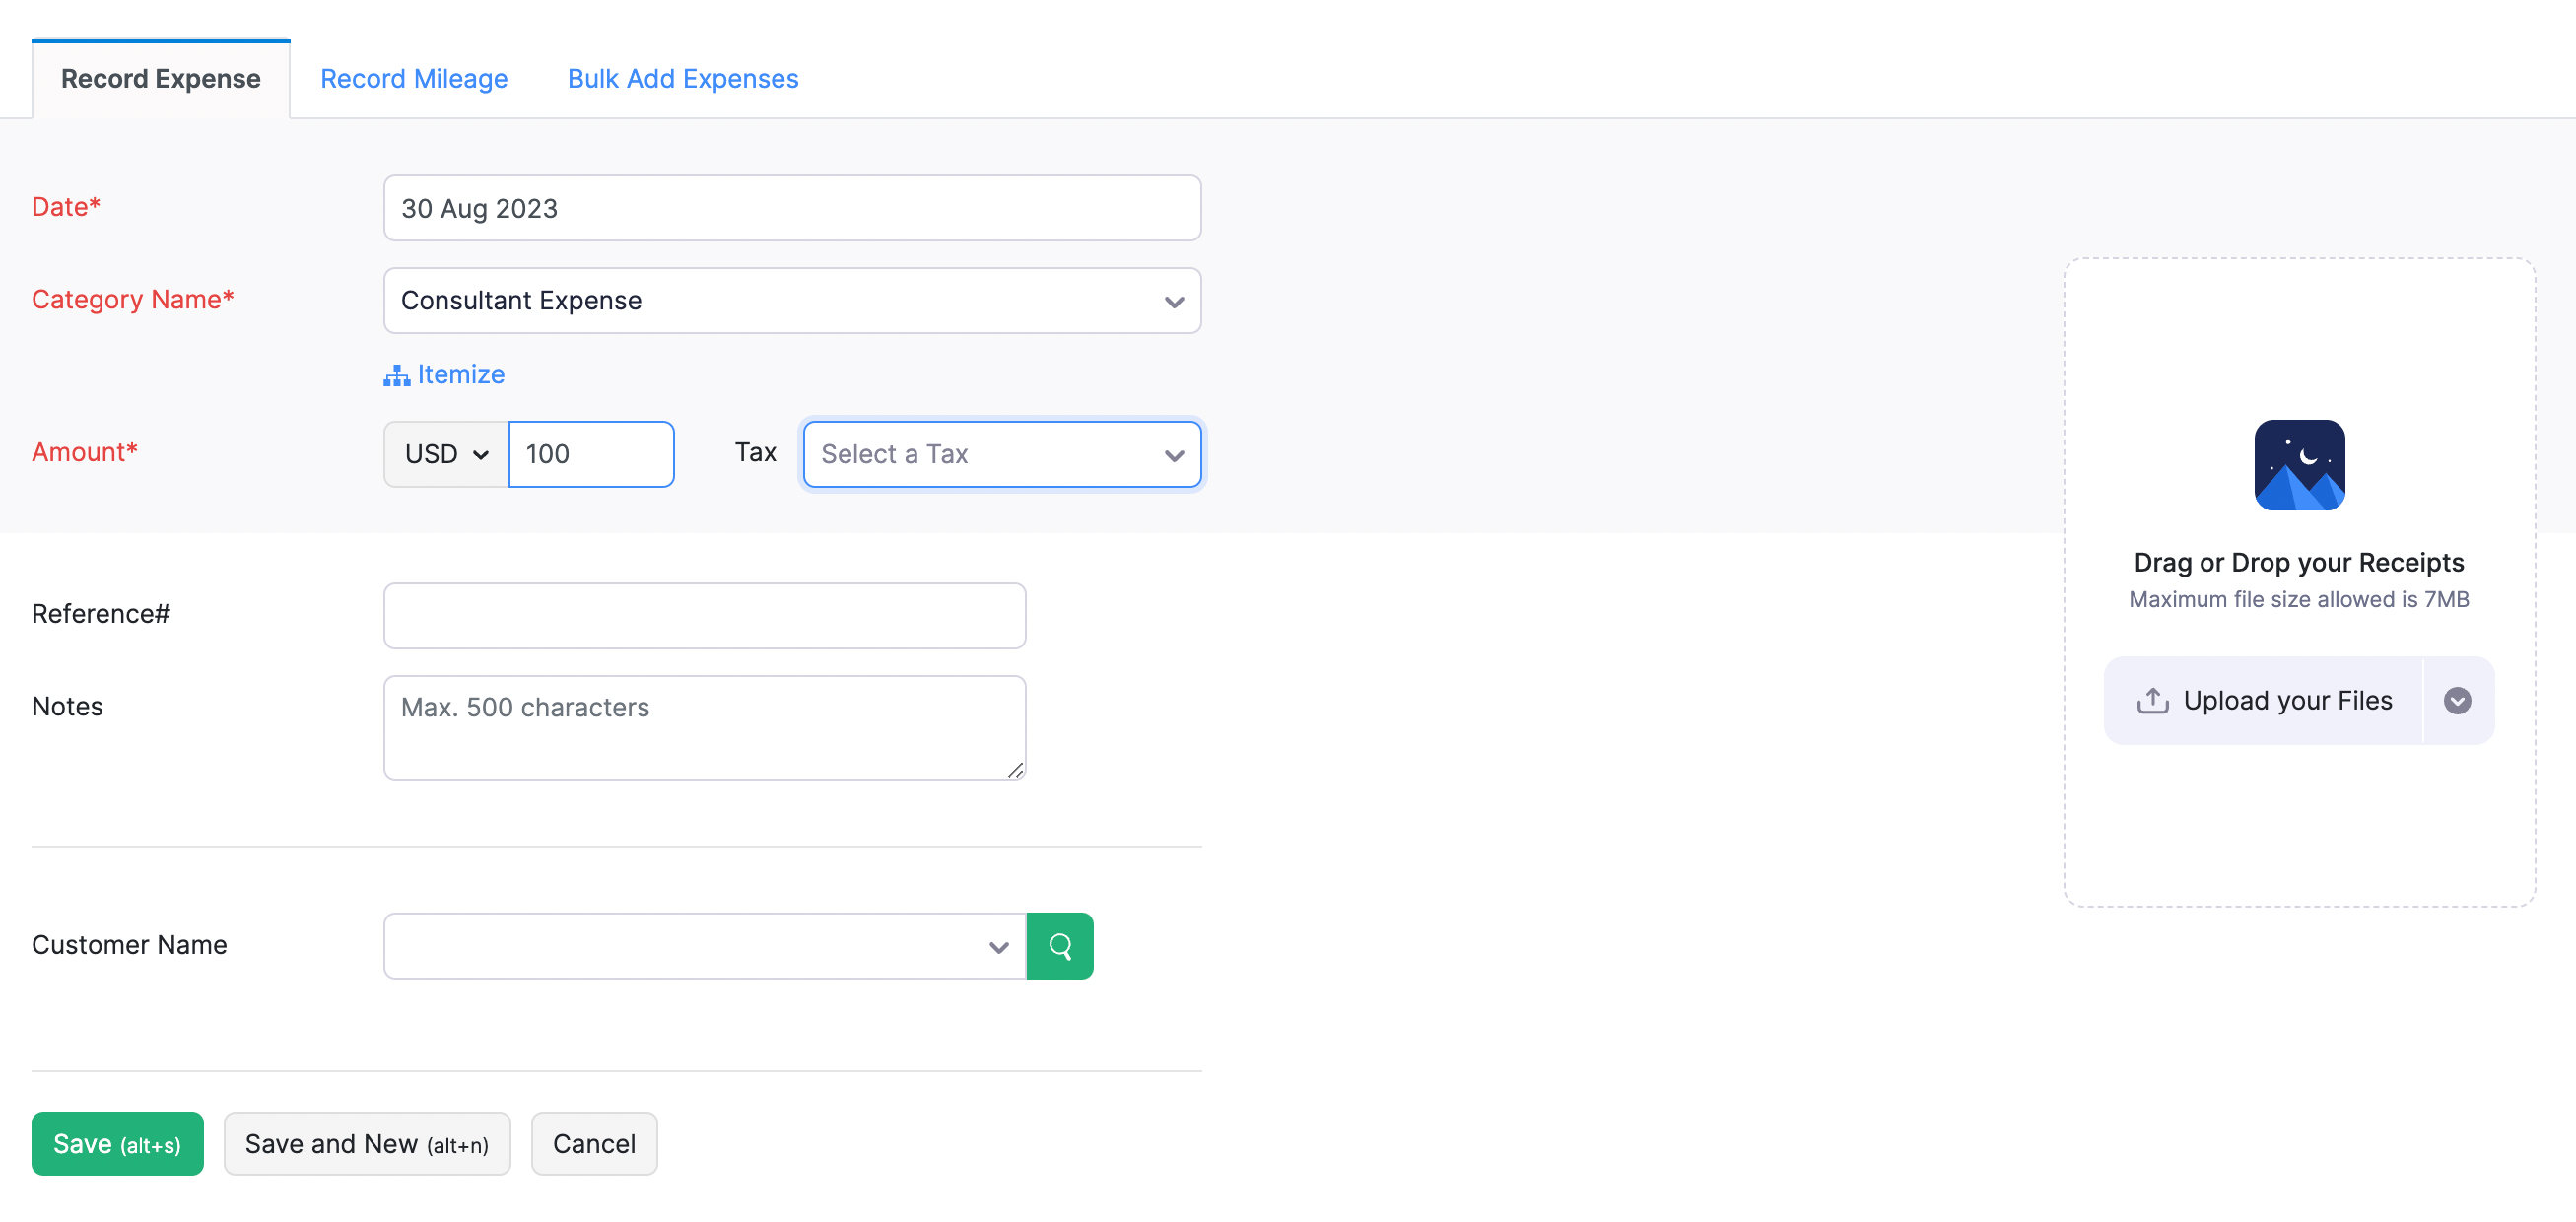
Enter the expense amount in the Amount field.
Choose Customer Name if you’re recording an expense incurred to a particular customer.
Select Billable, if you would be converting/adding this expense to an invoice.
You can also click a picture of the expense receipt and upload it to Zoho Billing. Click on the Attach receipt option inside an expense to do this. The receipt acts as a validation of the expense incurred.
All the expenses you record will show up on your Zoho Billing dashboard. It would be in the form of a pie chart representing each category and all your expenses would be segregated accordingly.
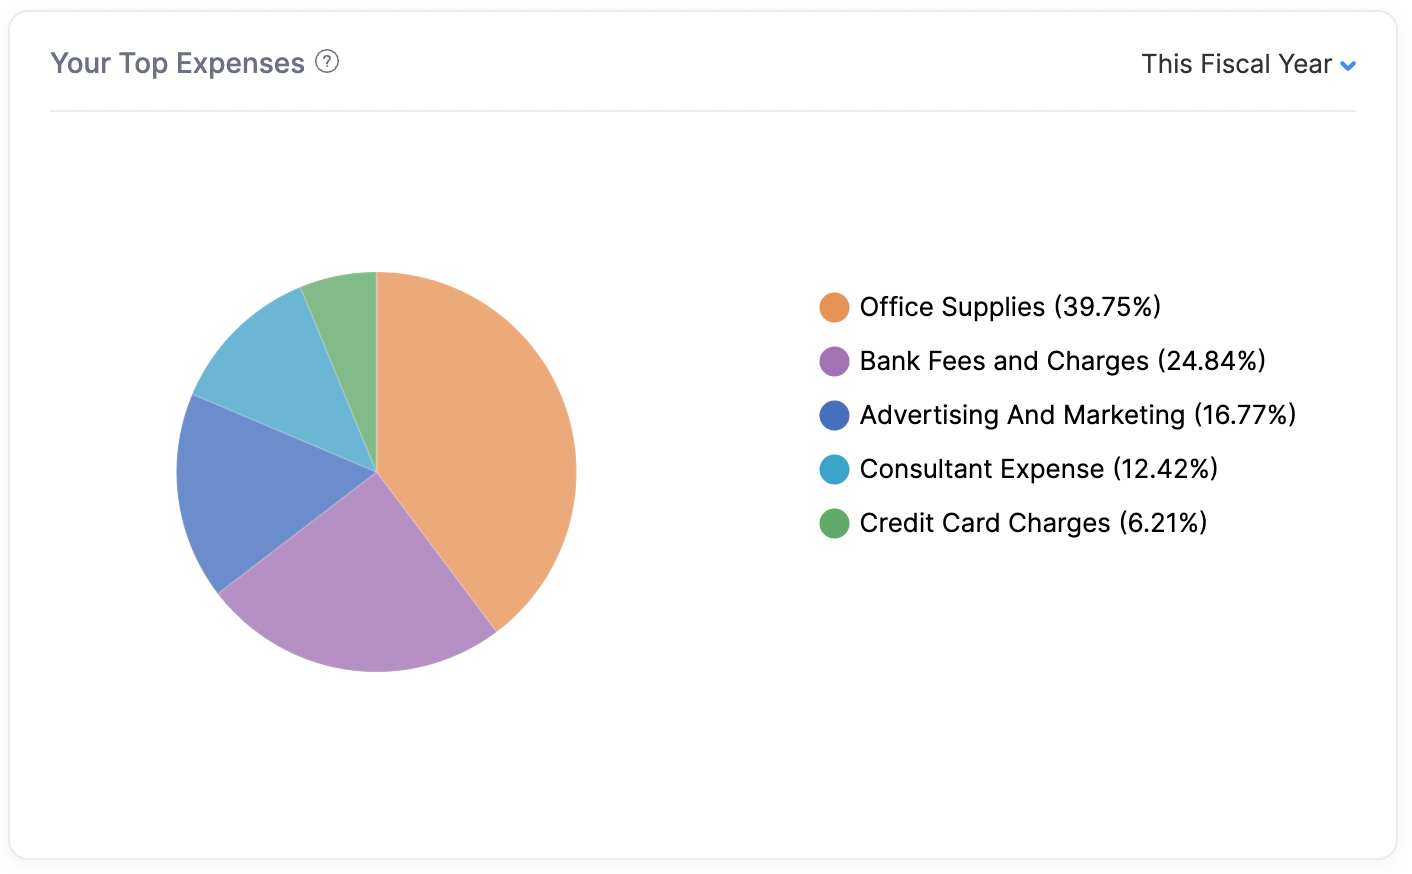
When you want to review the financial health of your company, a detailed assessment of your expenses is required and this is provided for you in the form of comprehensive expense reports.
Editing an Expense
To edit an existing expense, click Edit in the top left corner in the Expense Details page.(as highlighted in the image below)
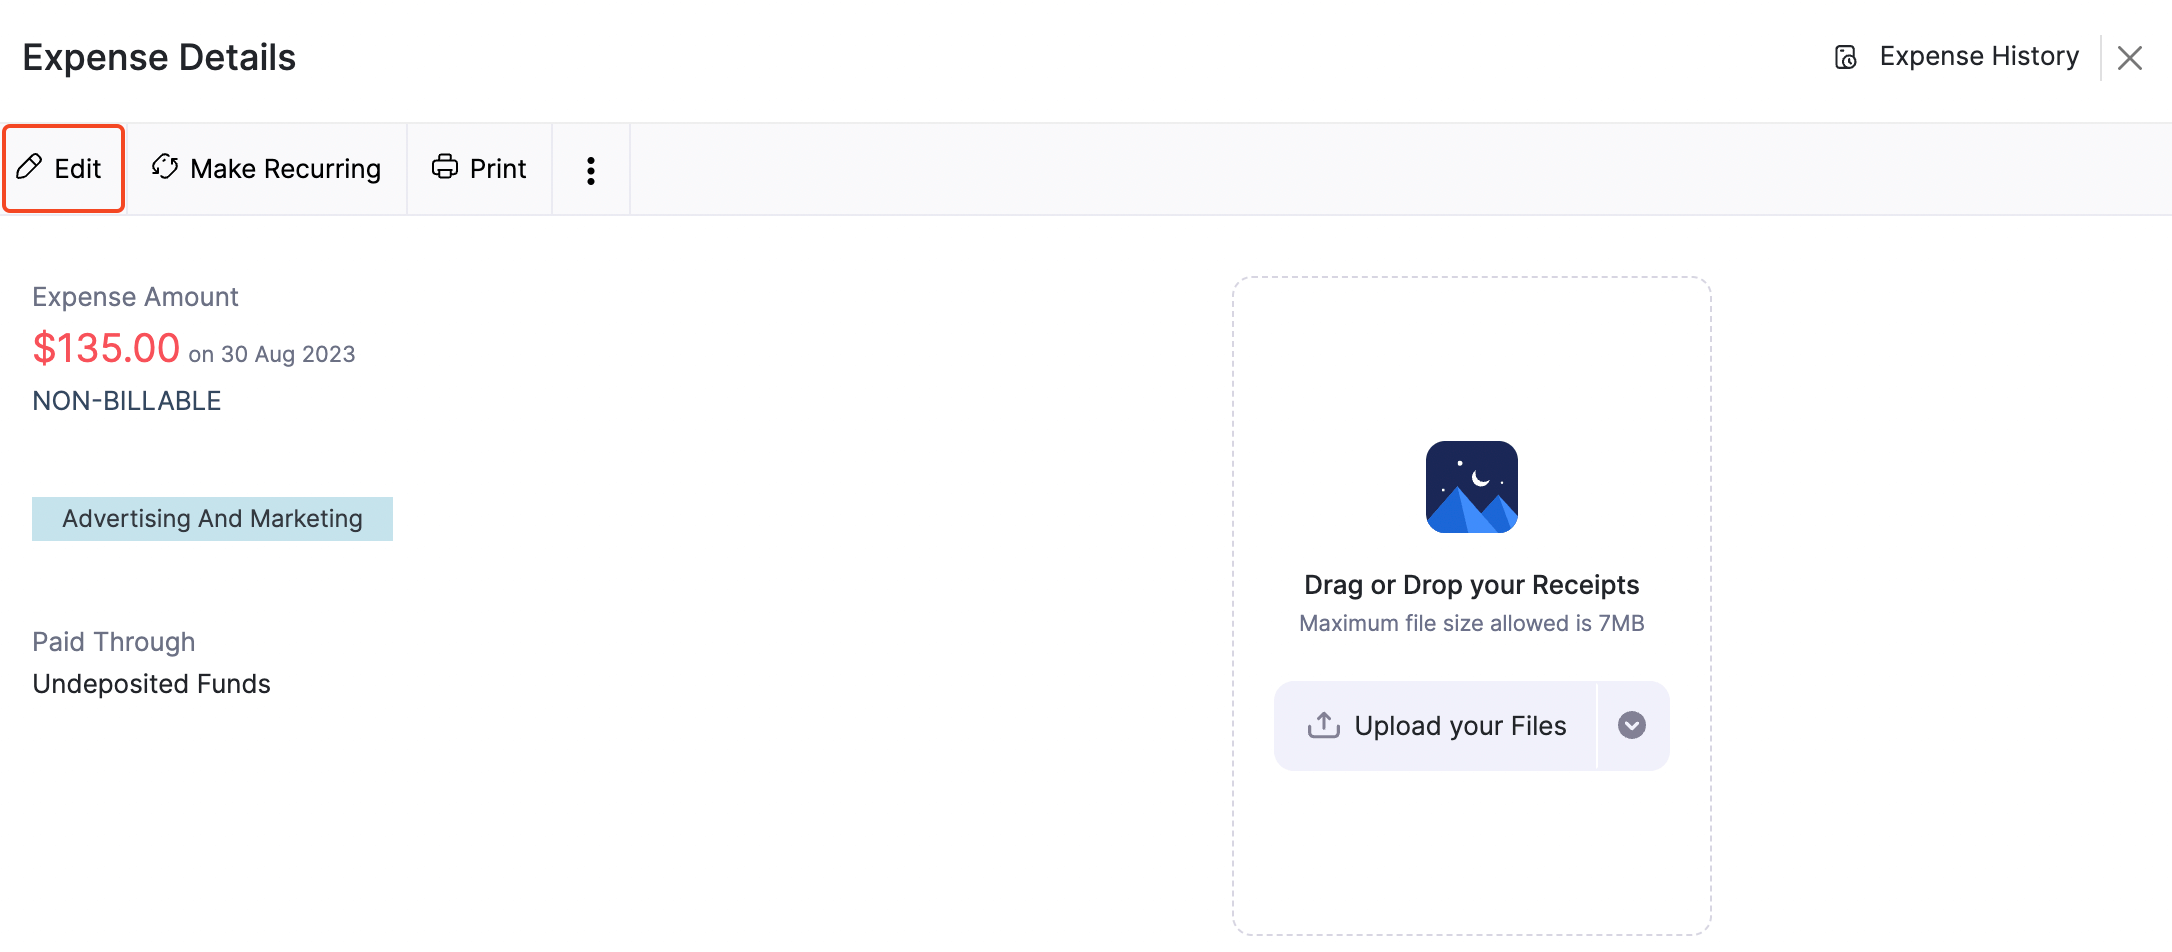
Now, go ahead and modify the expense details as required before saving the changes. The expense is edited accordingly.
Recording a Mileage expense
Zoho Billing allows you to record your organization’s mileage expense. Let’s take an example where you or one of your employees had to go on a business trip. If you would like to record the expense towards your trip for your accounting purposes, you can do so by recording the mileage expenses by selecting the Default Account as Fuel/Mileage Expenses.
To record a mileage expense,
Click the + icon beside the Expense module on the left side bar.
Navigate to the Record Mileage tab.
Choose the category under which this expense usually falls.
Select the default unit and the mileage rates.
Click Save.
Insight: When you enter the mileage expense for the first time, a dialogue box opens up where you will be entering the above mentioned details. Once you're done, these settings will be saved for the future use.Enter the date when the expense was made.
Choose the employee’s name from the drop down. This is the person who submits this expense.
Select Distance traveled and fill the Distance field. If you wish to calculate your distance traveled based on the odometer reading, select Odometer reading.
If you’ve chosen Odometer reading, enter the start reading and end reading from the odometer and the distance traveled will be calculated automatically.
Select your tax from the drop-down if your mileage expense is taxable.
Choose a customer and check Billable to bill the expense to your customer. This will allow you to create an invoice from the mileage expense.
Click Save.
Recording expenses for projects
Expenses incurred while working on a project can be recorded as well! You can choose to record this within the timesheet module itself or you can do it in the Expense module.
To record from the Timesheets module:
- Navigate to the Projects module and select a project.
- Click New Transaction drop down.
- Select Create Expense.
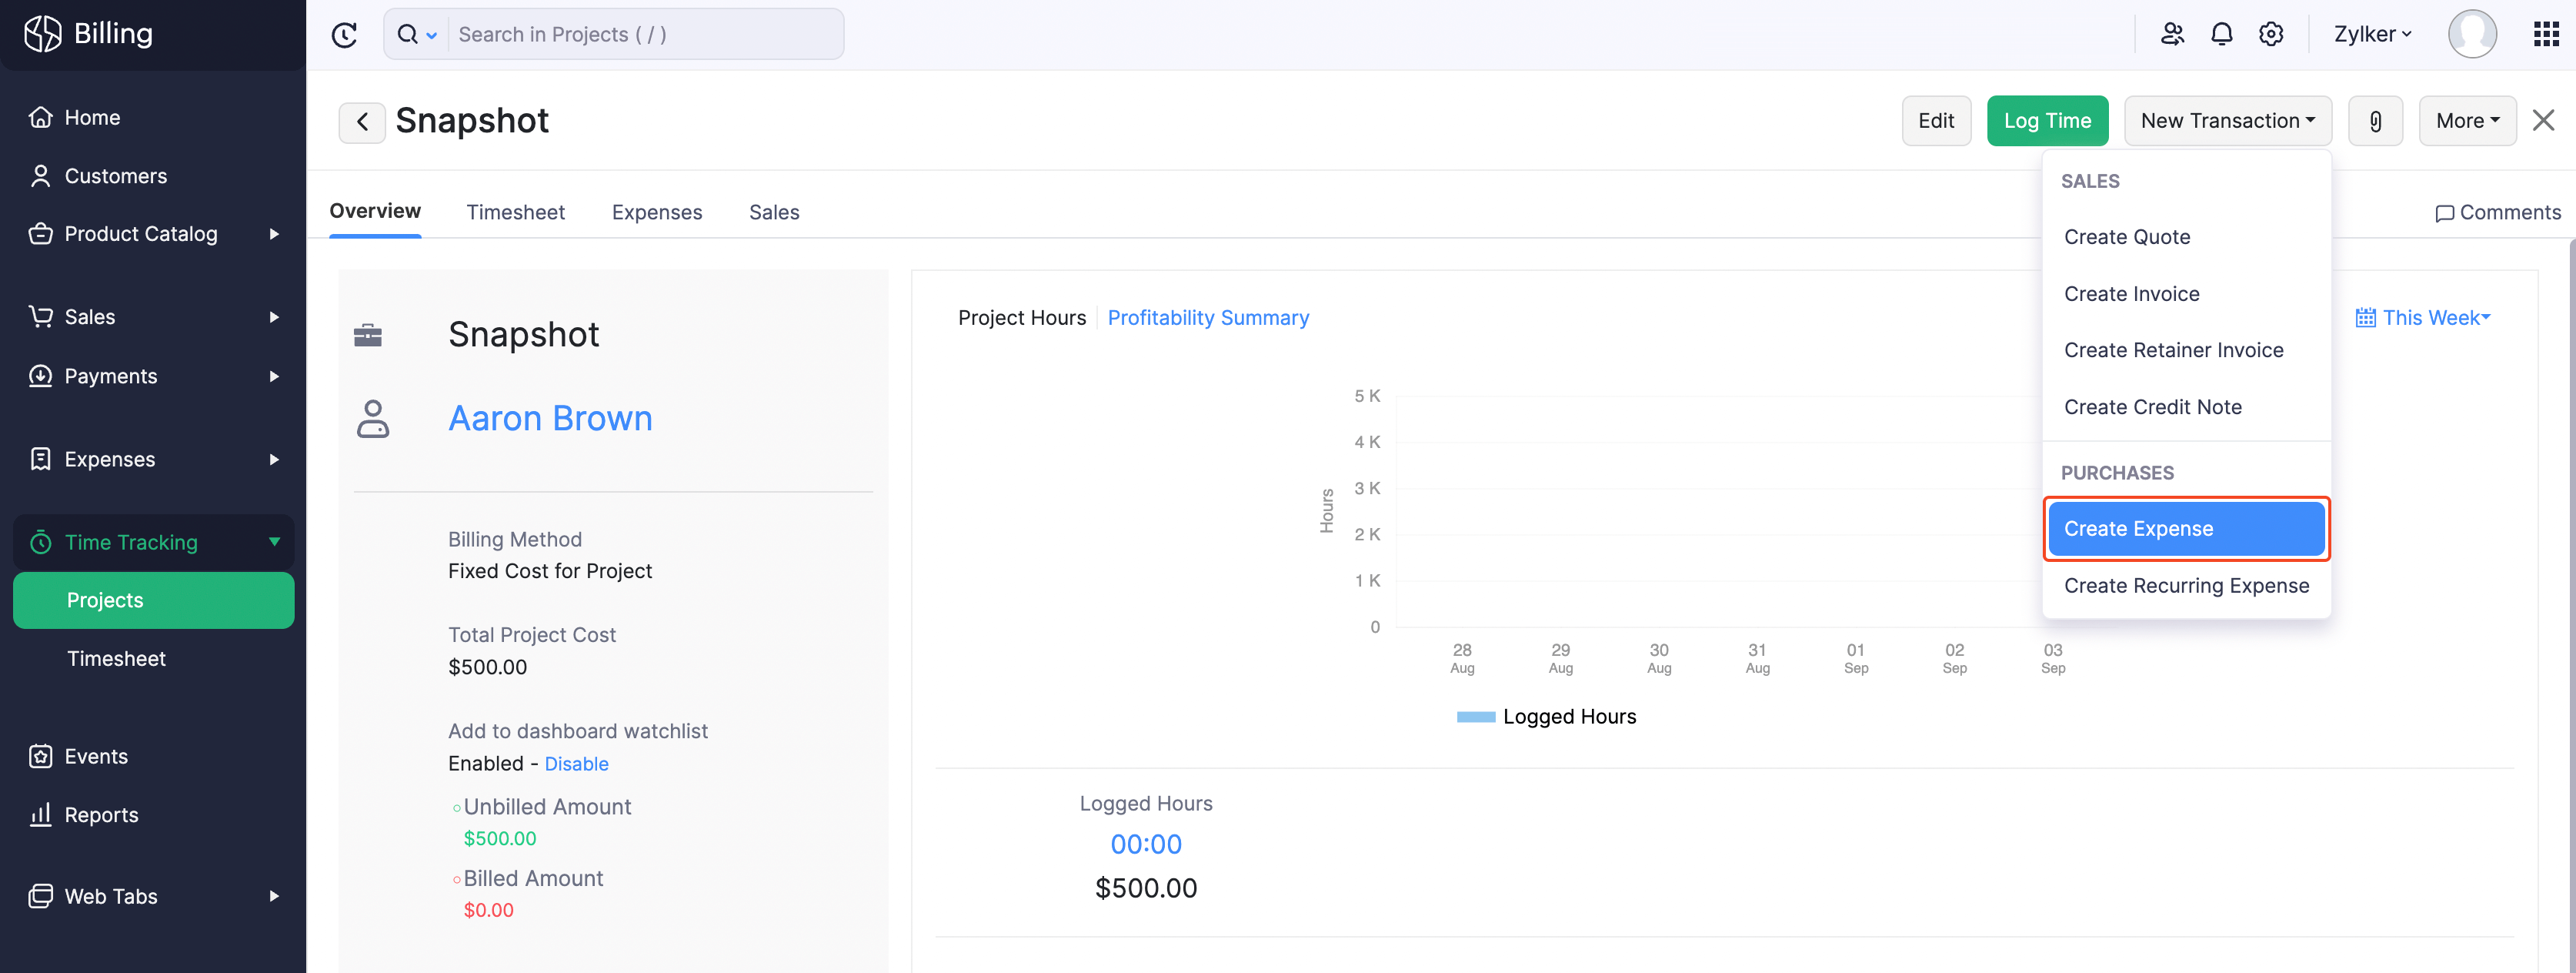
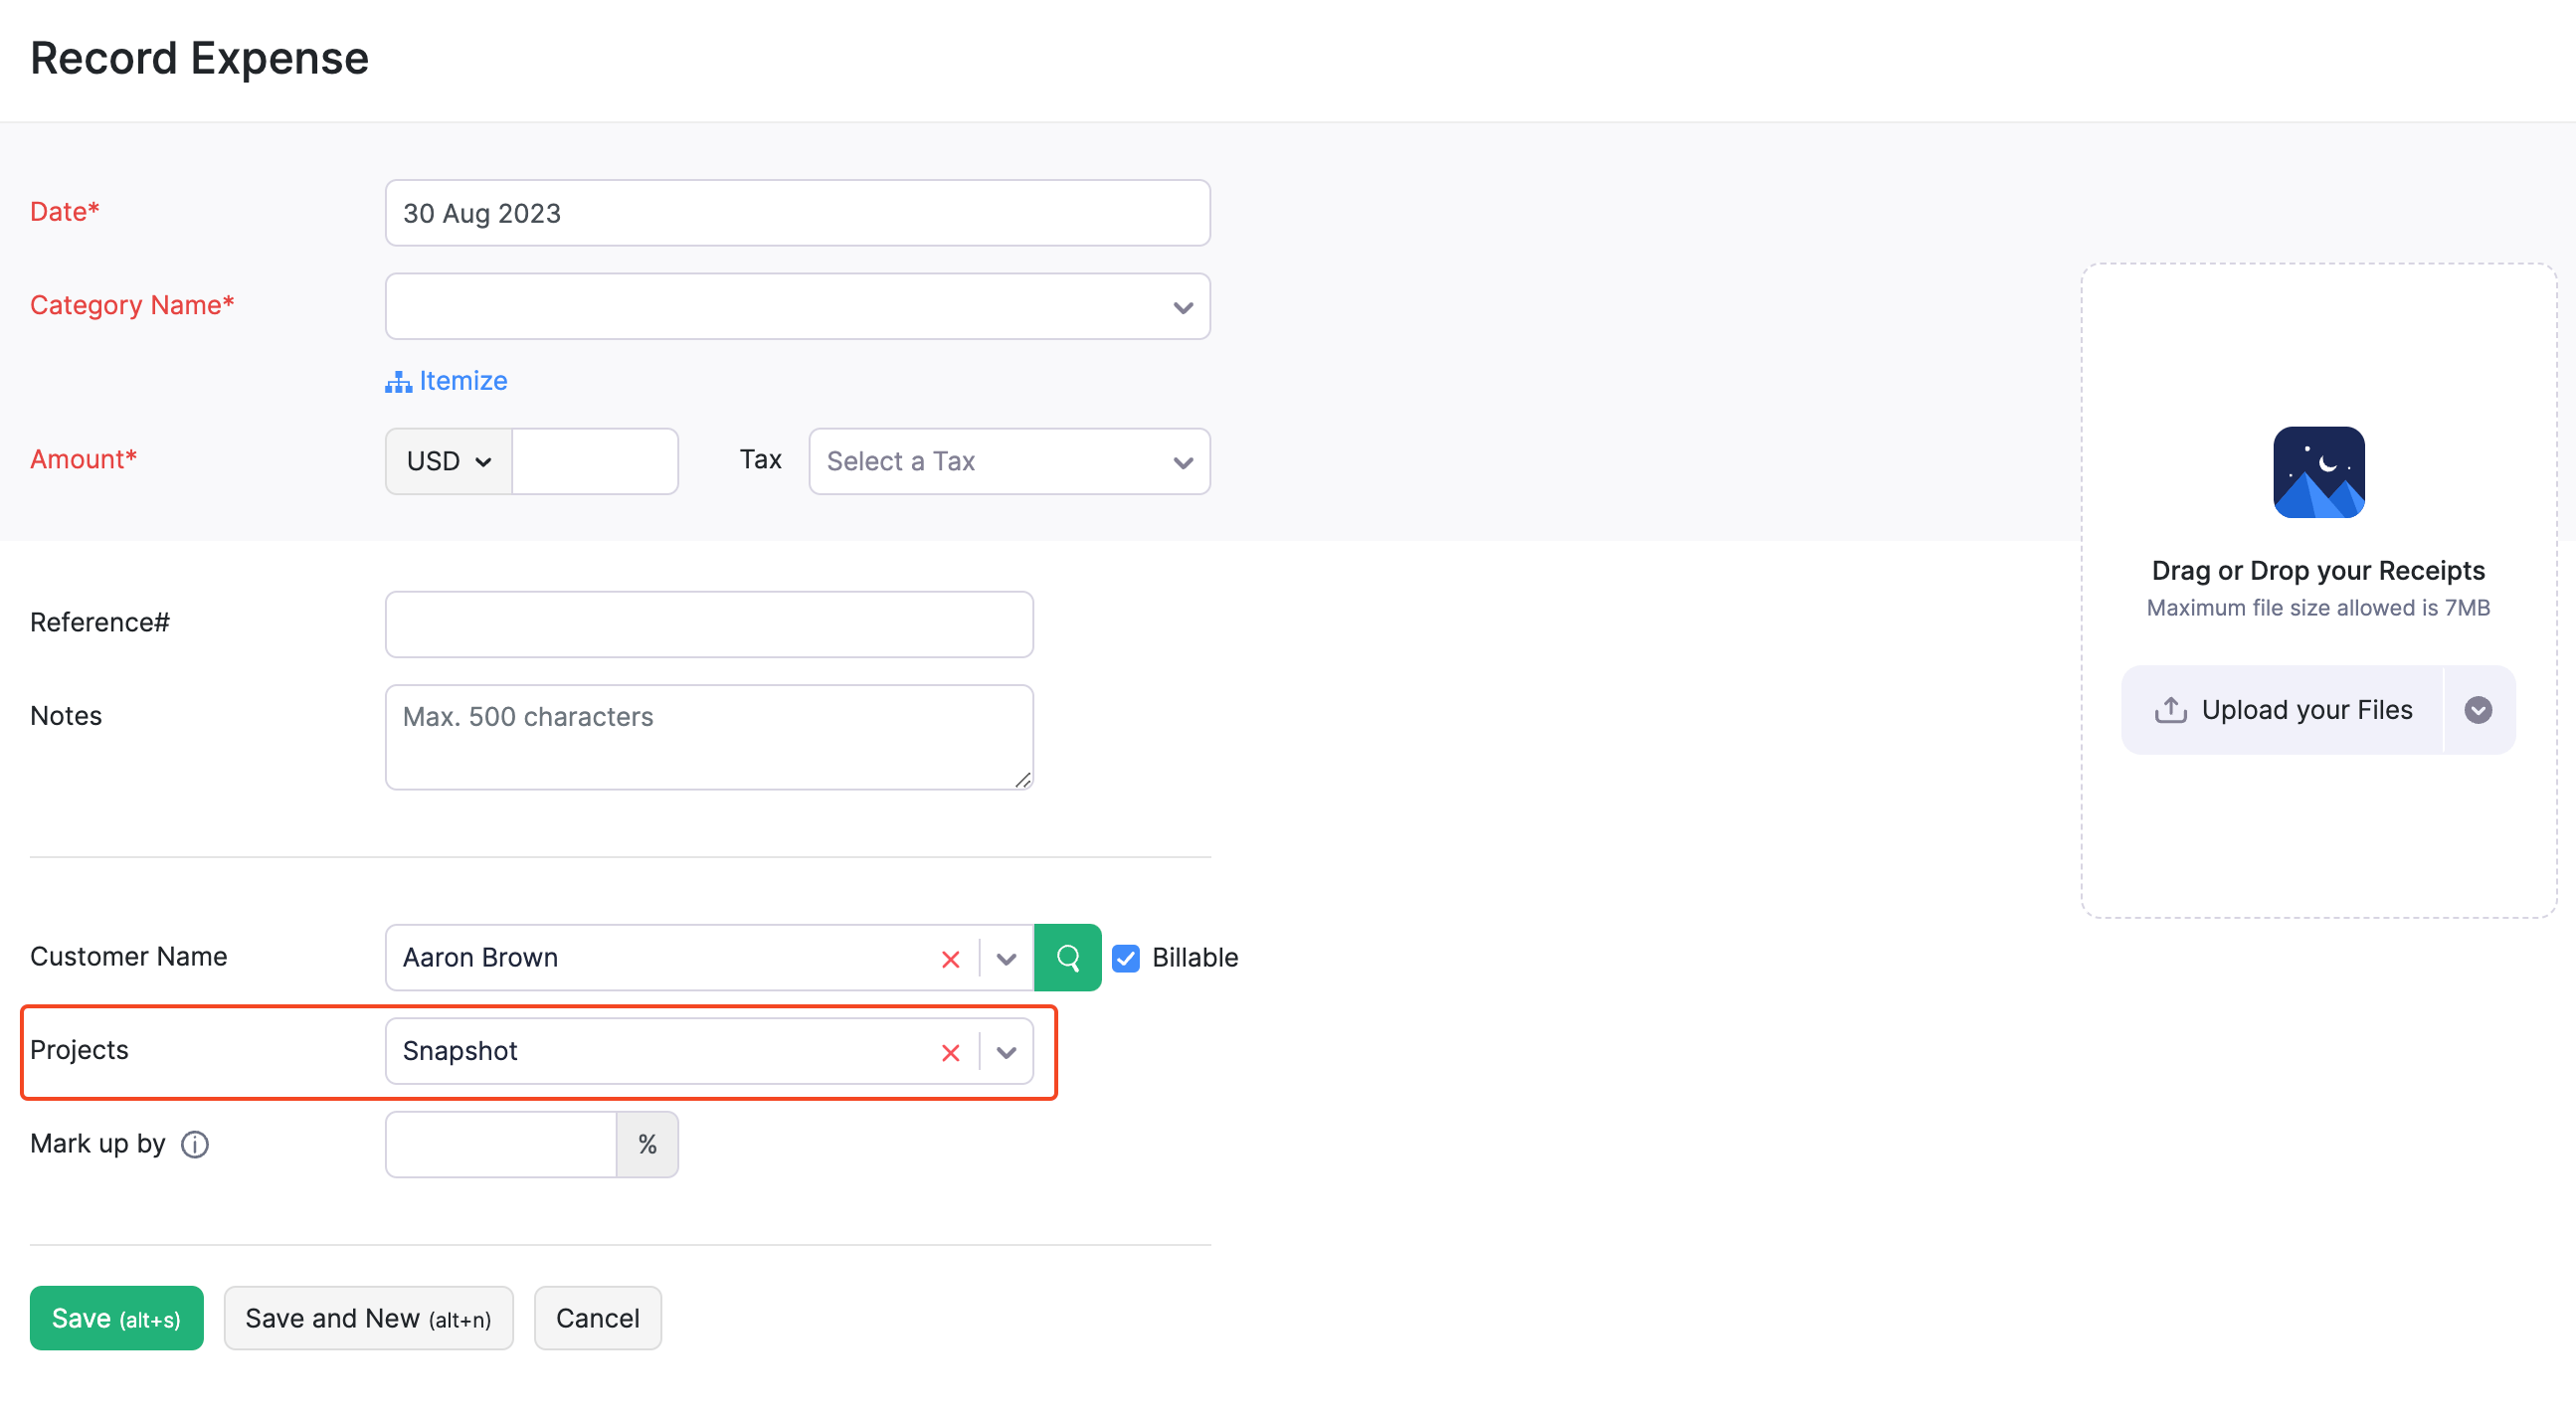
To record from the Expense module:
Navigate to Expenses.
Click + New to create a record a new expense.
Fill in the necessary details.
Select a project in the Projects field.
Click Save.
Adding Expenses in Bulk
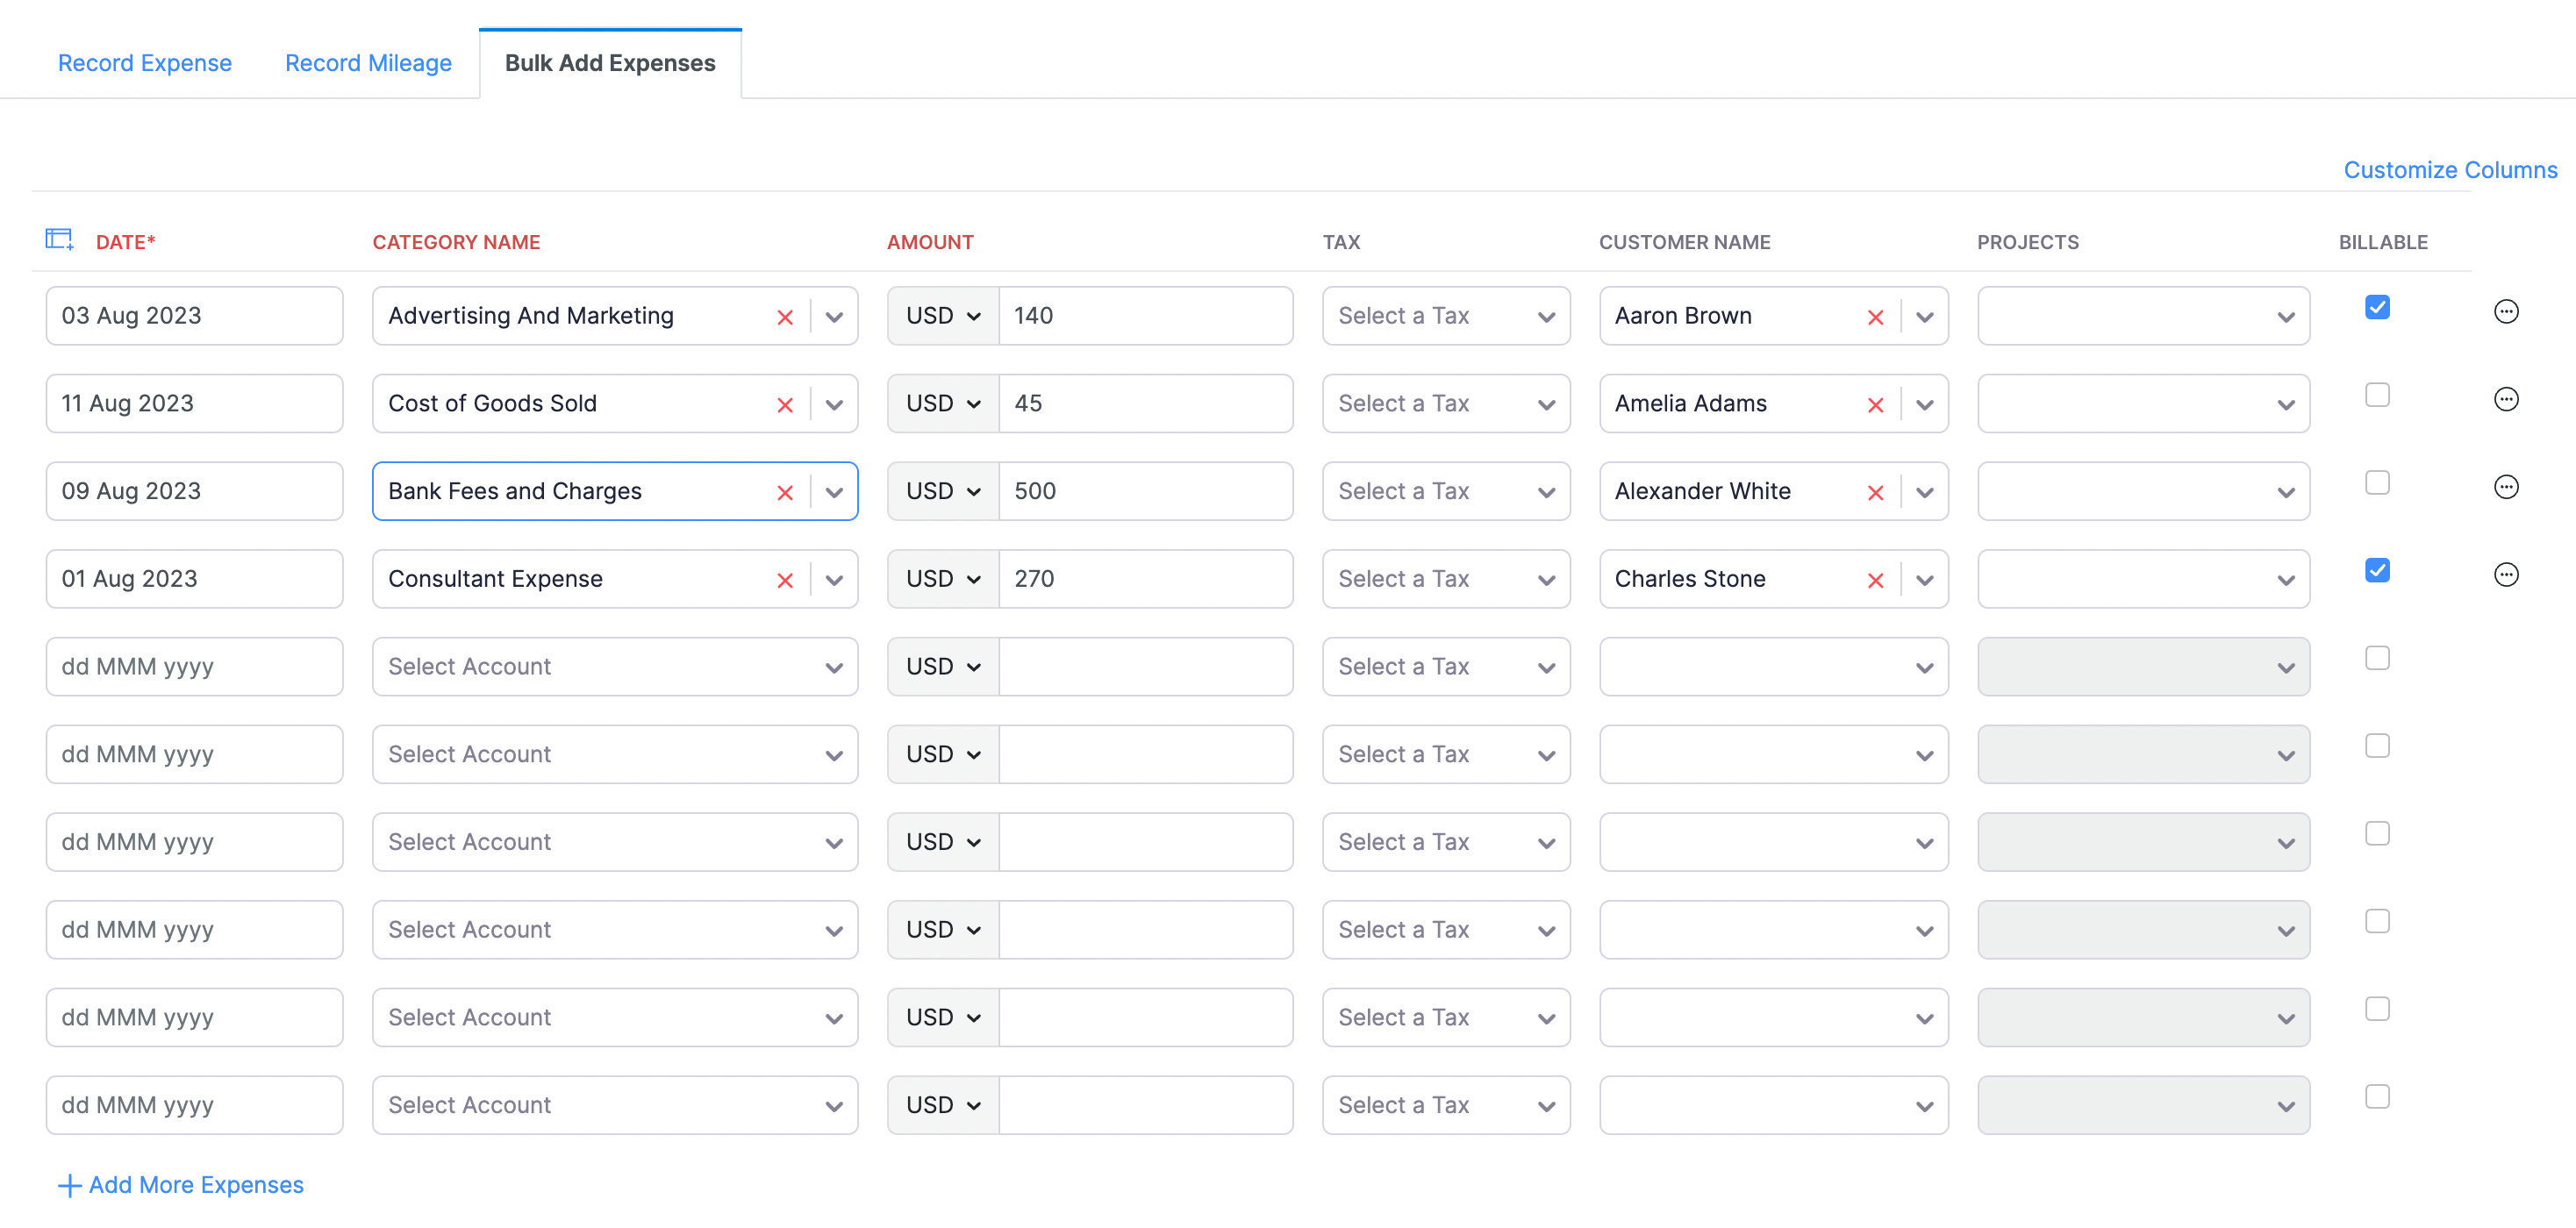
Zoho Billing allows you to add expenses in bulk.
If you would like to do the same, please follow the steps mentioned below:
- Click the + icon beside the Expenses module on the left sidebar.
- Navigate to the Bulk Add Expenses tab.
- Enter the date of the expense.
- Choose a category under which the expense falls.
- Enter the total amount of the expense.
Select a customer if applicable.
Select a project if the expense is associated to that project.
Check BILLABLE if this expense will be converted to an invoice.
Click Save.
Importing Expenses
Zoho Billing has an option to import your existing expenses into the system.
In such cases, you can import expenses to Zoho Billing. To import Zoho Billing:
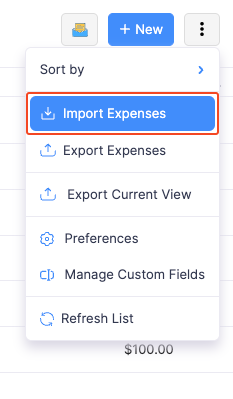
- Click the Expenses module on the left sidebar.
Click the Hamburger icon (next to the gear icon) on the top right corner and select Import Expenses.
Choose the file that needs to be imported. This file can be in TSV/CSV/XLS format.
Match the fields in Zoho Billing with the fields in your file and click Next.
If all the fields match perfectly, the system would show a message saying the same, after which you can click the Import button to finish the process.
In case if there is any mismatch, you will get an error message. You can go back and match the file or you can make changes in the file and import it again.


 Yes
Yes