Logging Time
Zoho Invoice allows you to record the time spent on each project and its tasks. You can instantly log time whenever you want to.
You can add the employees working in this project as users to your organization so that they themselves can login time based on the hours they work.
There are four ways by which you can log time.
- Use a Live Timer - Start/pause/stop a timer while performing a task.
- Enter Pre-recorded time - Time recorded while working on a task can be entered later.
- Instantly log - Just enter the time spent without getting into details.
- Weekly time log - If you have multiple projects and have manually recorded time for various tasks pertaining to these projects you can use this option.
- Monthly time log - Same as the weekly log time, here you can enter manually recorded time for various tasks from various projects over a month.
Use a Live Timer
You can start a real-time counter to log the time spent on a task. There are 2 ways to log time with a live timer:
- By associating the timer with a project.
- By starting the timer without a project.
To start a live timer associated with a project:
- Go to the Timesheet module.
- Select the project for which you want to start the timer from the Projects tab.
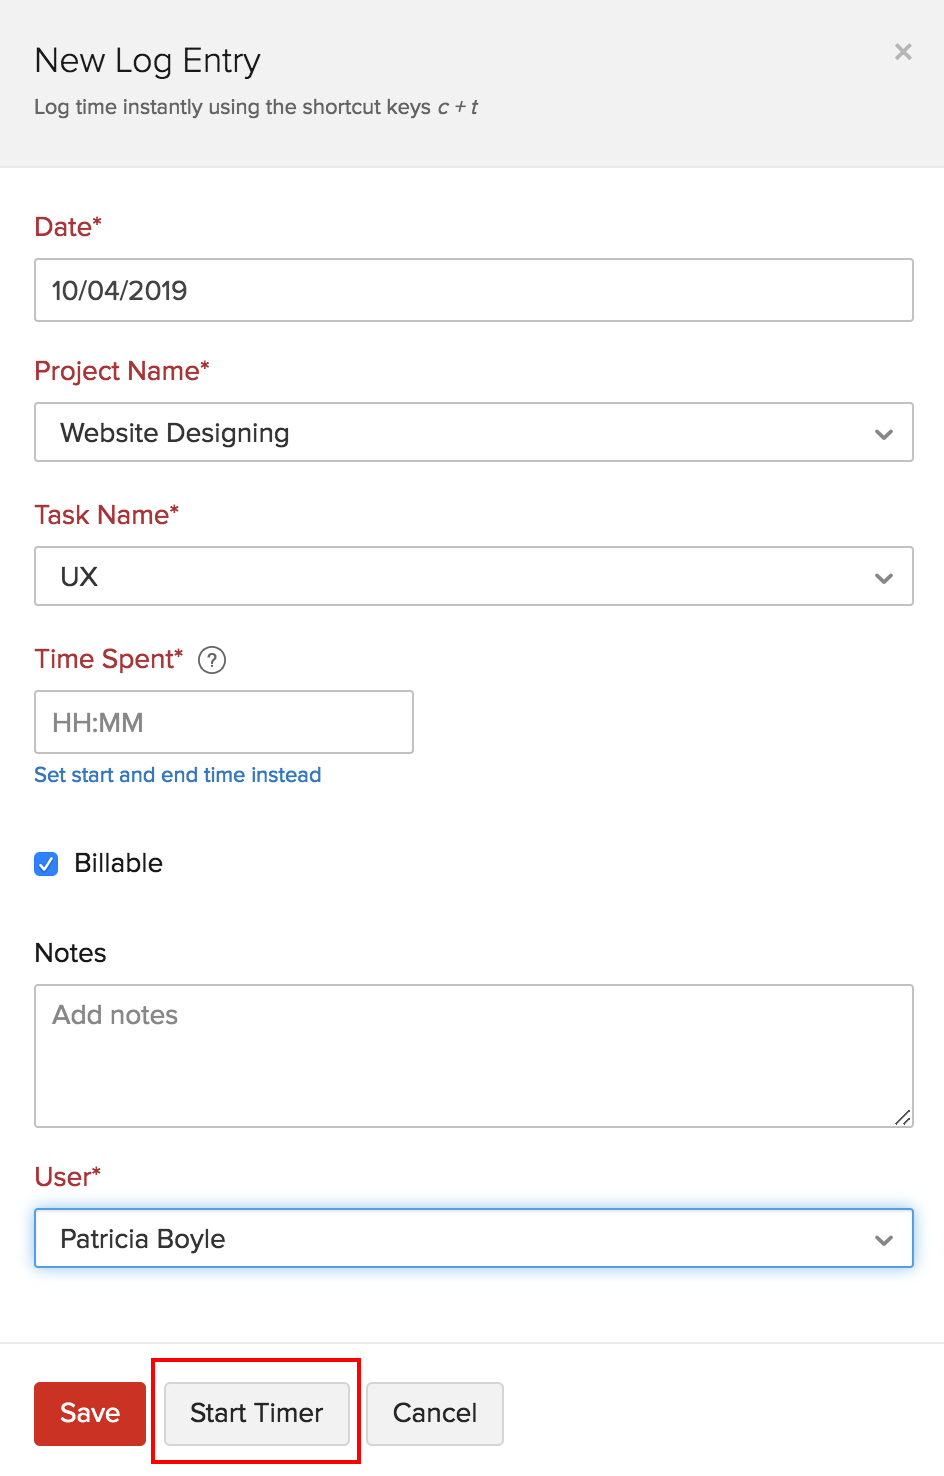
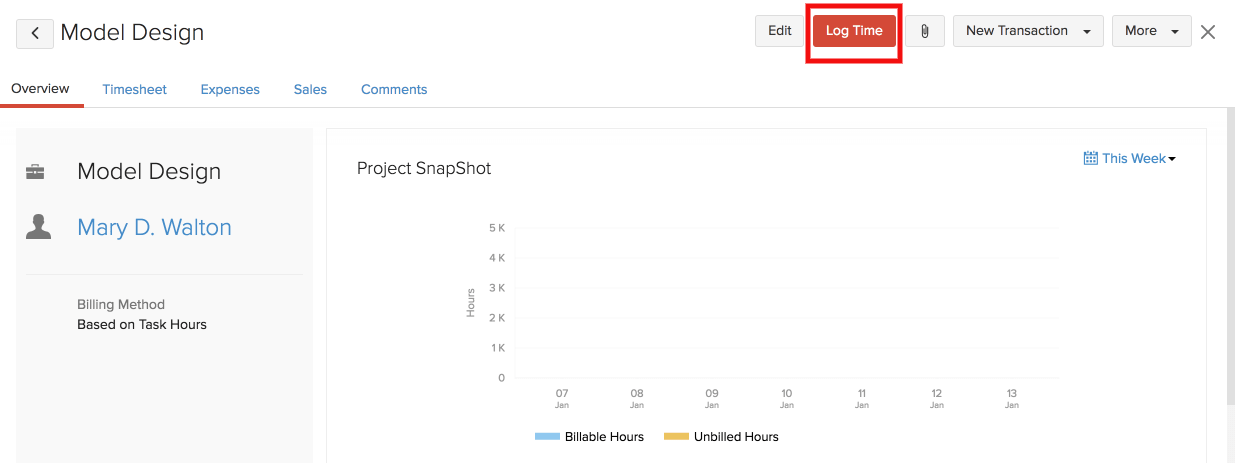
- Click the Log Time button placed on top of the project dashboard.

- Enter the Date and select a Task Name.
- Check the Billable box off if you do not wish to bill the task.
- Click Start Timer button to start logging time.
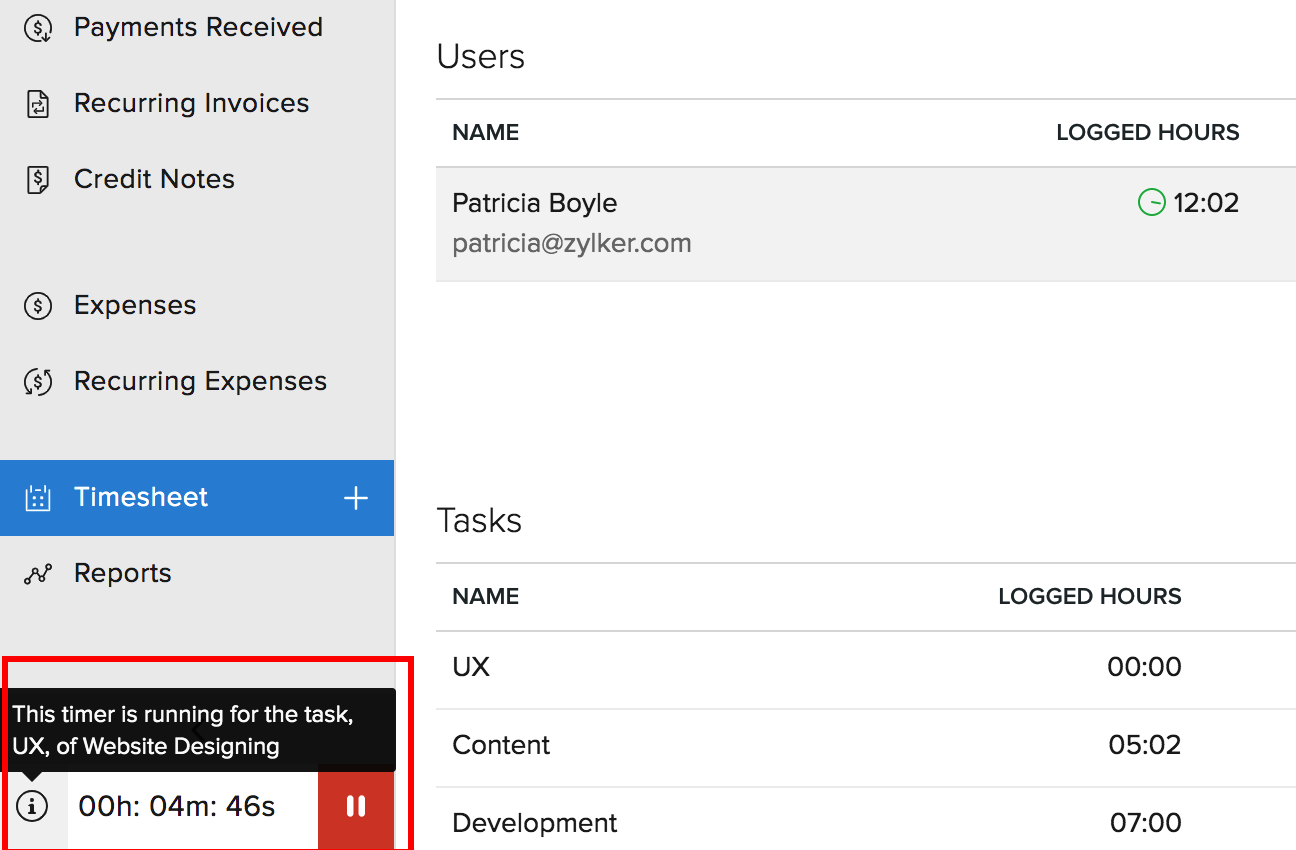
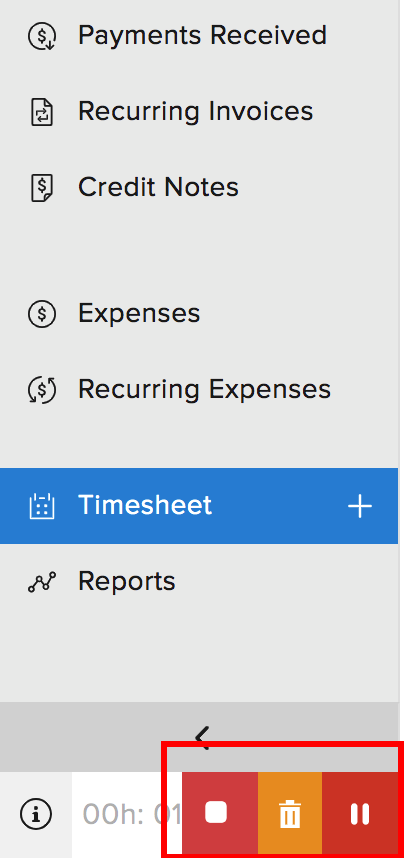
- You can find the timer running at the left-bottom corner of your browser.
- In the project details page, a timer icon will be displayed along with the details of the timer, next to the user who started the timer.
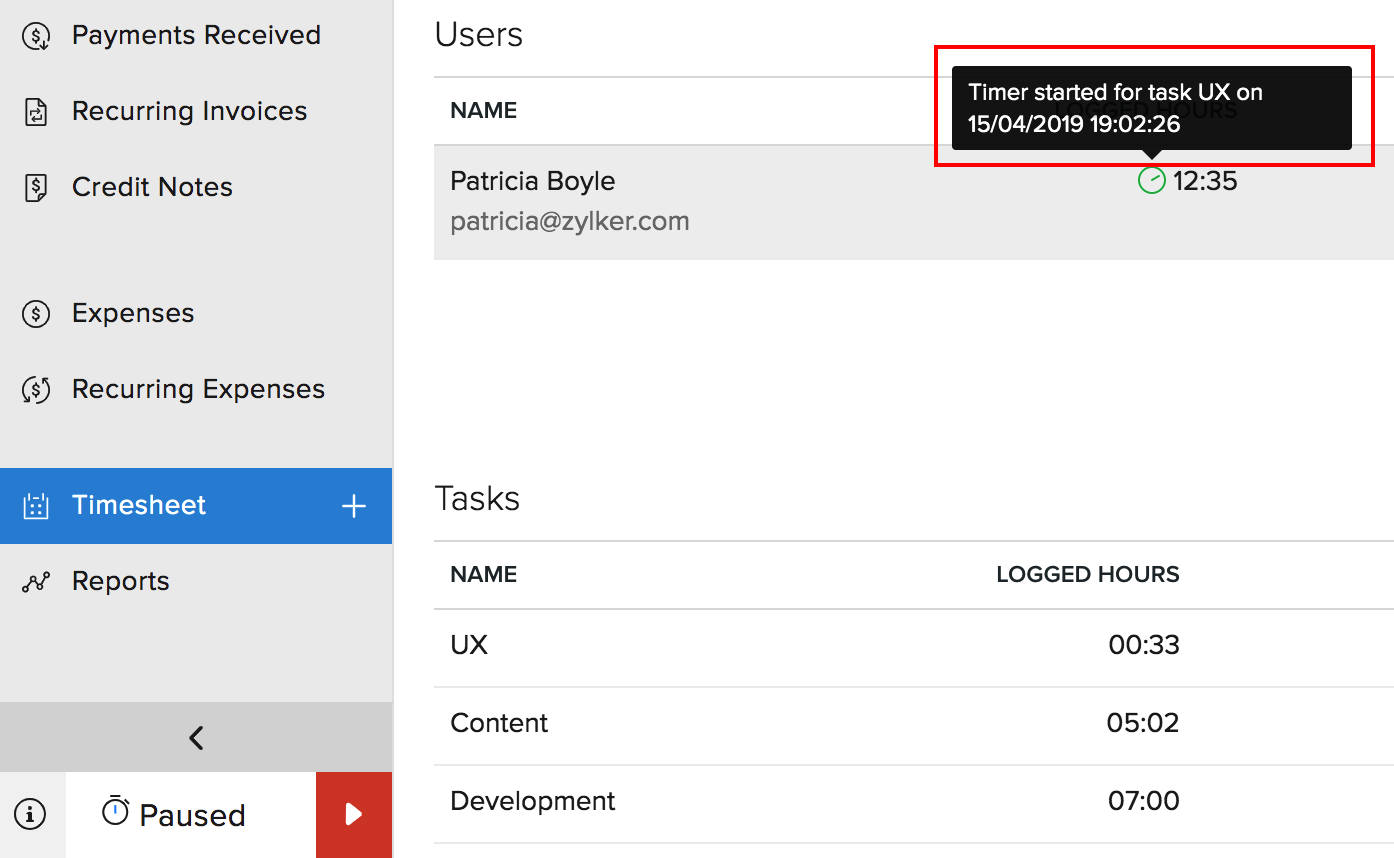
- Click the Pause icon on the timer if you want to halt the timer for a while. You can click Resume icon to continue logging time again.
- When you have completed your task, hover over the timer and click the Stop icon to stop the timer.
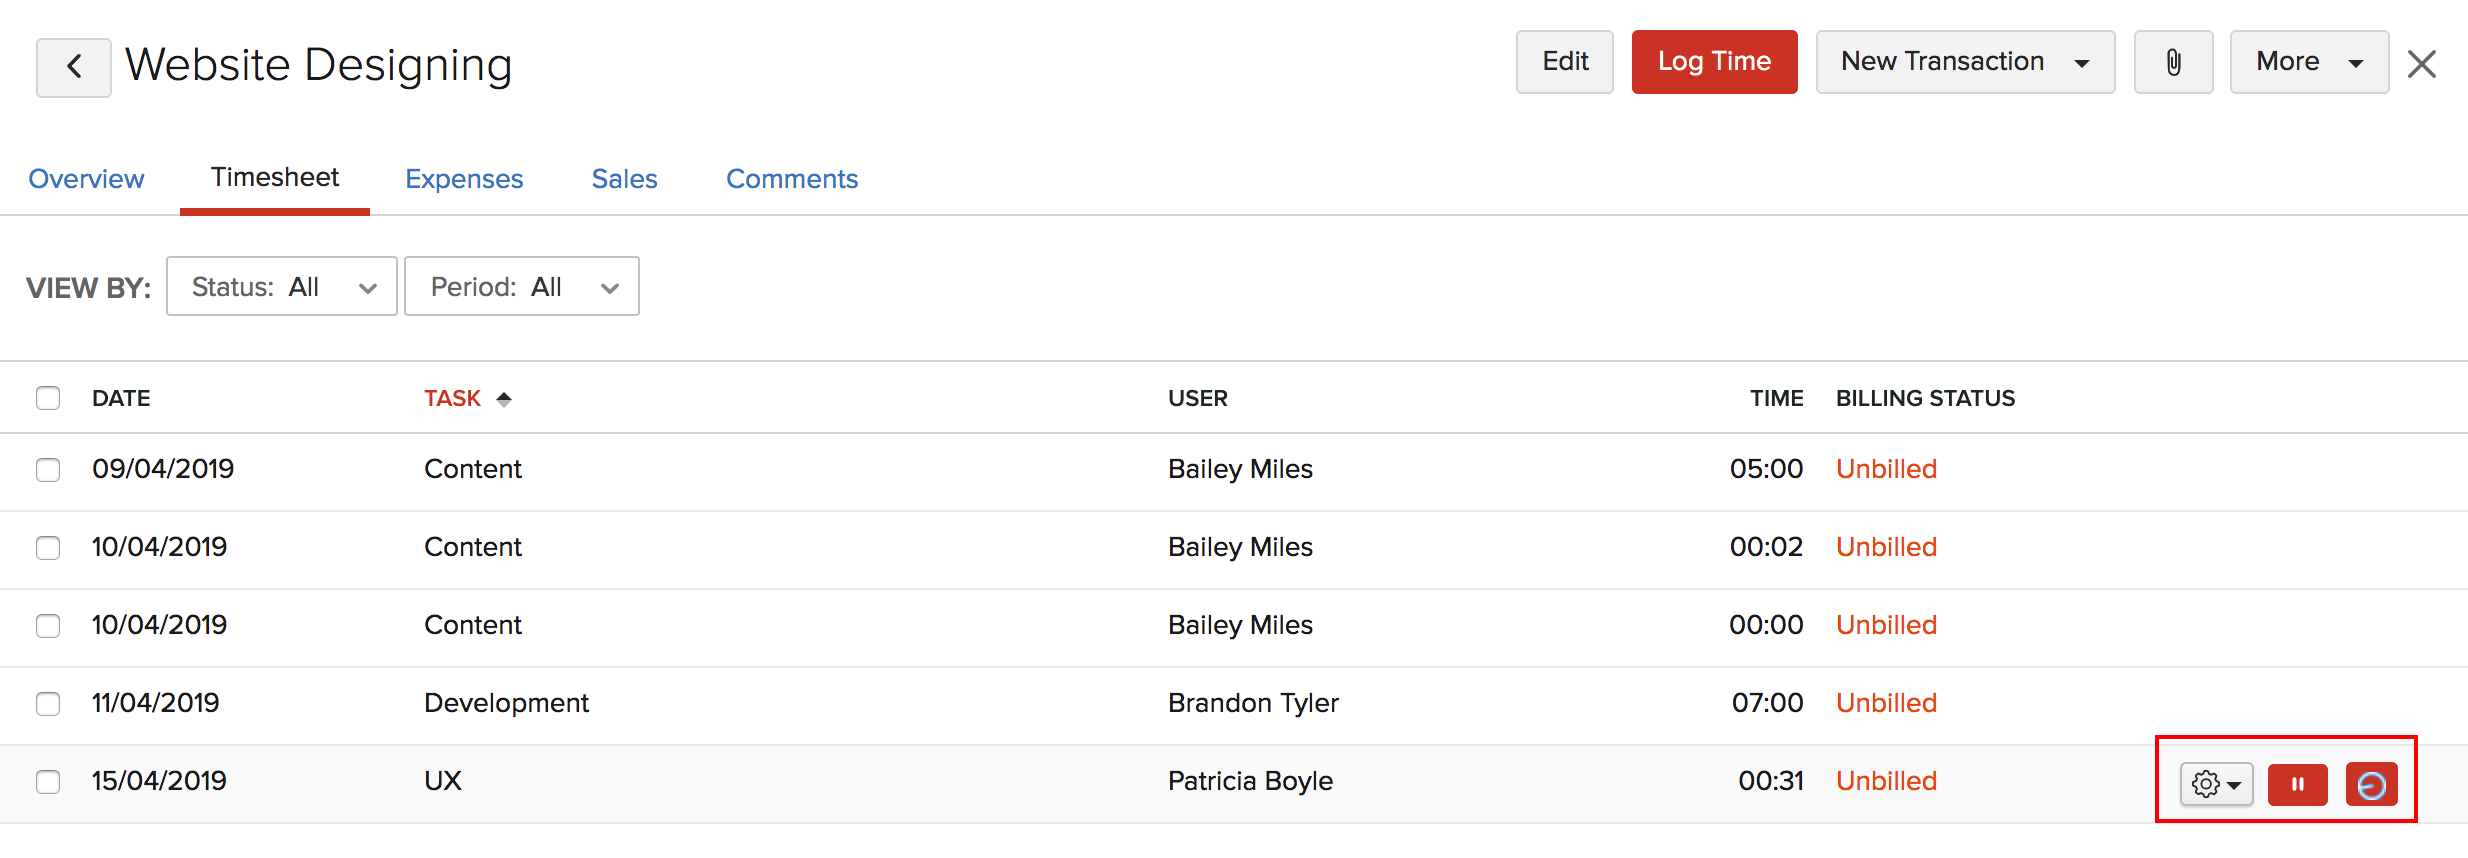
- You can also pause/stop the timer by clicking the corresponding button present next to the task under the Timesheet tab in your project dashboard.
To start a live timer without a project:
- Go to the Timesheet module.
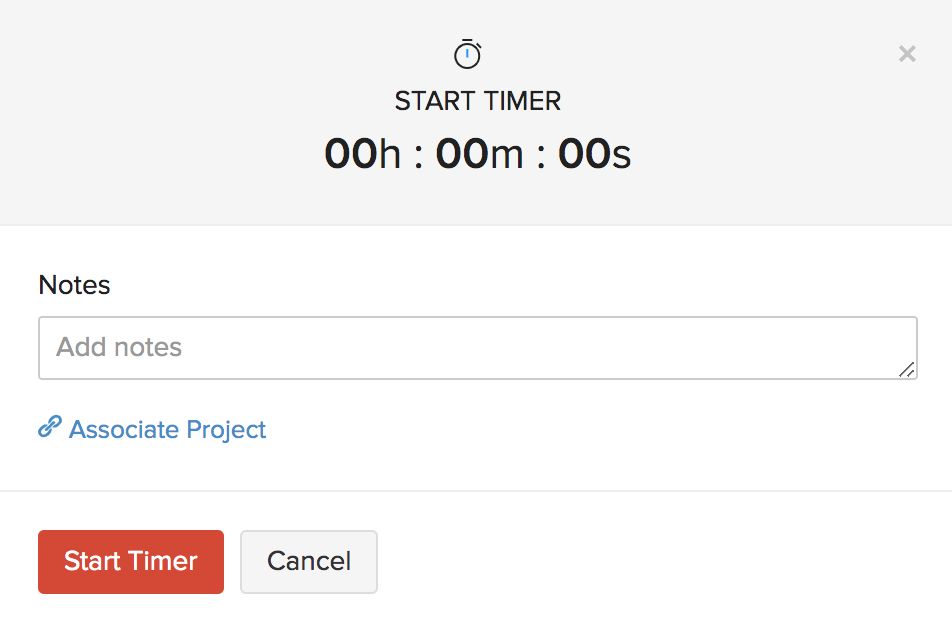
- Click the Start button placed on the top-right corner.

- Enter the required notes and click Start Timer button to start logging time.
- However, if you wish to associate the timer to a project, select Associate Project, enter the project details, and start the timer.
- You will find the timer running at the bottom-left corner of your browser.
- Click the Pause icon on the timer to halt the timer for a while. Click Resume icon to continue logging time again.
- To stop the timer, hover over the timer and click the Stop icon.
- If you had started the timer without associating it to a project, you need to enter the project details once you stop the timer.
- Click the trash icon on the timer to Discard a timer started without a project.
Enter Pre-Recorded Time
- Select the project that you created from the Projects window.
- Click on the Log Time button placed on top of the project dashboard.
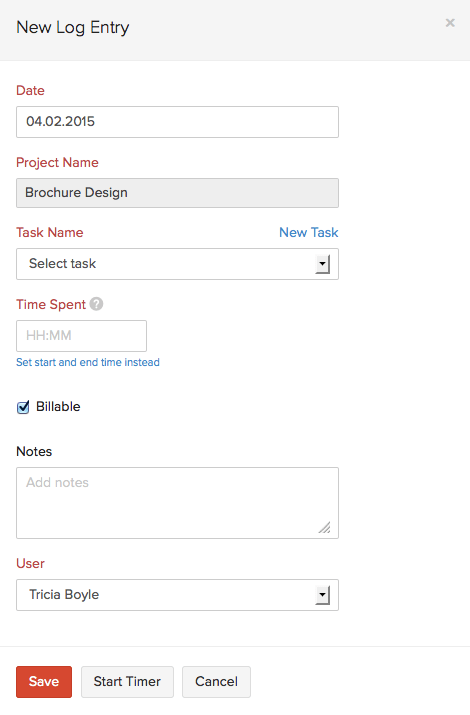
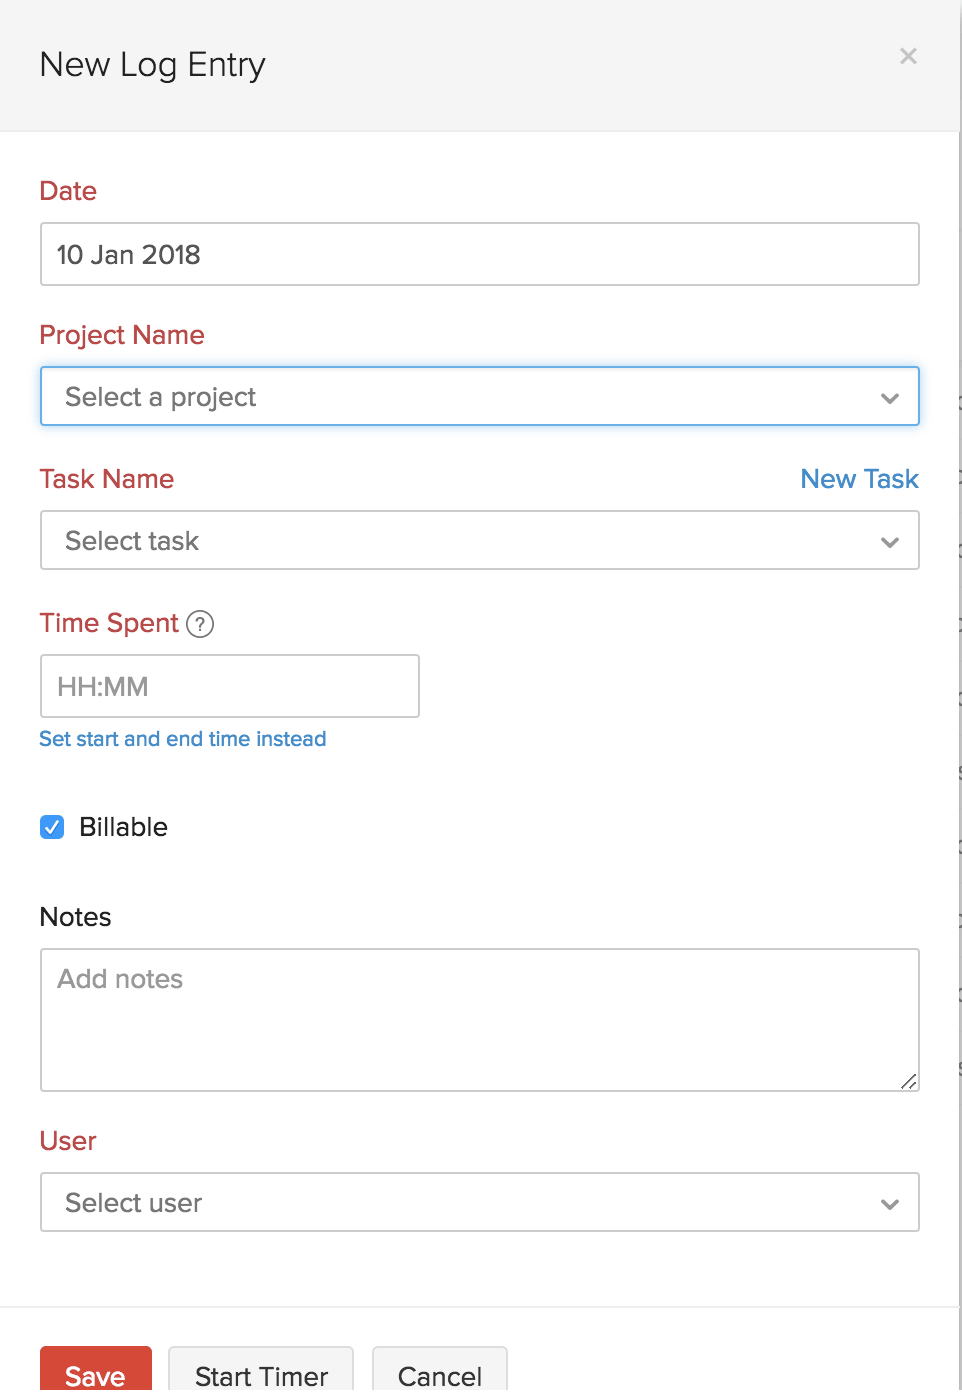
- Enter the Date on which the task was performed.
- Select the task from the Task Name drop down.
- Enter the hours spent on the particular task in the Time Spent field.
You can also record by entering the start and end time of the task, click on Set start and end time instead placed below the Time Spent field.

- Billable box is checked by default. If you do not wish for that particular time entry to be billed, check the Billable box off.
- Add any notes, if necessary, and select the User for whom the time is logged from the drop down.
Insight: The option to select users will be available only for Admin users.
- Click on Save.
Instantly Log Time for a Project
- Go to the Timesheets module on the left sidebar.
- Click the + Log Time button on the top right corner.

- Choose the date on which task was carried out, select the project name and task name.
- Click the New Task option if you haven’t added the task earlier.
- You can enter the time spent on the task in the Time Spent field or click Start Timer to start recording the time.
Weekly Log Time for Multiple Projects
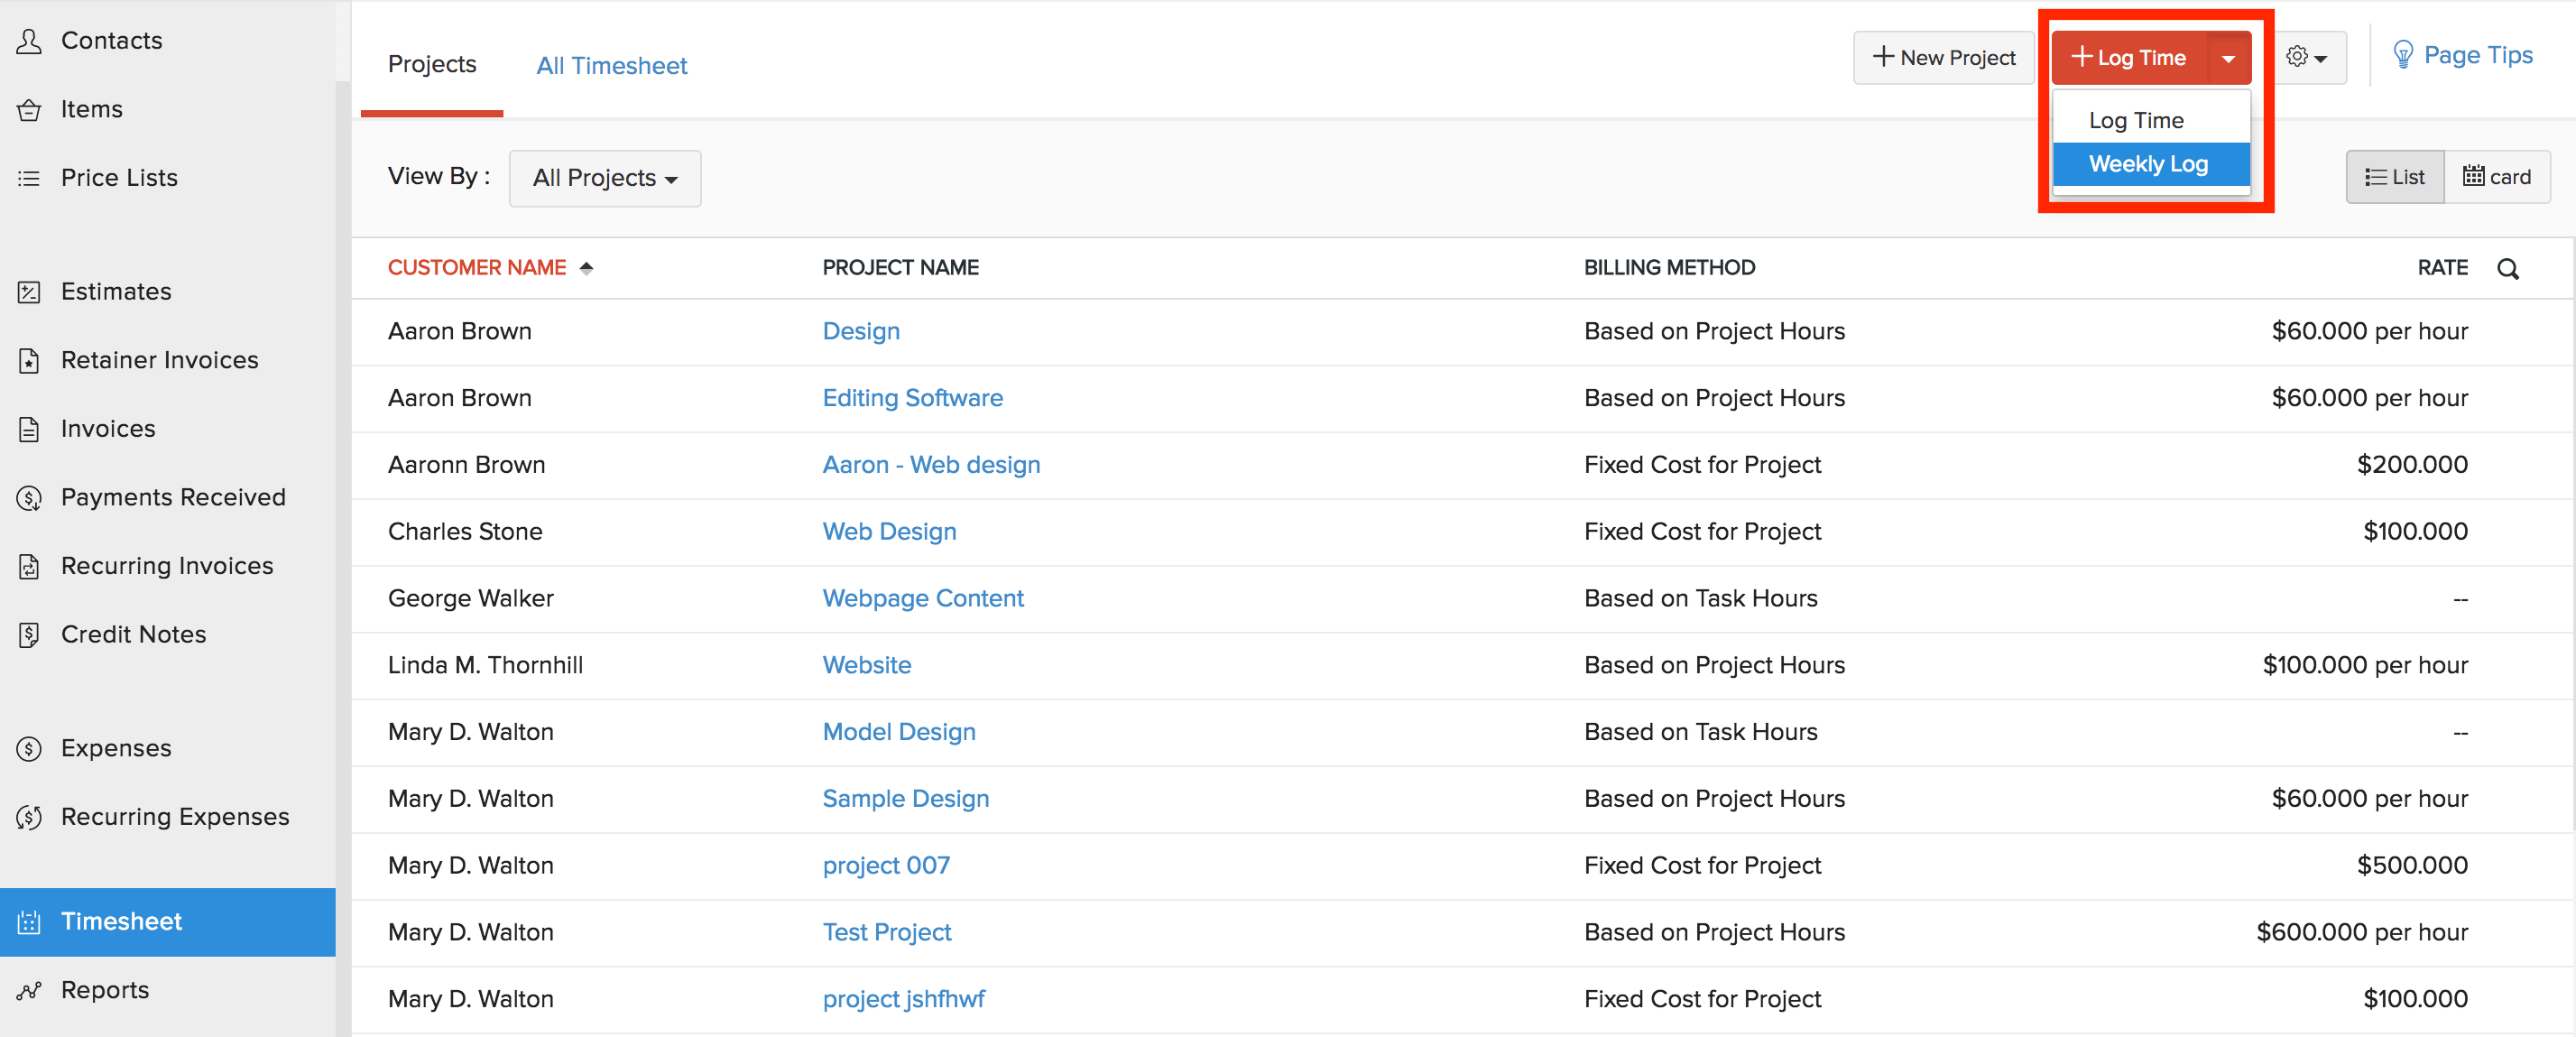
- Go to the Timesheets module on the left sidebar.
- Click the + Log Time drop-down and select Weekly Log.
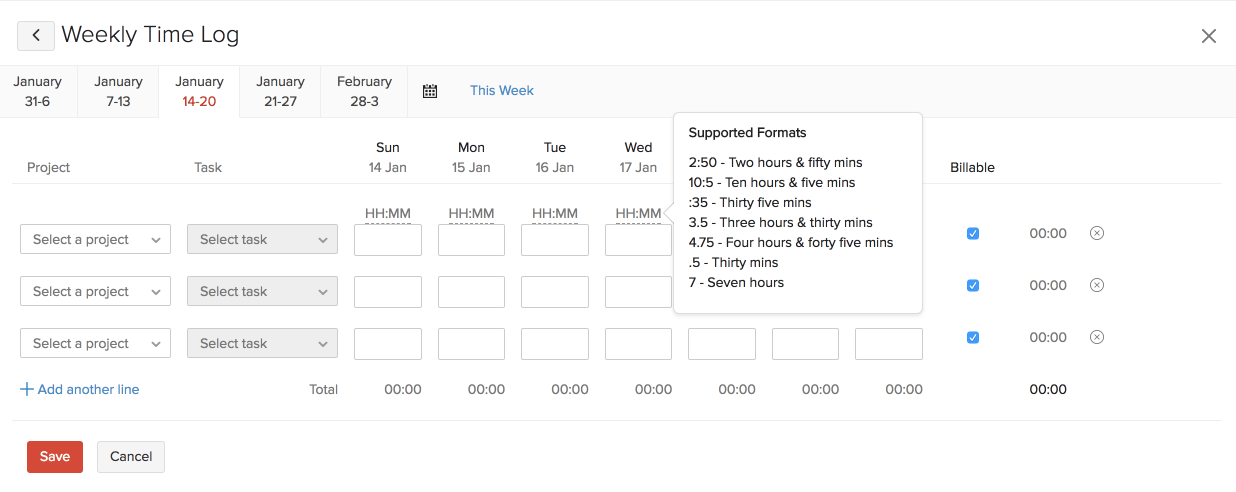
- Choose the week from the date section above.
- Choose a project and its associated task.
- Enter the worked hours under the respective date. You can click the HH:MM to know formats in which you can enter the time.
- If you will be converting the logged time into an invoice, select the Billable box.
- Hit the Save button when you’re done.
Monthly Log Time for Multiple Projects
- Go to the Timesheets section on the left sidebar.
- Tap the All Timesheet tab on the top.
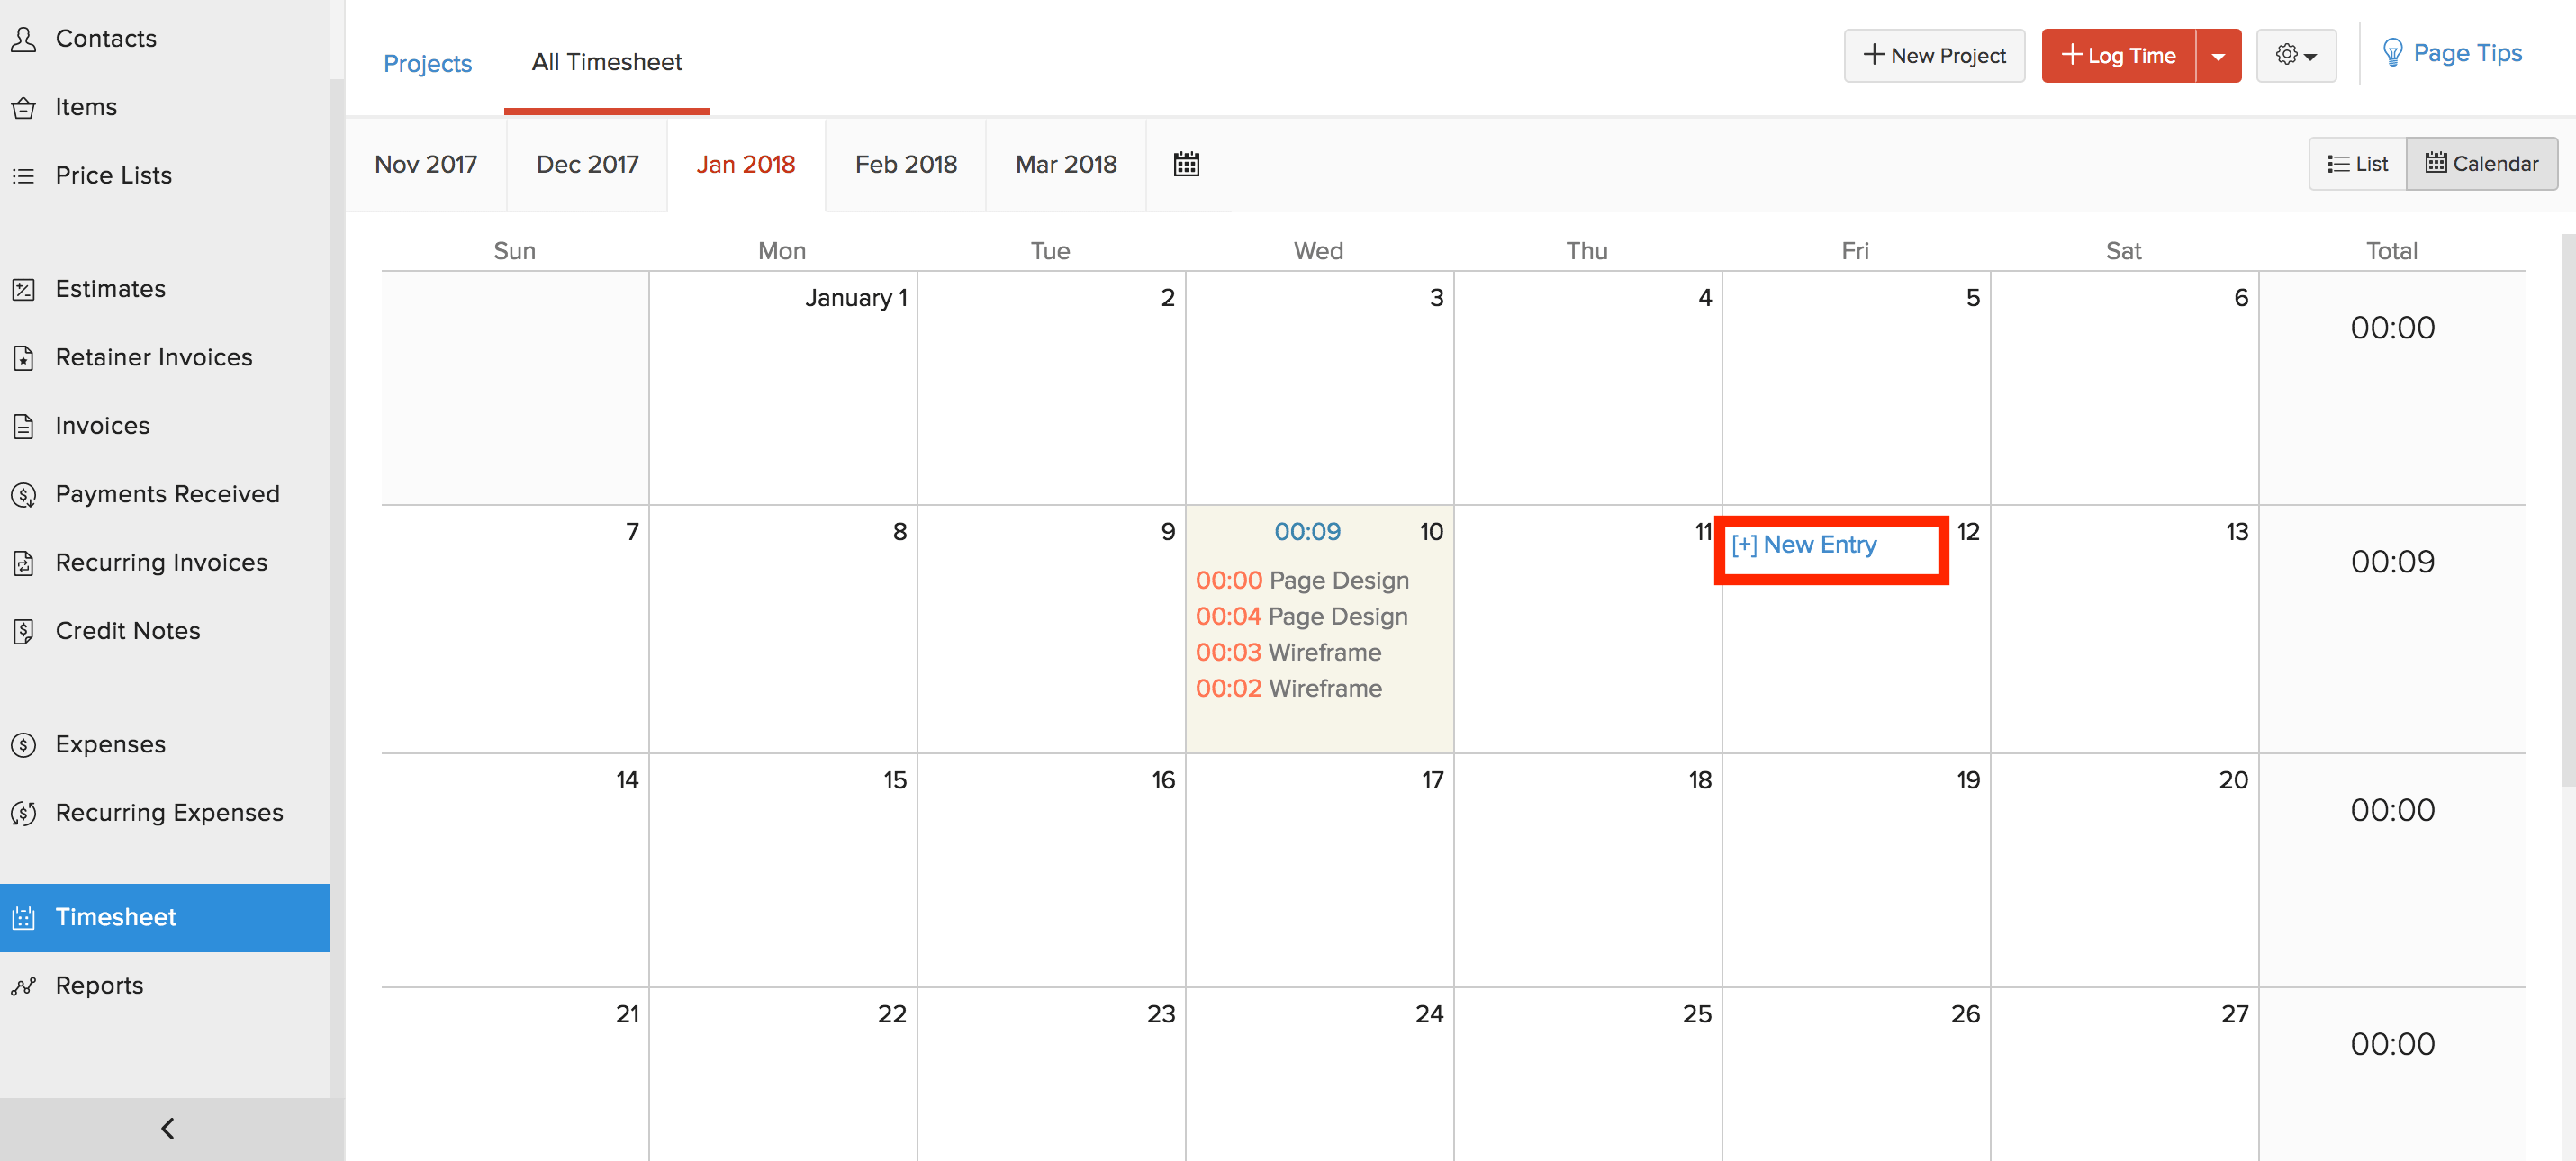
- Click the Calendar button at the top right corner of the page.
- Click the + New Entry by hovering onto the appropriate date.
- The time log entry will appear. Fill in the required details and save.
Chrome Extension
You would also be able to log time using our chrome extension! To learn more, please click here.


 Yes
Yes