➥ Learn about Zoho Directory
Zoho Directory
Zoho People's integration with Zoho Directory allows Administrators to handle identity and user access management with ease. Manage access to multiple products with varying login credentials using one central tool. Zoho Directory improves your organization's online account security.
Using Zoho Directory Integration
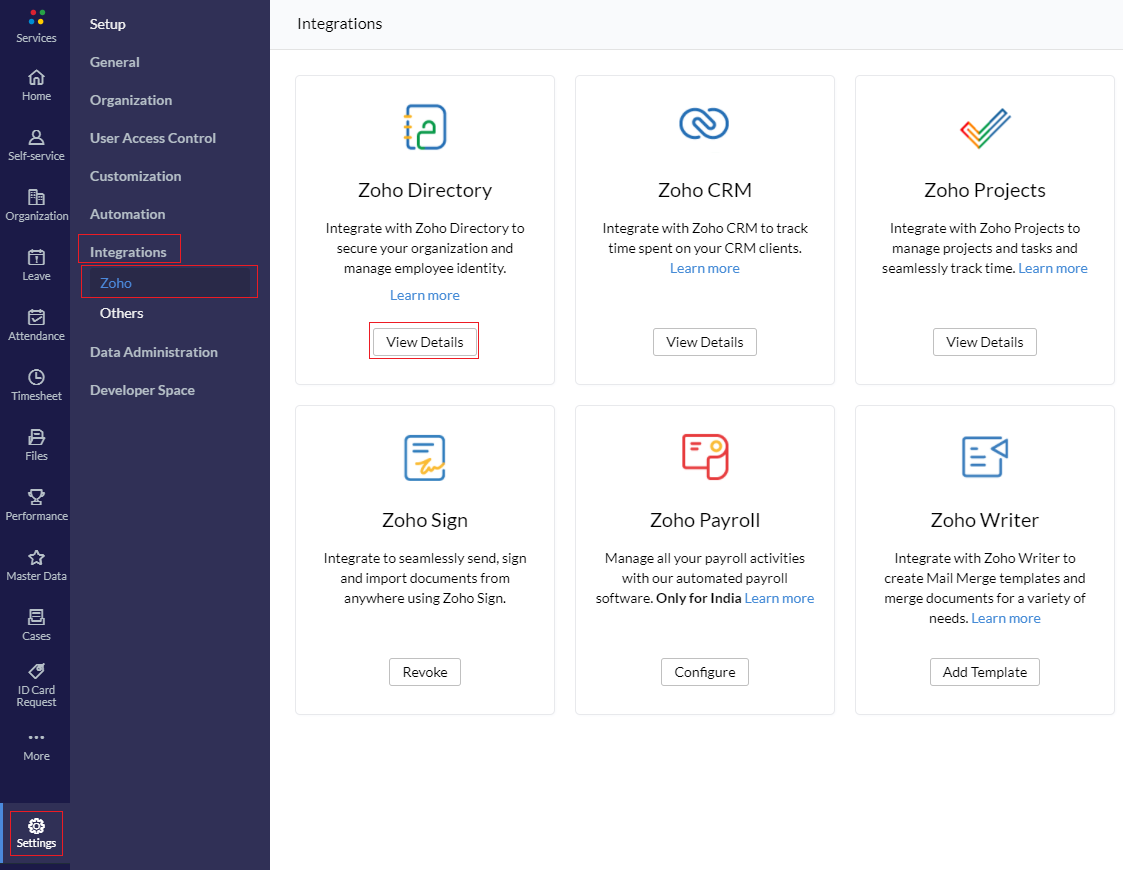
- To begin, go to Settings > Integrations > Zoho. Select View Details in the Zoho Directory space.
- Click View Details, for a list of all services.
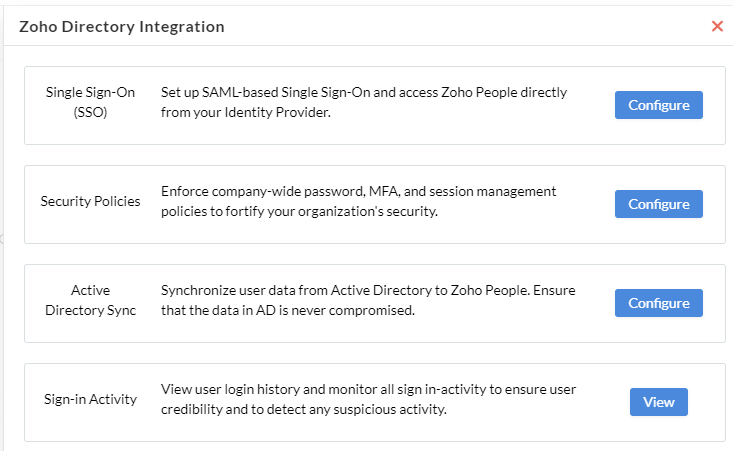
- There are 4 options to choose from. Single Sign-On, Security Policies, Active Directory Sync, Sign-in Activity. To begin, click Configure to sign-in and start using the listed features. You can learn more about the various features below
Features:
Single Sign-On:
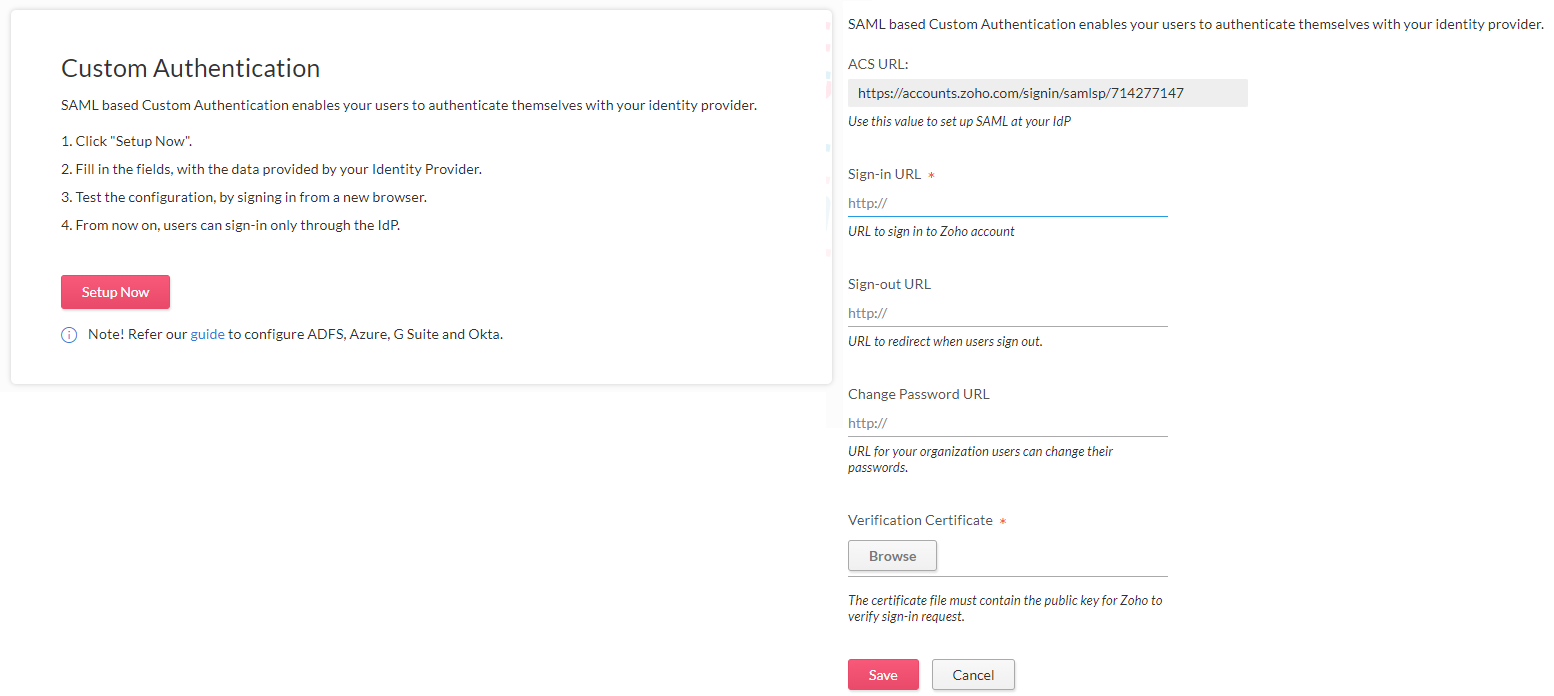
Enabling SAML will allow the users to authenticate themselves through their identity provider (or domain). For example, if SAML is enabled for zylkercorp.com, then users logging in from that domain will be verified and allowed to login.
you can learn more here.
To setup Single Sign-On, click Configure, and Setup Now , to go through the setup.
For detailed instructions to setup, Click here
Security Policies:
Security policies are a set of customizable rules that govern how your users can authenticate themselves. They consist of four components:
- Password policy: This component dictates how strong the users' passwords must be and how often they have to be renewed.
- MFA: This component dictates which multi-factor authentication modes the user can use to sign in.
- Allowed IPs: This component dictates which IP addresses the user can use to sign in. Any sign-in requests from IPs that aren't allowed will be denied.
- Session management: This component dictates how many active sessions a user can have, and for how long.
To Add a Security Policy
- Open the Zoho Directory Integration page (Settings > Integrations > Zoho > Zoho Directory)
- In the security policy configuration space, Click Configure, a getting started page will explain a few details about this service.
- You can click on the Default Policy to edit the policy, or click + Add Security Policy to configure a new policy.
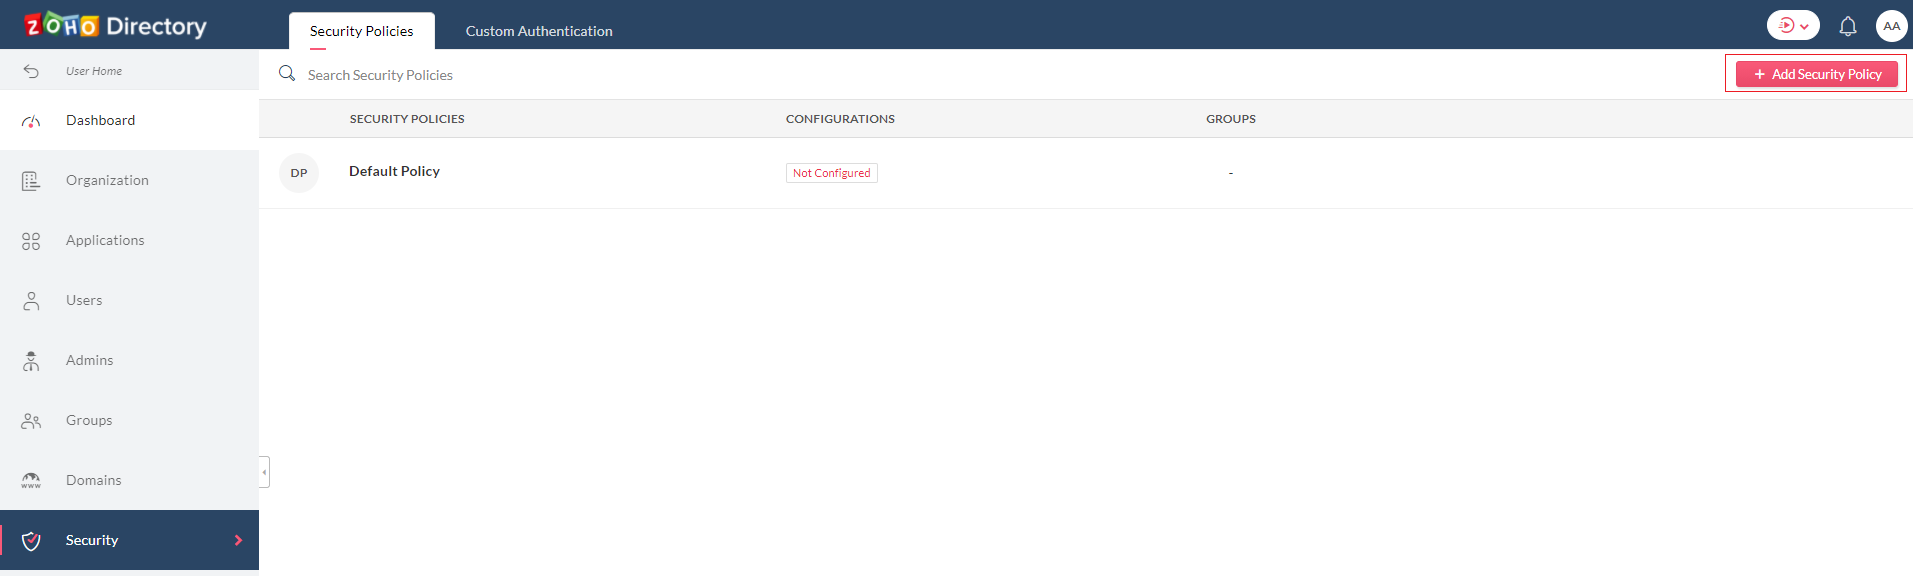
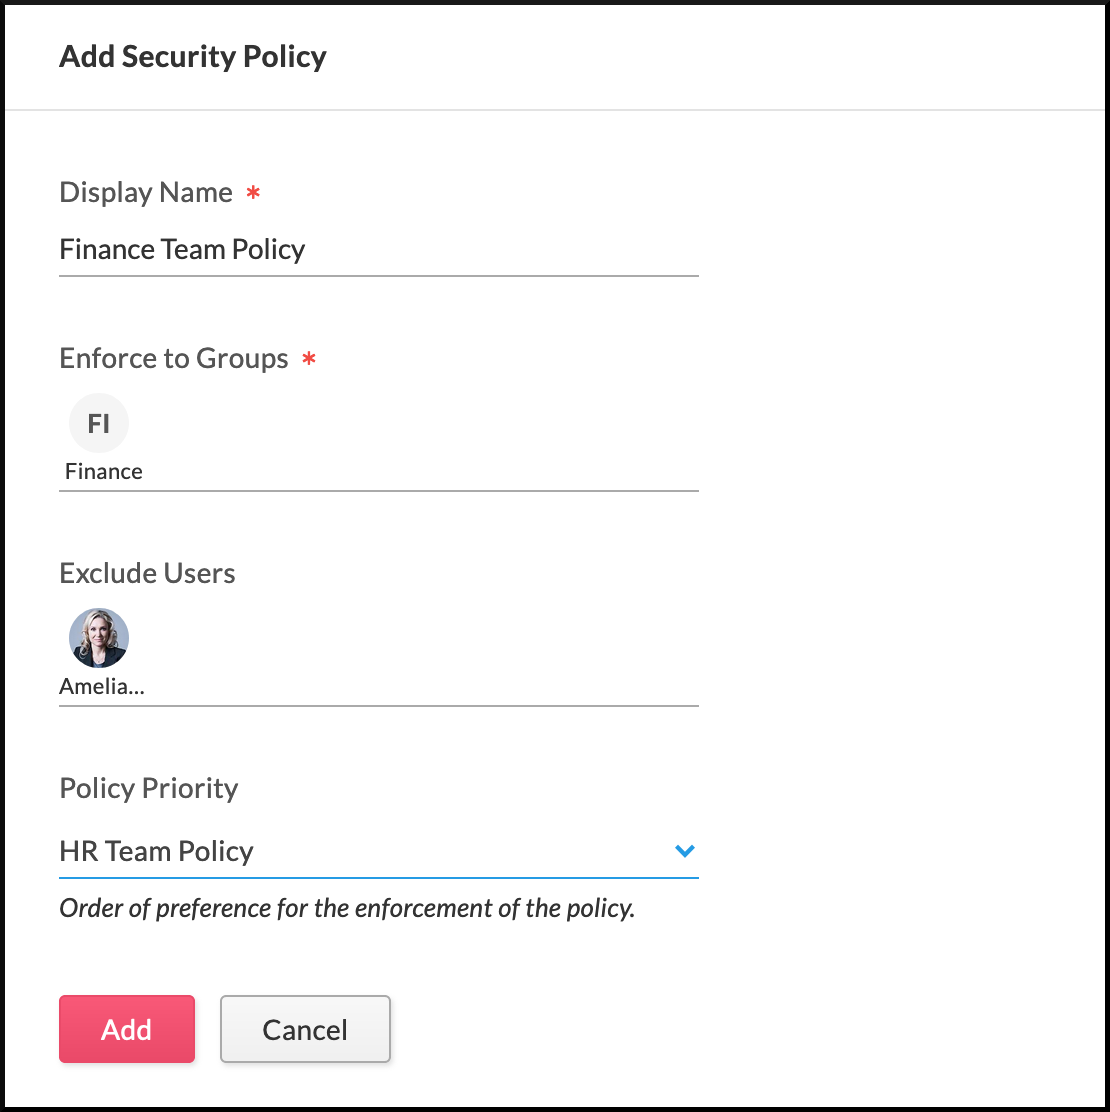
- When configuring a new security policy, a display name, the group for which this policy is to be enforced can be configured, you can also choose to exclude specific users.
- Finally click Add to save changes.
To learn about setting up MFA (Multi Factor Authentication), click here
Active Directory Sync:
Zoho Directory Sync is a secure and straightforward directory and password synchronization tool which helps in syncing users and their passwords in Active Directory (AD) with Zoho accounts.
Zoho Directory enables you to delegate user authentication and management to your Active Directory or LDAP server via Zoho Directory Sync (ZDSync) tool. This tool performs a one-way synchronization from your existing LDAP server to the Zoho Directory Admin Panel. This enables you to maintain all your user identities in a single place, without having to add, edit, or disable user accounts manually in the Admin Panel. As the synchronization always happens from AD to Zoho, the data in AD is never compromised.
Zoho Directory Sync Tool Functions:
- Queries your LDAP Server.
- Queries your Zoho Account.
- Compares the data in the two lists.
- Curates any changes during comparison.
- Updates your Admin Panel with all necessary changes.
Click here to learn more about Active Directory Sync and to download Password Sync Agent (windows).
For setup and configuration steps, Click here
Sign-in Activity
Monitor active users, and view recent sign-in activities. Additionally, view user login history, usage, see reports, and more.
To access, this feature:
- In The Zoho Directory Integration page, (Settings > Integrations > Zoho. Select View Details under Zoho Directory. Click View to view sign-in activity from Zoho Directory.
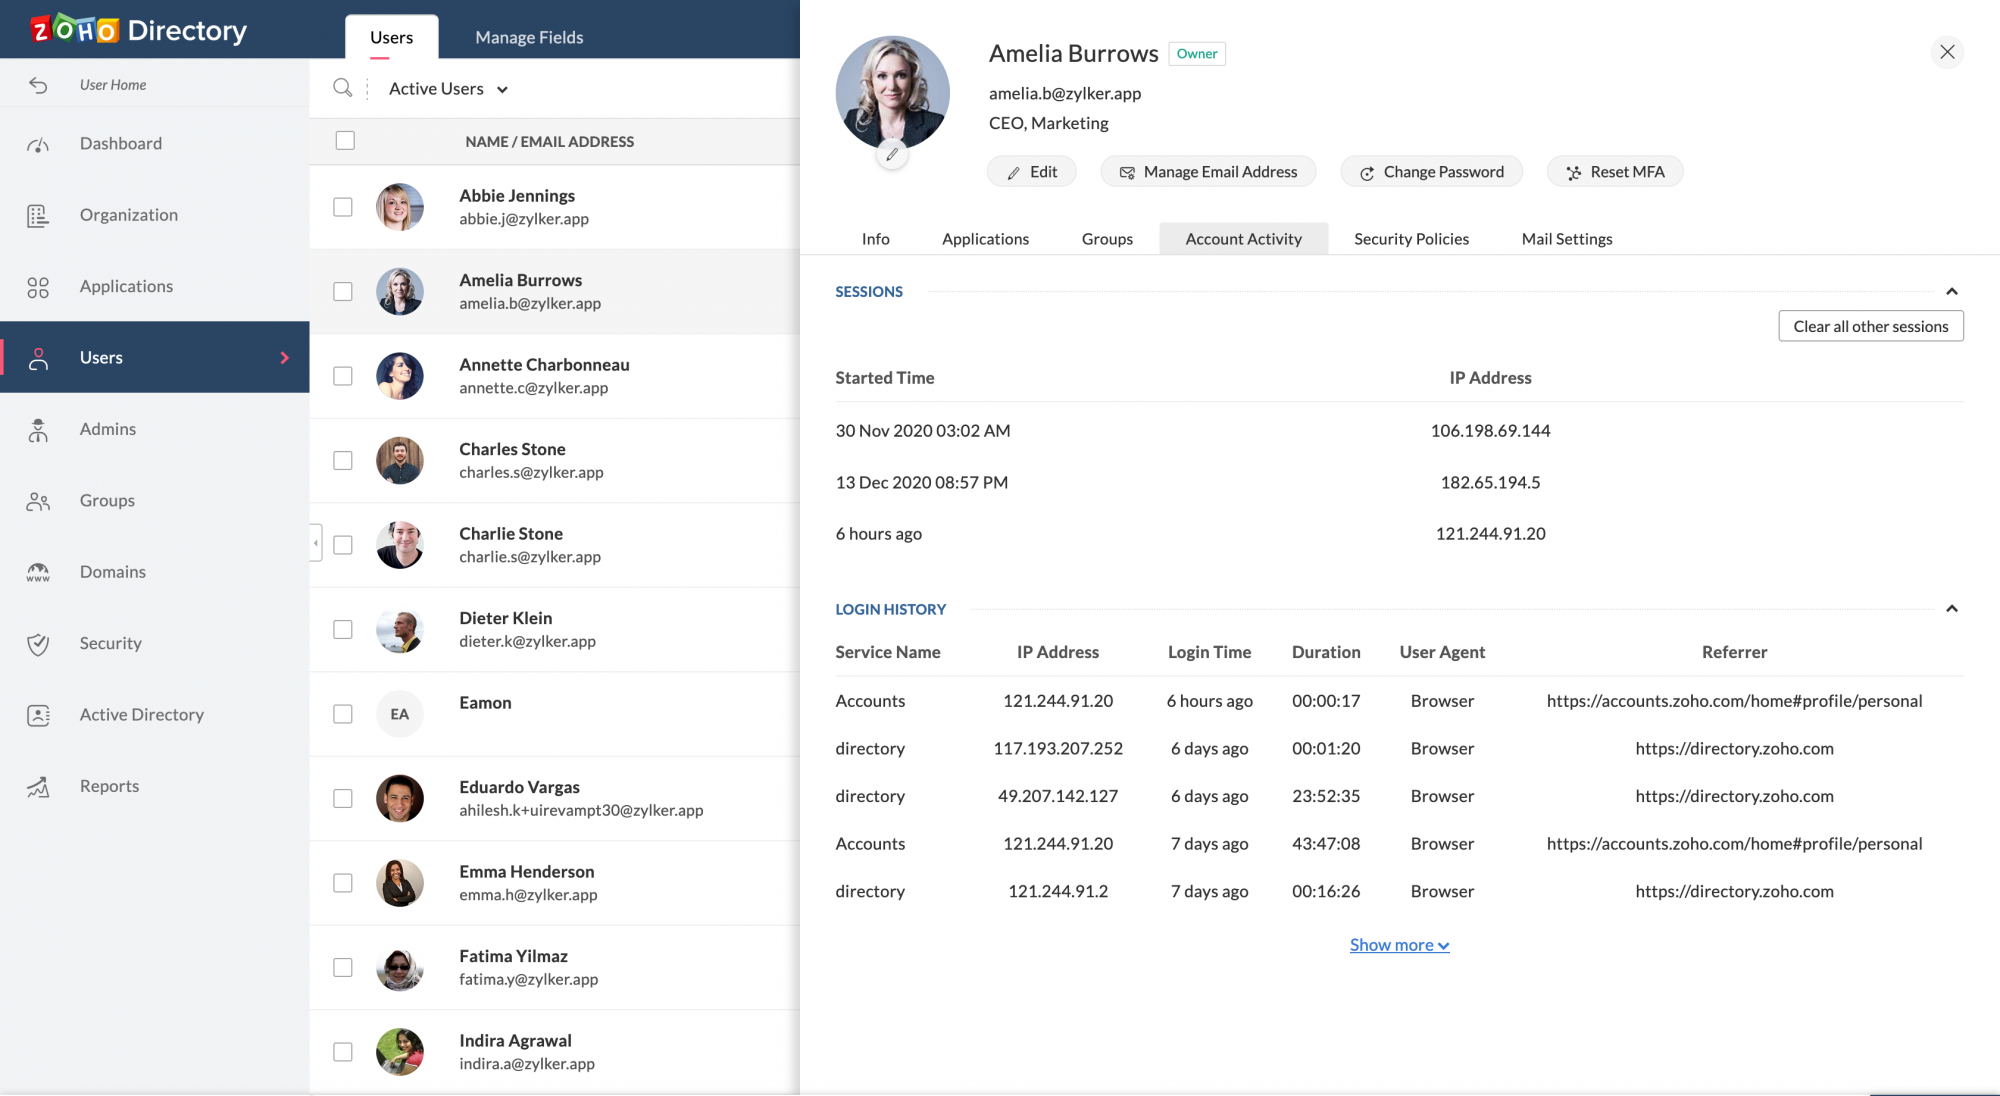
- Select Users from the side menu to view list of all your Active users.
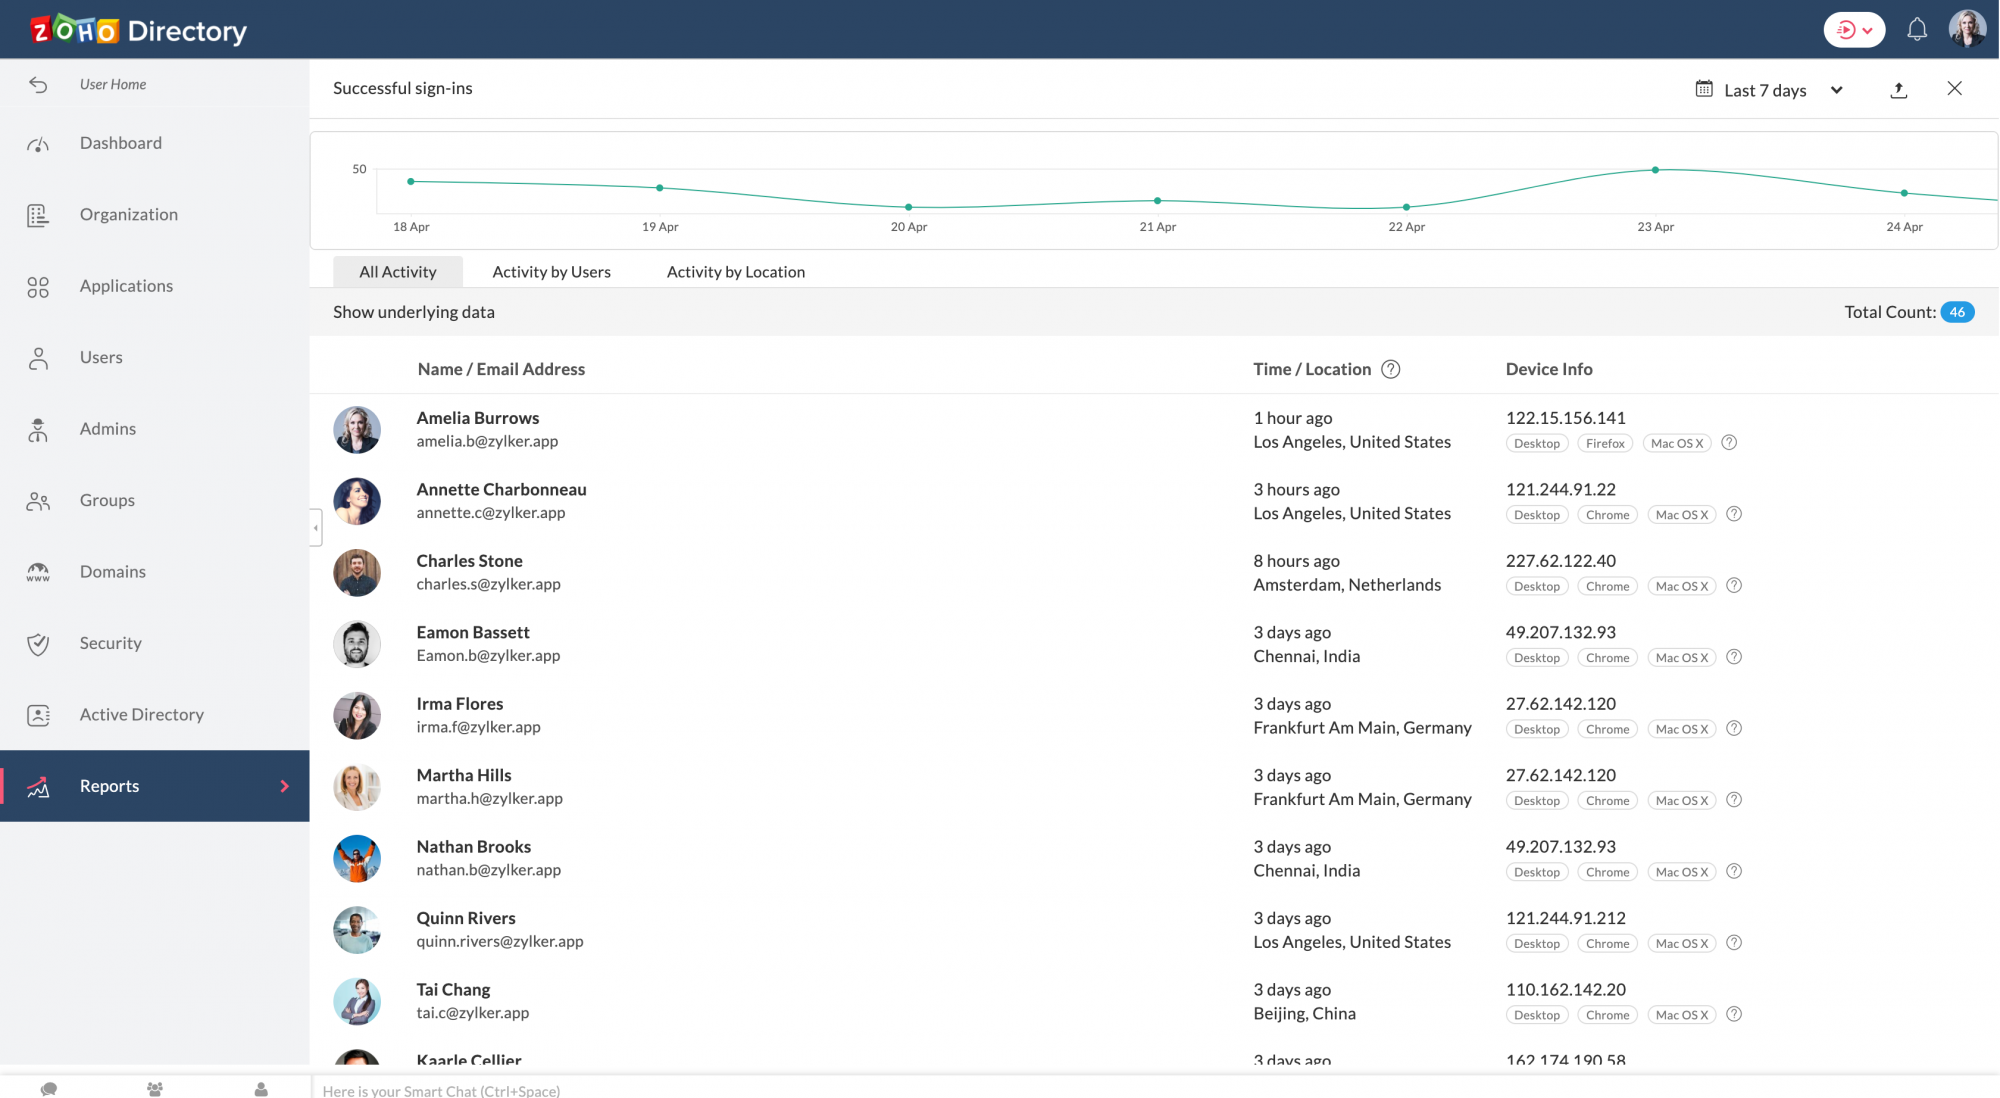
- Click on the user whose activity you wish to view and choose Account Activity (refer below image).
- On clicking that you will see details such as the IP address from where the user accessed Cliq and the login time.