Payroll Integration-Paybooks
Zoho People has integrated with Paybooks for a simplified payroll experience. This integration is available only in India. Basic information of Employees, locations, pay cycle and LOP data will be synced. In specific, information like Email ID, Employee ID, Gender, Date of Birth, Date of Joining, Employee Type, Designation, Department, Location, that are needed for payroll processing will be synced to Paybooks as a result of this integration. Employee records that match the conditions set for 'Location' and 'Employee Type' in your payroll preferences will be synced.
- Integrating with Paybooks
- Pushing LOP data to Paybooks
- Viewing LOP data in Paybooks
- Enabling Employees to Access Paybooks' dashboard
- Viewing Salary Slips in Paybooks
- Syncing Left-out Data
- Updating Edited Data in Paybooks
- Disabling Integration with Paybooks
Integrating with Paybooks
Paybooks will be visible under Integration > Services and configuration for Paybooks will be accessible only for the Super administrator in Zoho People. The list of administrators will be displayed, from which you can pick the payroll admin. The administrator who is chosen as the payroll admin is the only one who will be able to access this service apart from the Super administrator.
If you have an active organizational account in Zoho People, you will be able to sync with Paybooks. The 'Integrations' tab of Zoho People's Admin Console enables you to connect to Paybooks in a single click. Your Zoho People user Id and password are sufficient for you to access Paybooks.
The steps are as follows.
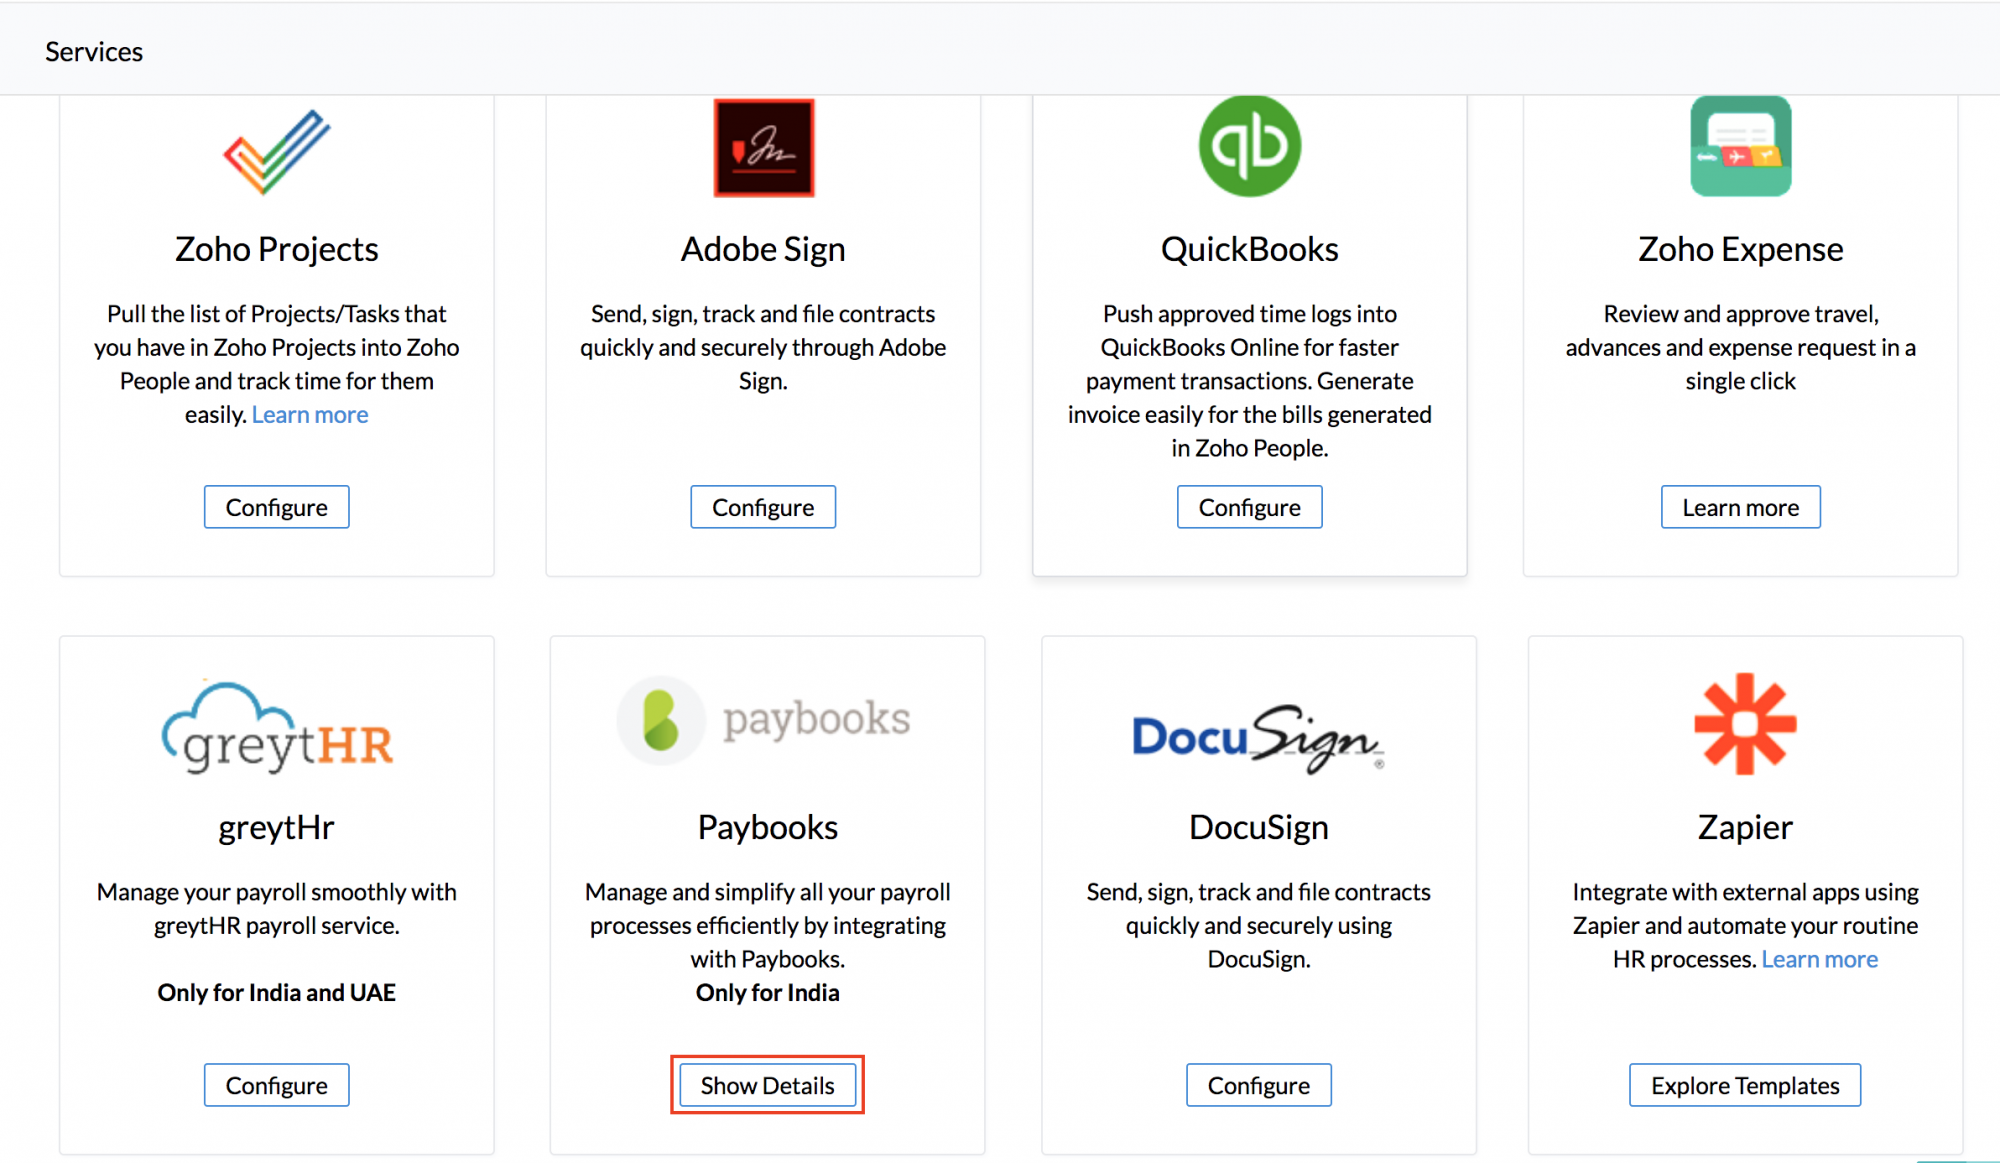
- From your home page, go to Settings > Integration > Services
- Under paybooks, click on 'Configure'
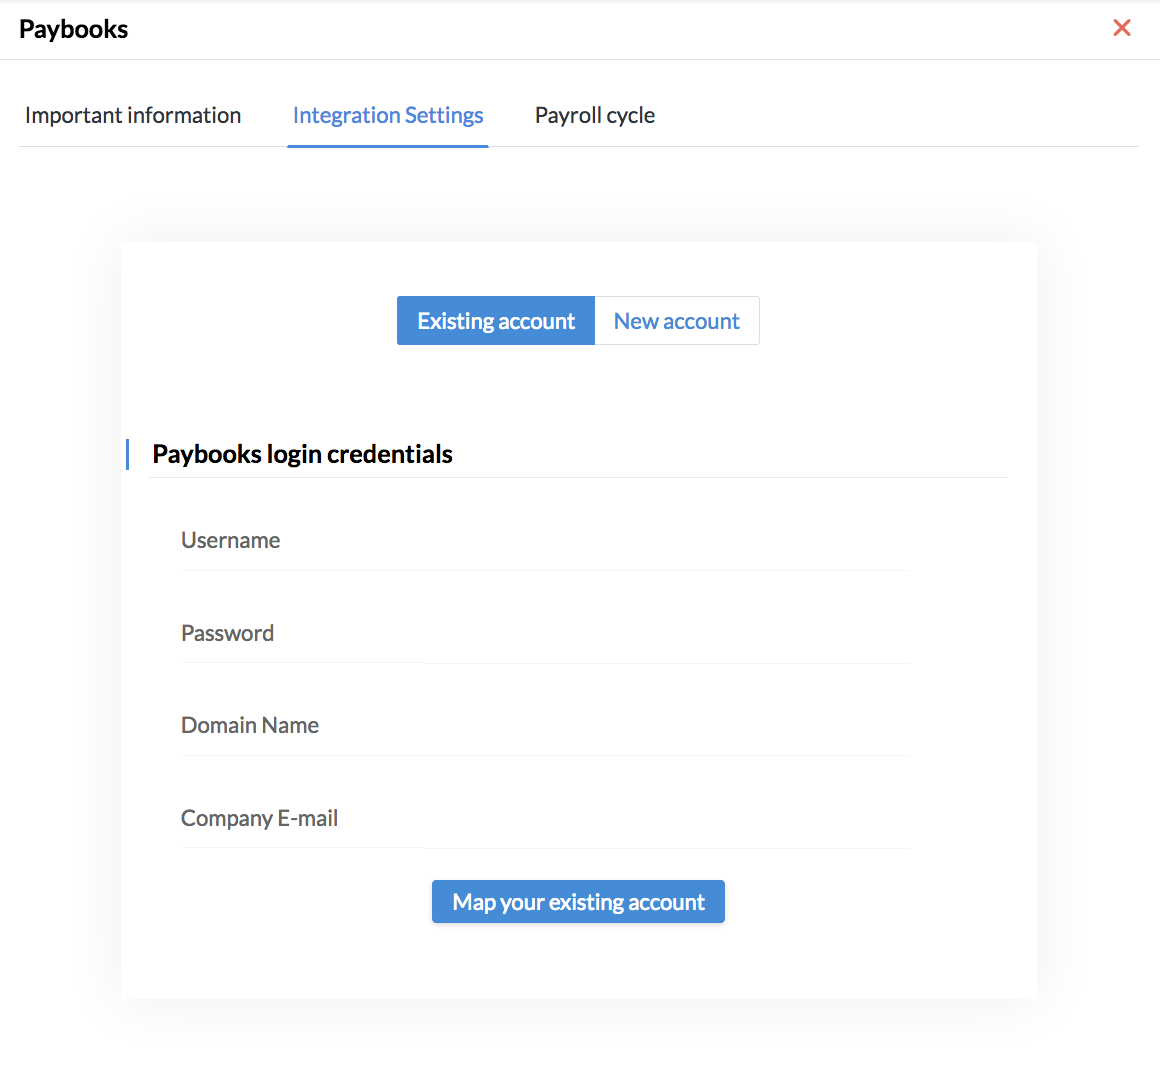
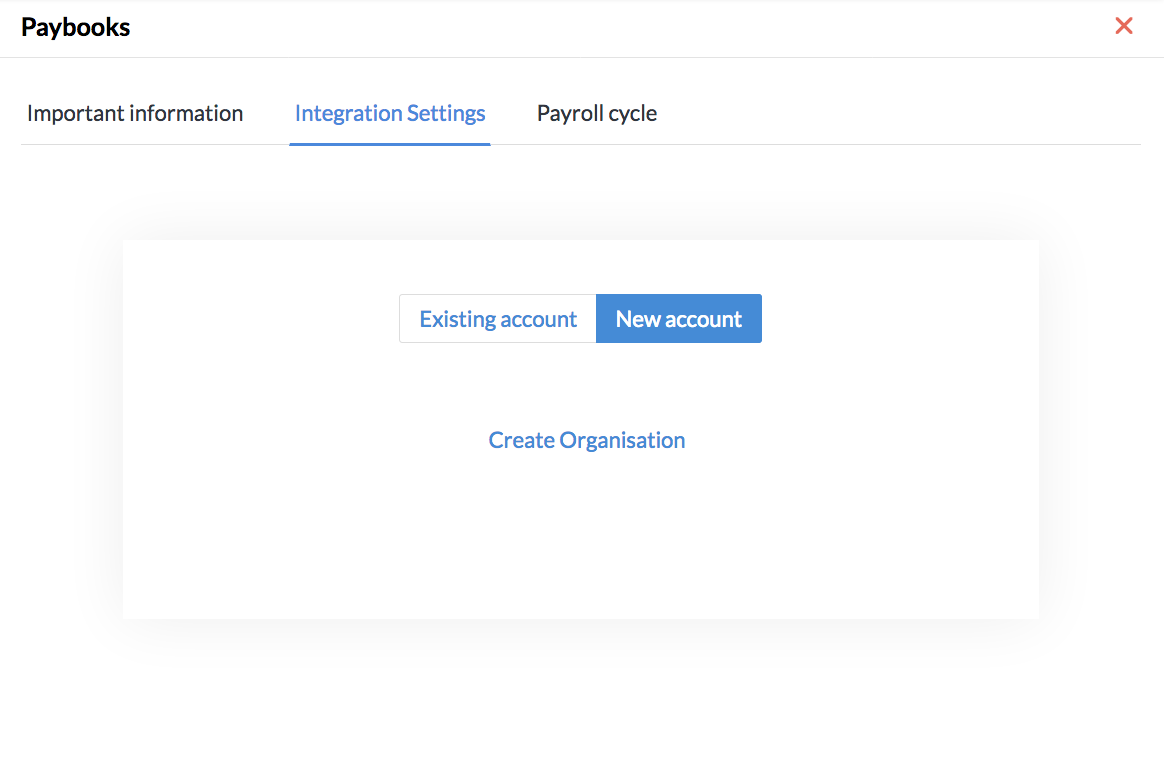
- Under Integration Settings, select an Existing or New account
- If you have an existing account, then you can give the User Name, Password, Domain and Company email of your paybooks account
- If it is a new account, then click on 'Create Organisation'
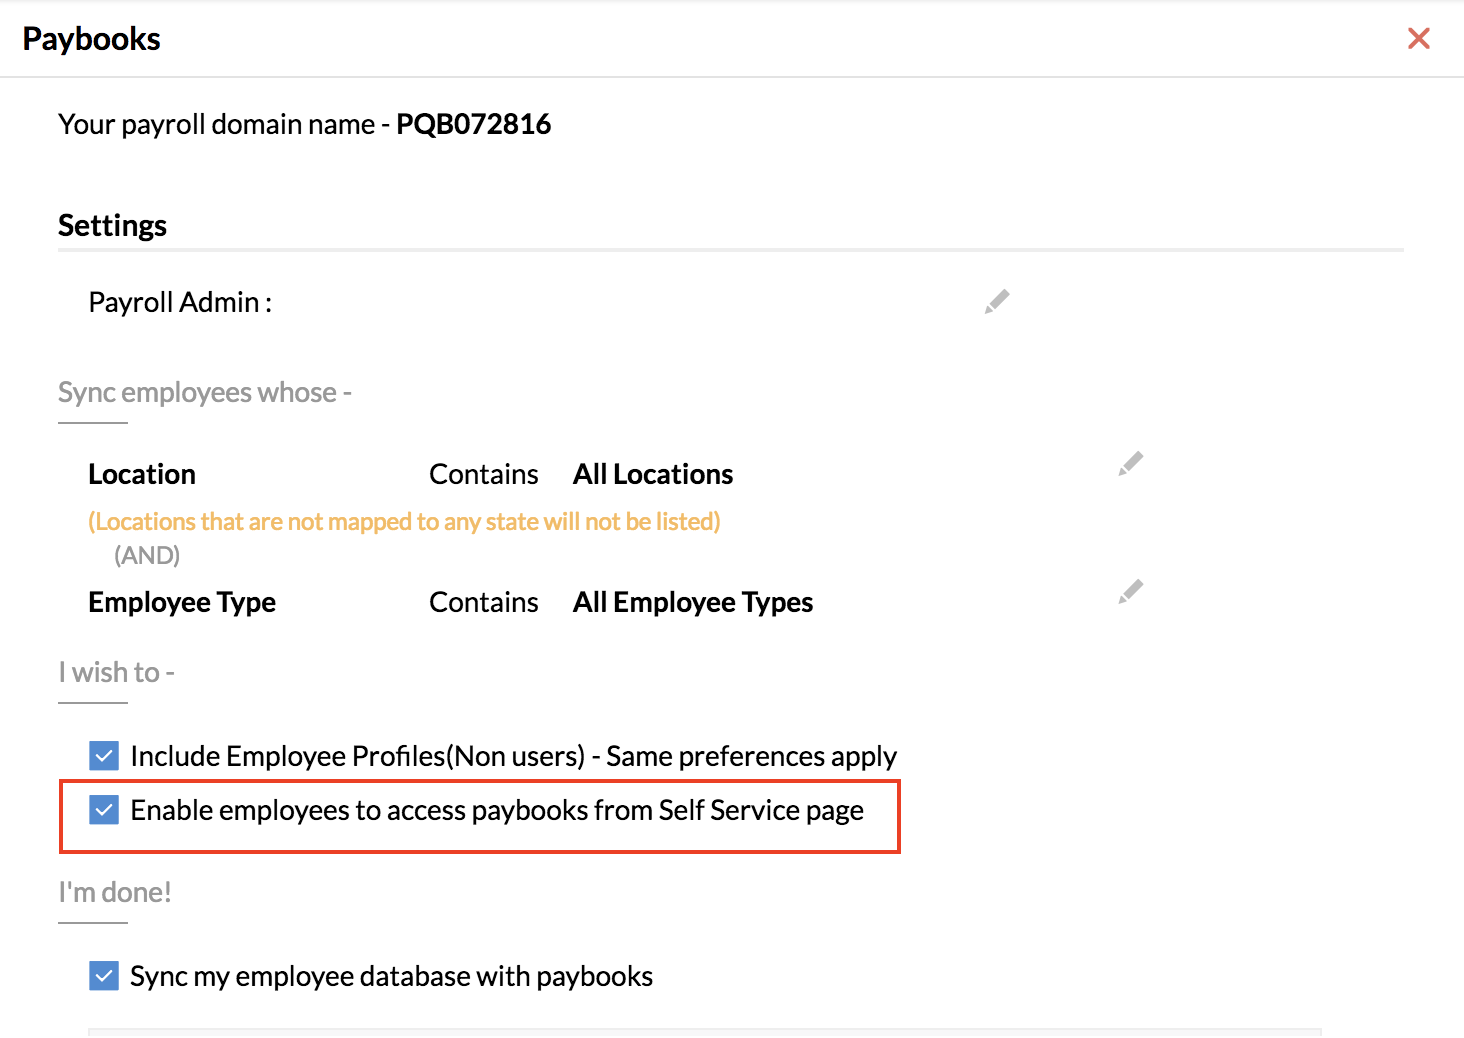
You will be taken to the 'Integration Settings' page, where you can complete the steps given below.
- Under Settings, you can select the Payroll admin of your organization
- Under Location, select the Locations for which you would like to process payroll
Note: The locations that you select should be mapped to a state.
- Select the Employee types for which payroll needs to be processed
- Under 'I wish to' make the selection as required
- Click on 'Sync my employee database'
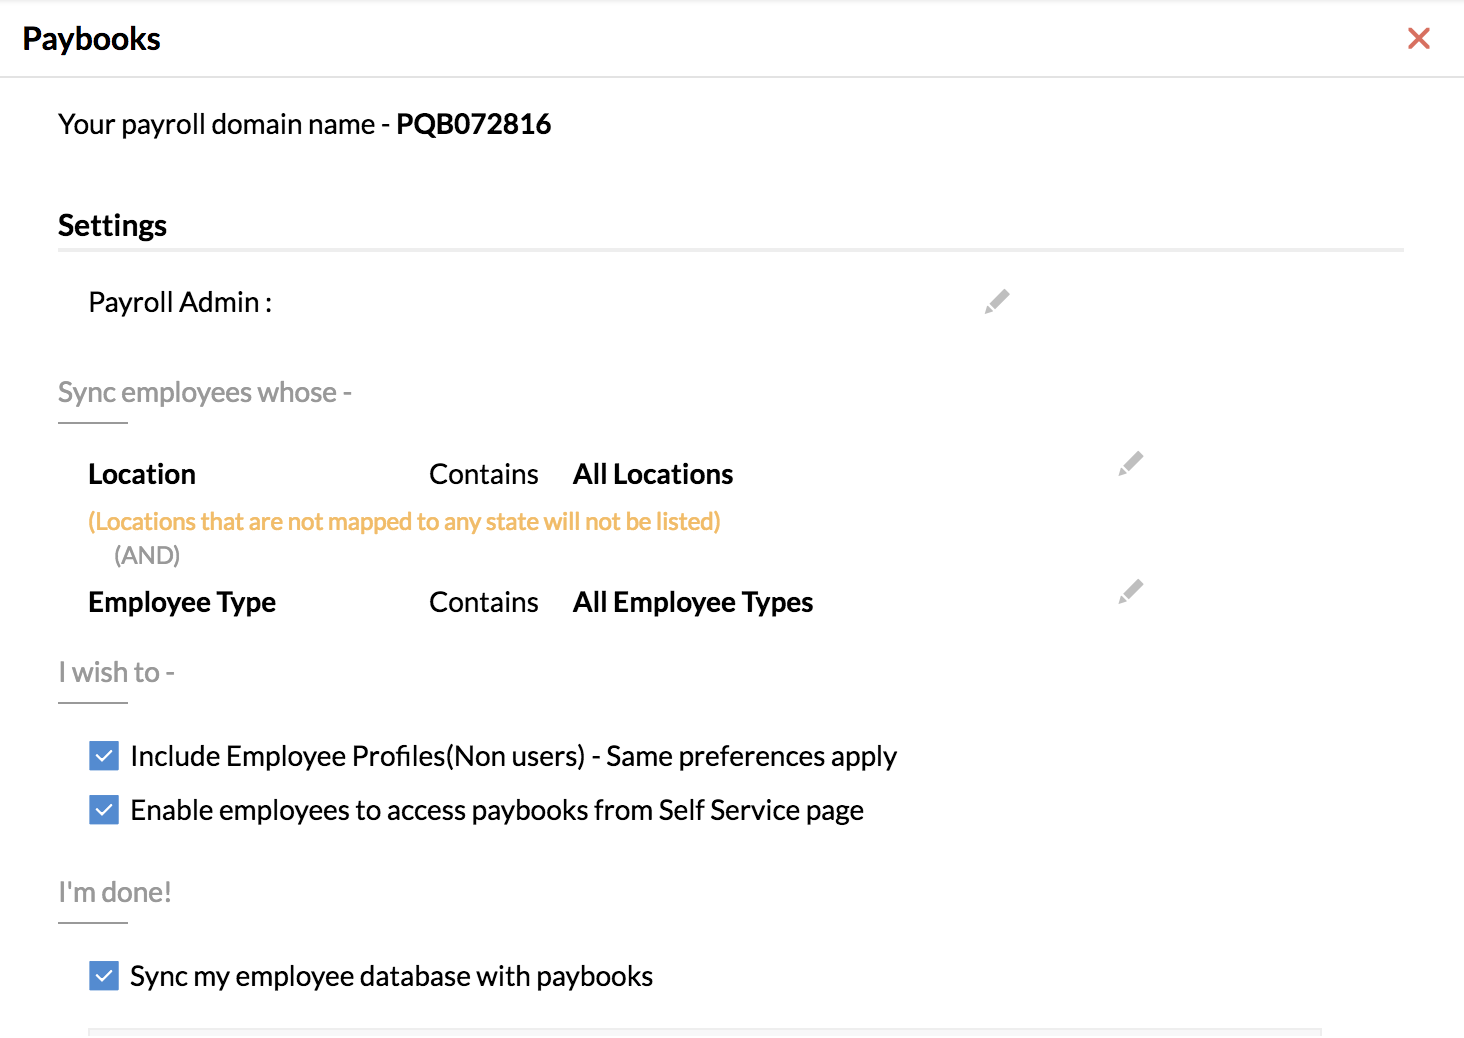
Note: The 'Sync' option will be visible only during the first time of data sync. The sync for existing accounts or new accounts will be carried out based on the conditions set under 'Location' and 'Employee Type'. The fields - Date of Joining, Date of Birth, email ID and Gender are mandatory for the sync to happen.
Note: If no pay period is configured, the pay period will automatically be set from the first date of the month to the last date of that month.
![]() Tip: Click here to know how to configure a pay period.
Tip: Click here to know how to configure a pay period.
The configuration of the Pay period helps you generate the LOP report.
Pushing LOP data to Paybooks
Once a pay period is configured for the Leave Module in Zoho People, the Loss of Pay details gets captured automatically in the LOP report, as 'Carry over' leave. After the processing day( set under 'Pay Period Settings'), you can manually add the carry over details as 'Loss of Pay', which in turn can be pushed to Paybooks. Once the sync is successful with Paybooks, the LOP report data can be pushed to Paybooks and payroll can be processed based on the number of days of Loss of Pay captured.
Follow the steps given below to push LOP data to Paybooks.
- From your home page, go to Reports > Leave > Loss of pay details
- Click on the ellipsis icon and select 'Push to Payroll'
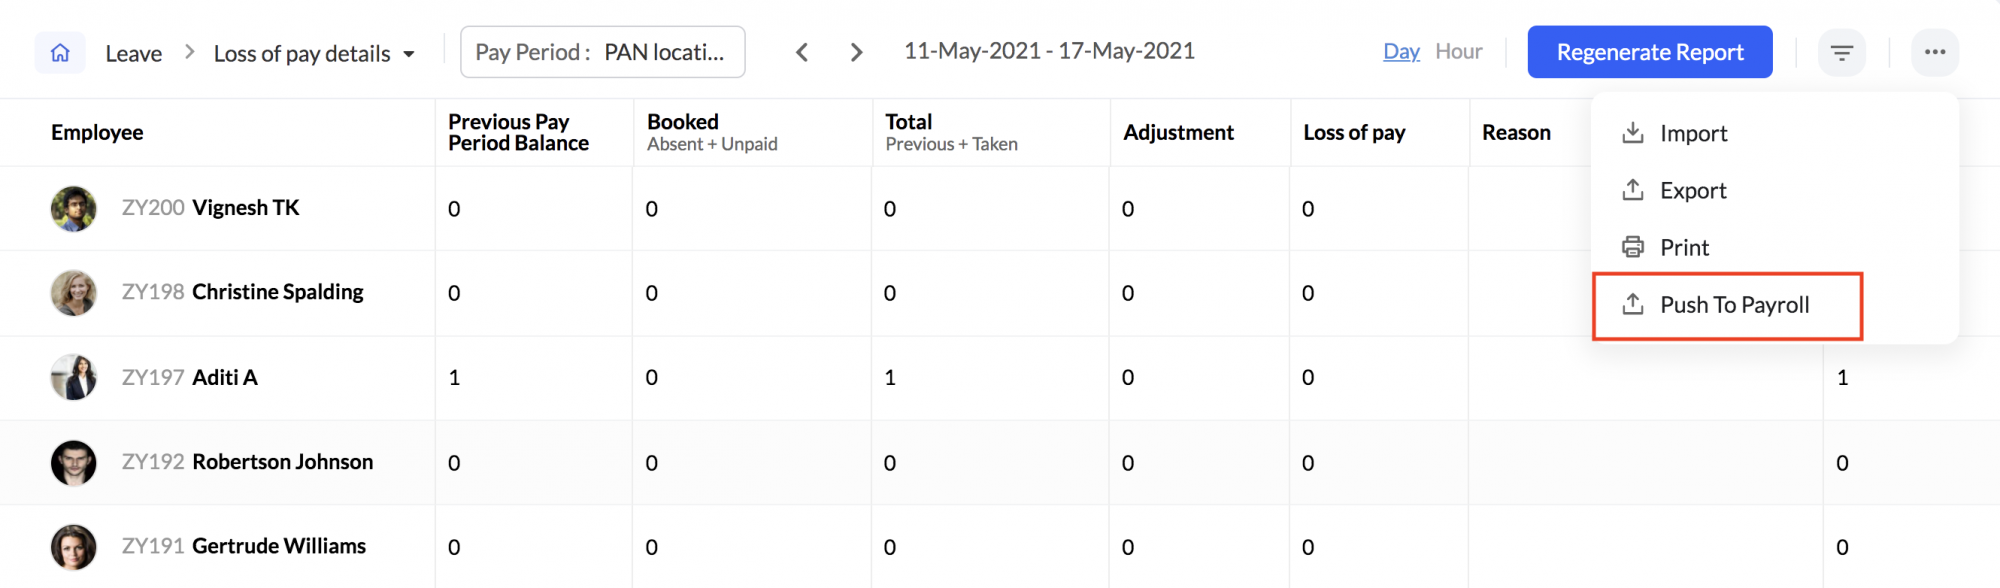
- Select the Location and Payroll Cycle and click 'Push'

If you wish to push LOP data of all the employees in the selected location, you need not select any employees. By default, the LOP data of all the employees in the selected Location and Payroll cycle will get pushed to Paybooks. If you wish to push LOP data of specific users alone, select the users from 'Selected Users' dropdown. Now the LOP data of the selected users will be pushed to Paybooks. This data should be pushed every month manually and this option will be visible only if the integration is active.
![]() Tip: Click here to know how to configure a pay period.
Tip: Click here to know how to configure a pay period.
Viewing LOP data in Paybooks
To view the pushed LOP data in paybooks,
- From your Zoho People Home page, click on Settings(gear icon) > Integration > Services
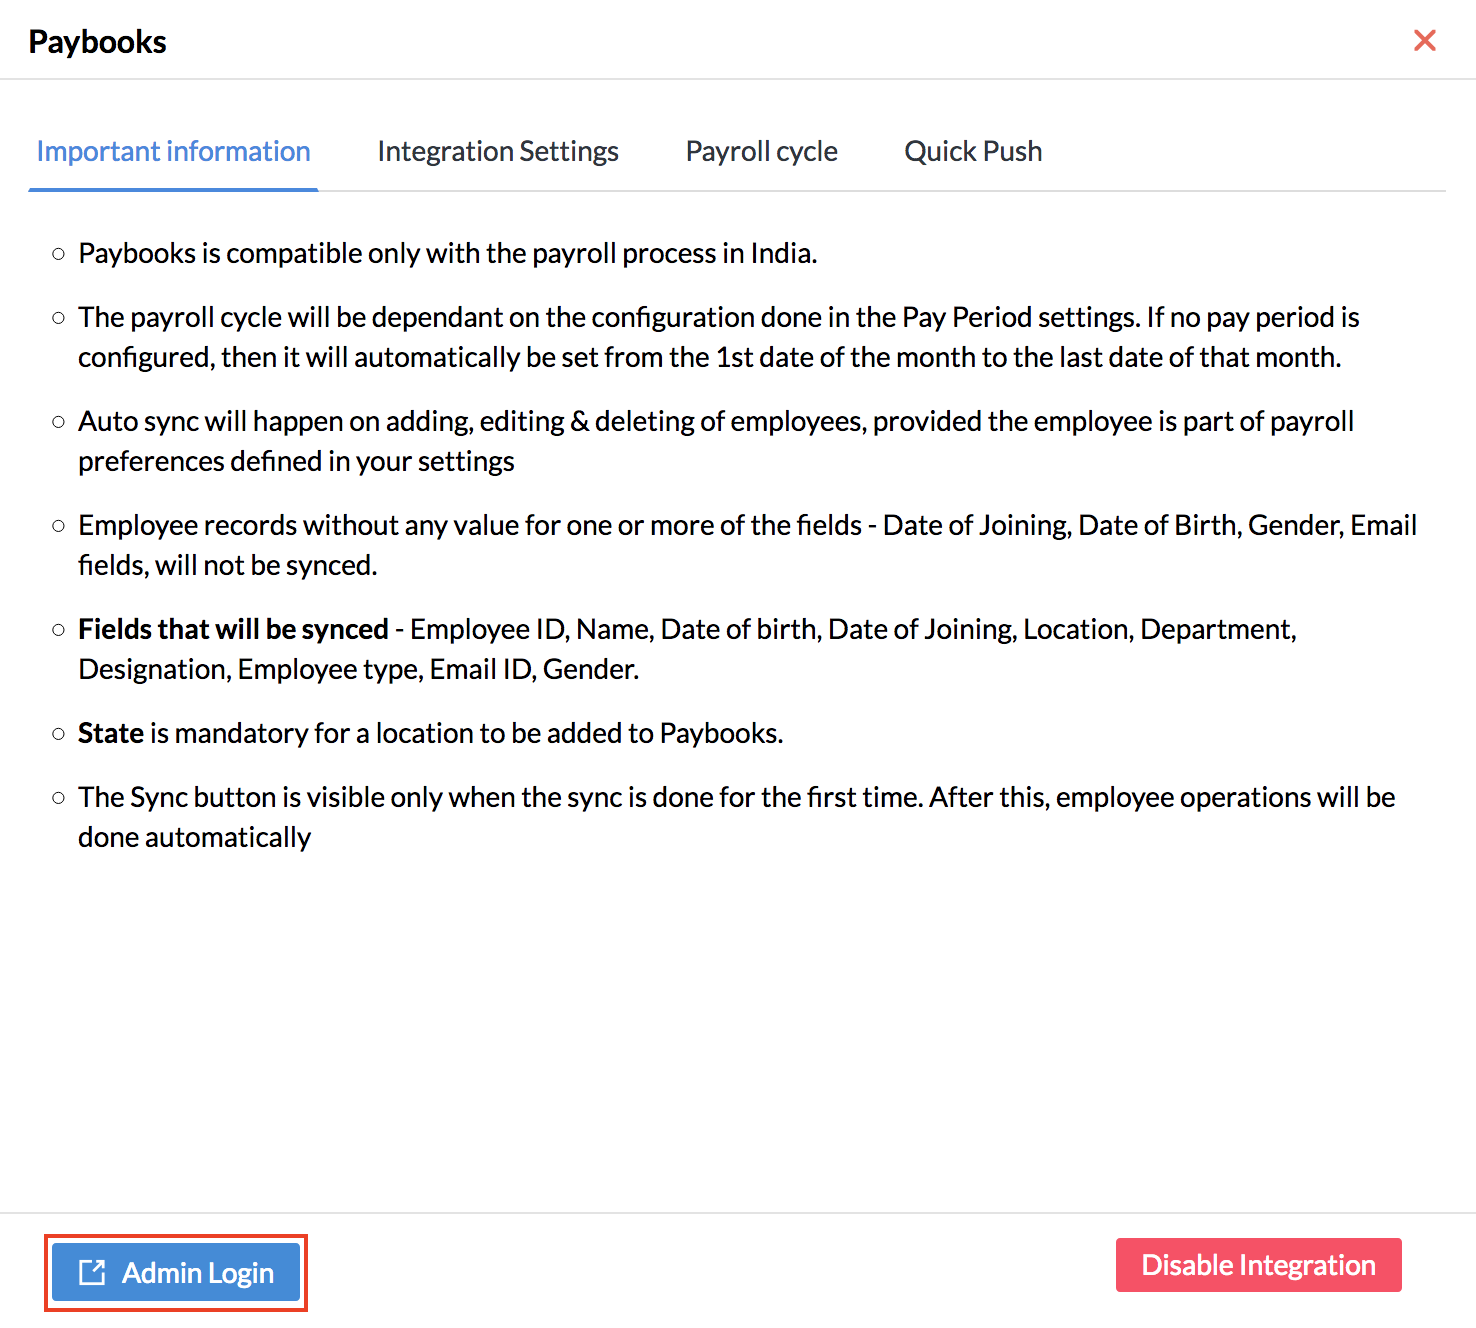
- Click on 'Show details' under paybooks
- Click on 'Admin Login' at the left bottom. You will be taken to your paybooks dashboard
- Click on 'Attendance' under Quick Links
- Select the required locations for which you would like to view the LOP data of employees
Under Attendance, you will find the LOP details listed.
Note: Only the Administrator can view the LOP details pushed to Paybooks.
Enabling Employees to Access their Payroll Dashboard
In the Settings page where you set up the integration, you can allow employees to access paybooks from their Self-Service page.
Once this is done, employees can access their payroll data using 'Access my payroll' option in their profile page and have their pay slips printed. They can also use it to submit their reimbursement claims, to view TDS details etc.
Note: In case accessing payroll dashboard is denied for employees, the ESS(Employee Self Service) should be enabled in Paybooks.
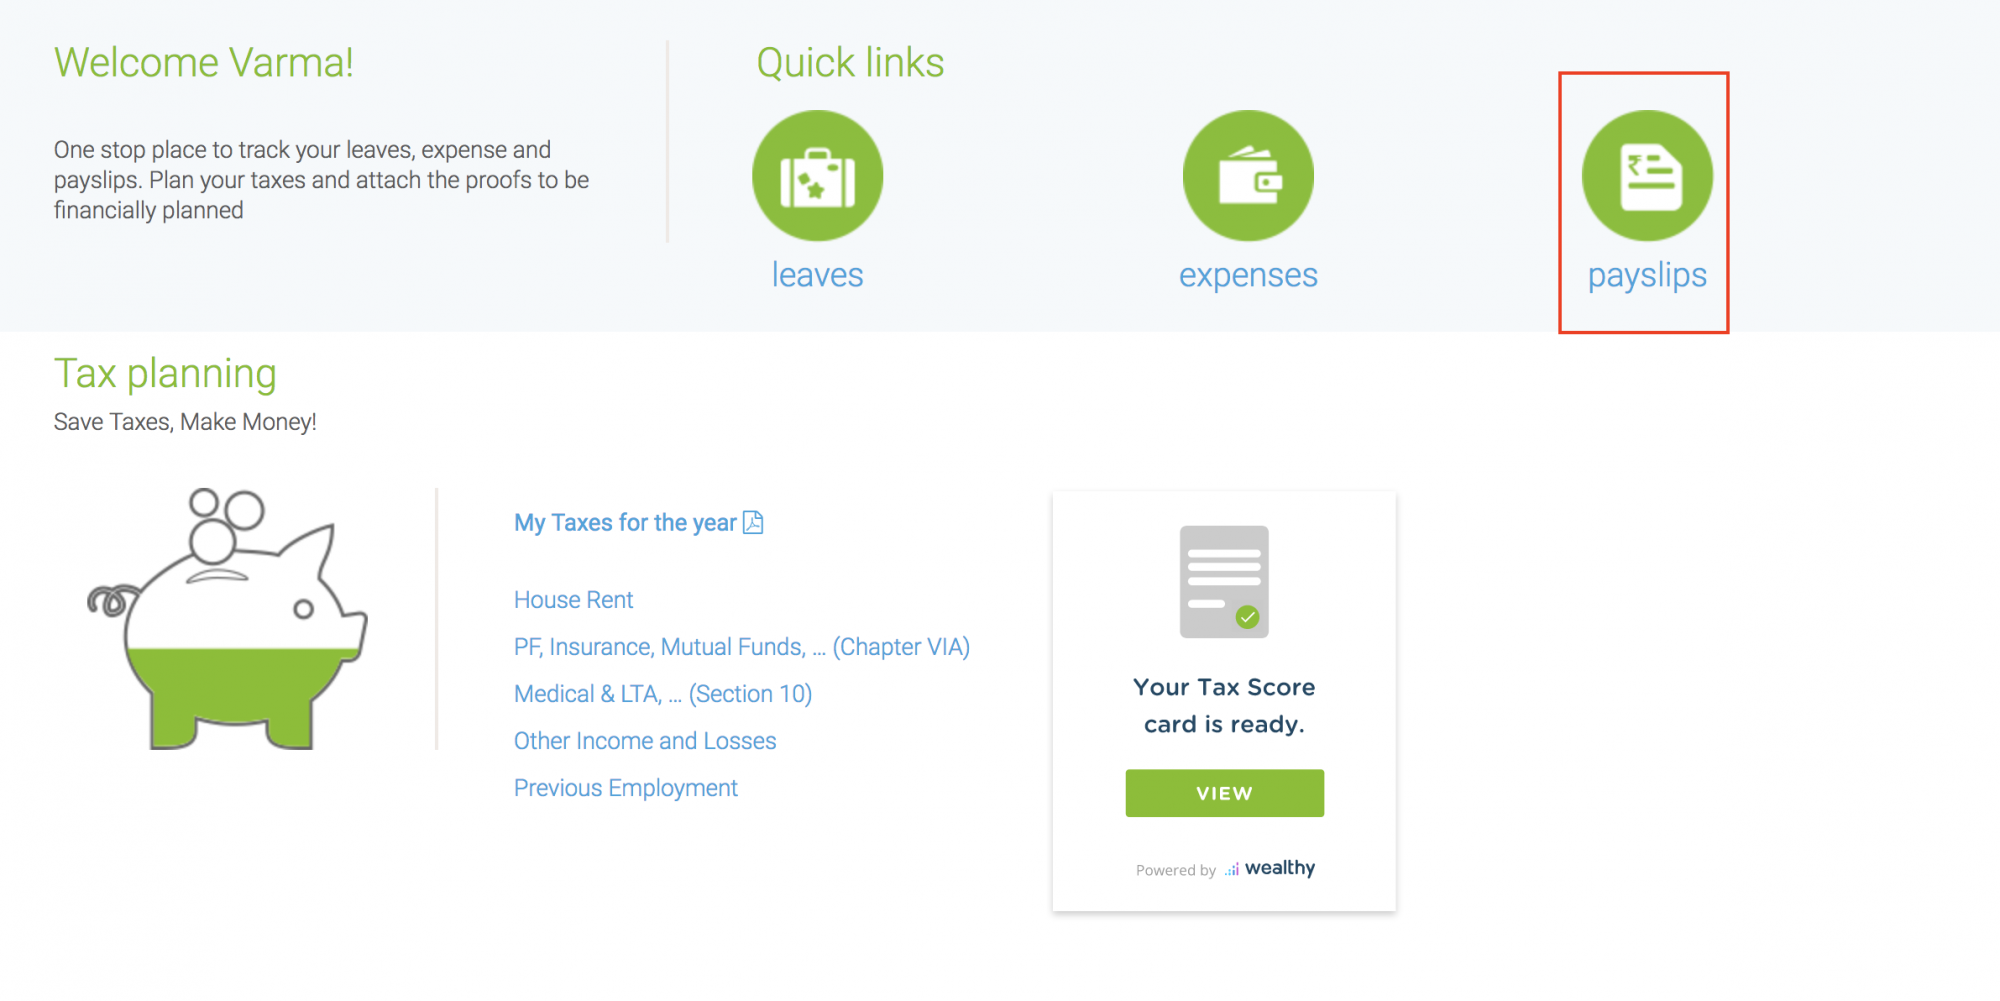
Viewing Salary Slips in Paybooks
To view your Salary Slip in paybooks,
- From your Zoho People Home page, go to Self-Service > Profile
- Click on 'Access my Payroll'(right top corner). You will be taken to the paybooks dashboard
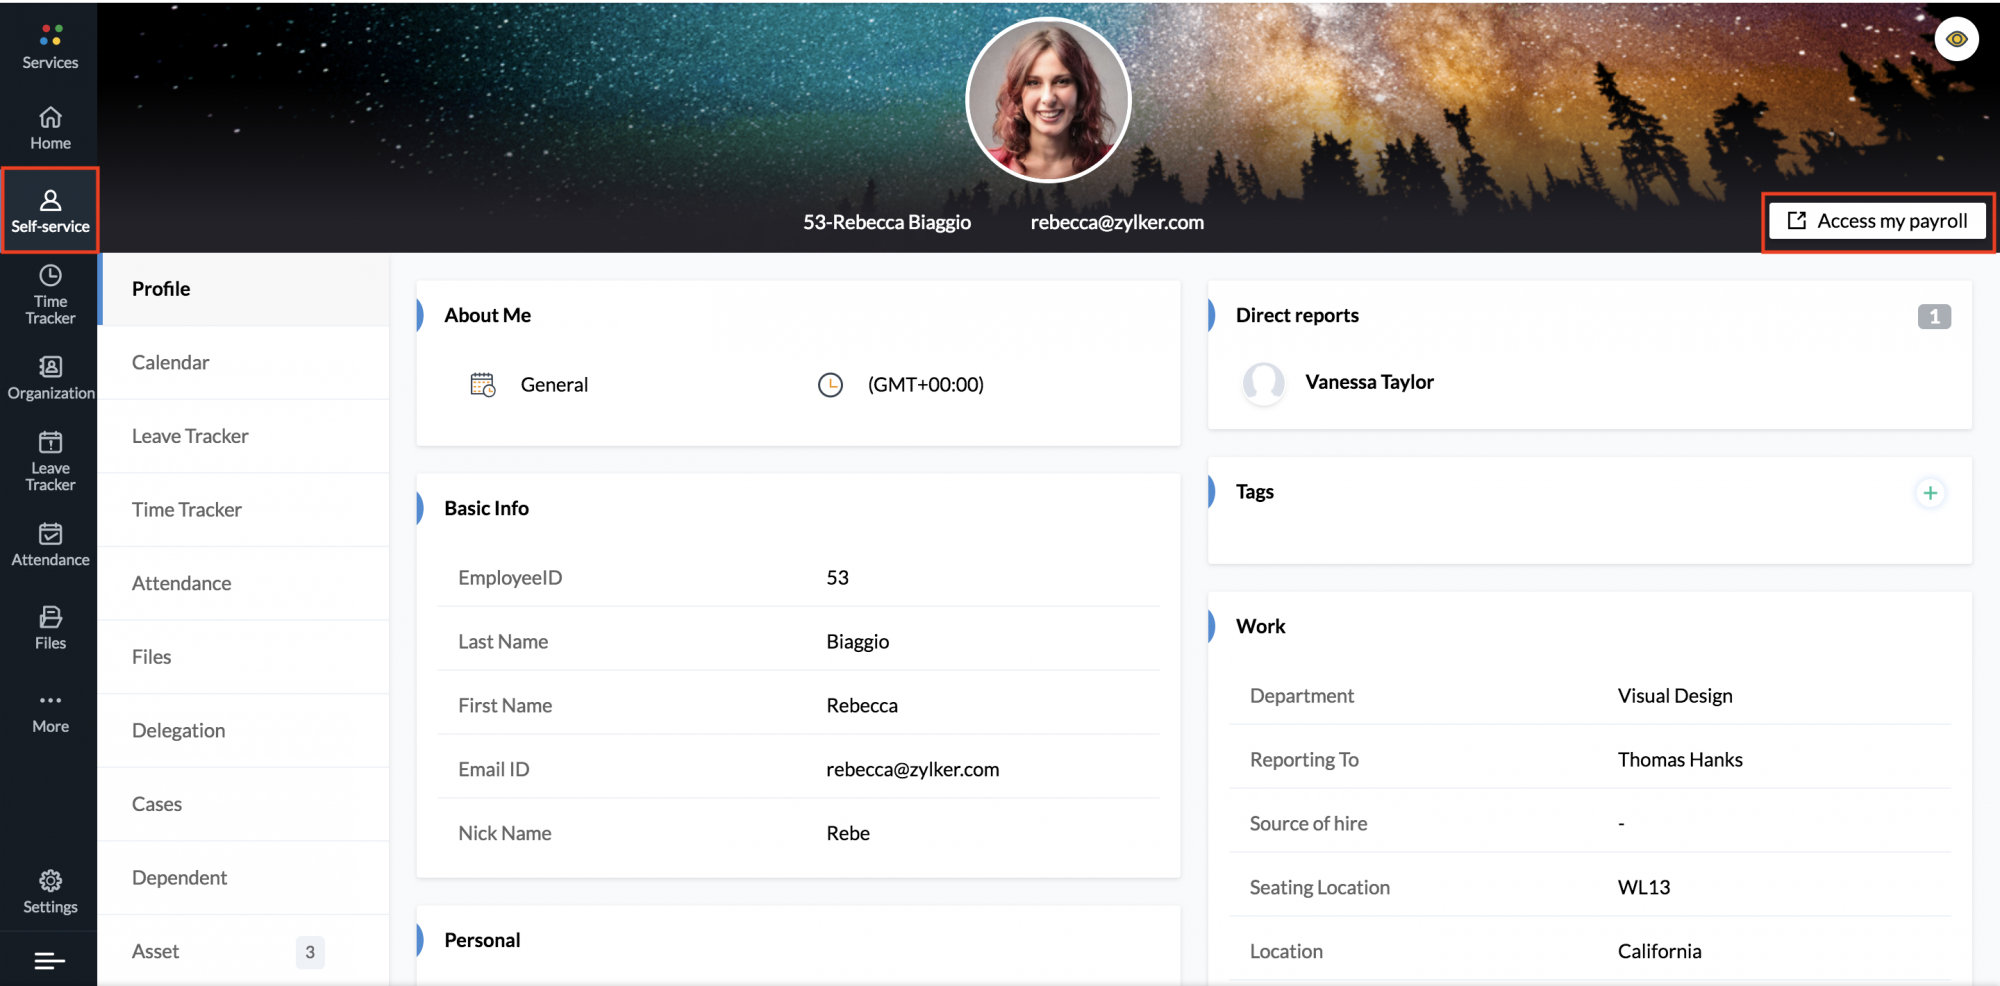
- Click on 'payslips' to view your salary slips
Note: Employees can access their payroll dashboard from Zoho People's Self-service page only on the following conditions.
- The employee is included in the payroll preference
- The employee is active in Paybooks
Syncing Left-out Data
The 'Quick Push' option helps to push data of specific employees to Paybooks. This helps in cases where data has to be pushed again for some employees due to some error. It also helps in scenarios where the data of some employees are left out while being pushed/auto-synced.
- From your home page go to Settings > Services > Paybooks > Show Details
- Go to the 'Quick Push' tab'
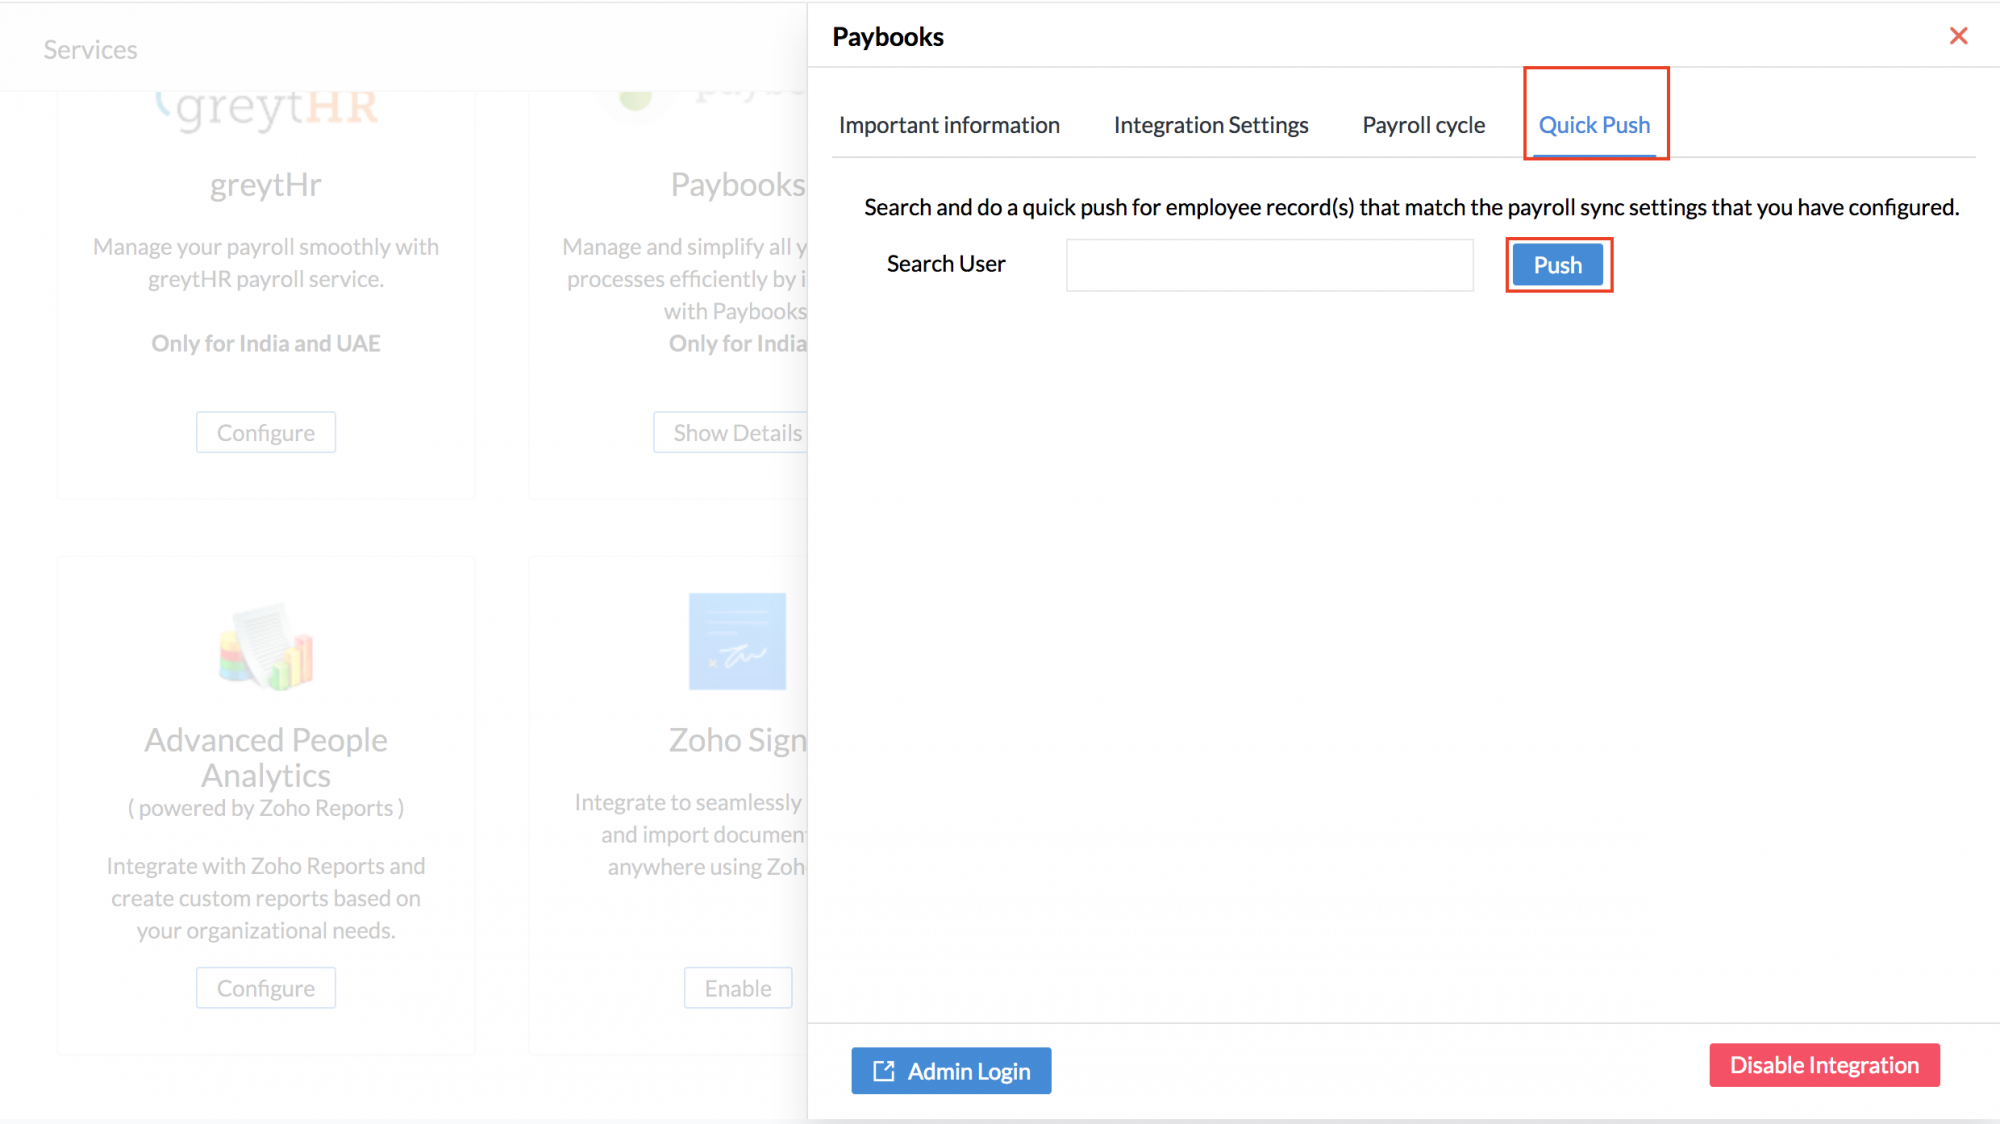
- Select the user for whom you would like to Push data and click on 'Push'
The selected user's data will get pushed to Paybooks. You can select one or more users using this option.
Updating Edited Data in Paybooks
Edited data gets automatically updated under the following conditions.
- When there is an edit in any information it will be synced, provided the employee (whose details are edited) is mapped to the location and the employee type that is mentioned in the preference.
- If there is an edit in either the location or the employee type and this does not abide by the conditions that you have defined in the Settings, then the details will not get updated in Paybooks.
- If a location is removed in Zoho People's 'Integration Settings', then the employees of the corresponding location will be excluded from Paybooks' payroll processing automatically.
- If any change regarding location or employee type is done in the employee form and if the changed location and employee type does not come under the specified payroll preference, then the employee will be excluded from the payroll process.
Disabling Integration with Paybooks
Yes. To disable your integration with Paybooks,
- From your Home page, click on Settings(gear icon)> Integrations > Services > Paybooks
- Click on 'Show Details'
- Now click 'Disable Integration' (right bottom corner) to disable your integration with Paybooks