Electronic Signature
Digital signing of letters can be automated by configuring electronic signatures into Workflows. An e-signature template can be created and then mapped to the workflow, so you can send letters and get them signed using Zoho Sign in an automated way, resulting from any action or record addition in Zoho People.
- Enabling Zoho Sign for a Form
- Configuring an E-signature template
- Setup signature template and Send for signature - Organization files
- Mapping the E-signature template to a workflow
Enabling Zoho Sign for a Form
To configure an e-signature template, the option to send documents for e-signature using Zoho Sign should be enabled in the particular form, in the first place.
Click here to know more about Zoho People's integration with Zoho Sign.
To enable e-signature options for a form,
- From your home page, go to Settings > Customization > Forms.
- Select the respective form for which you would like to enable e-signature i.e Zoho Sign.
- Click Form Properties.
- Under Third Party Integrations, check Enable Zoho Sign.
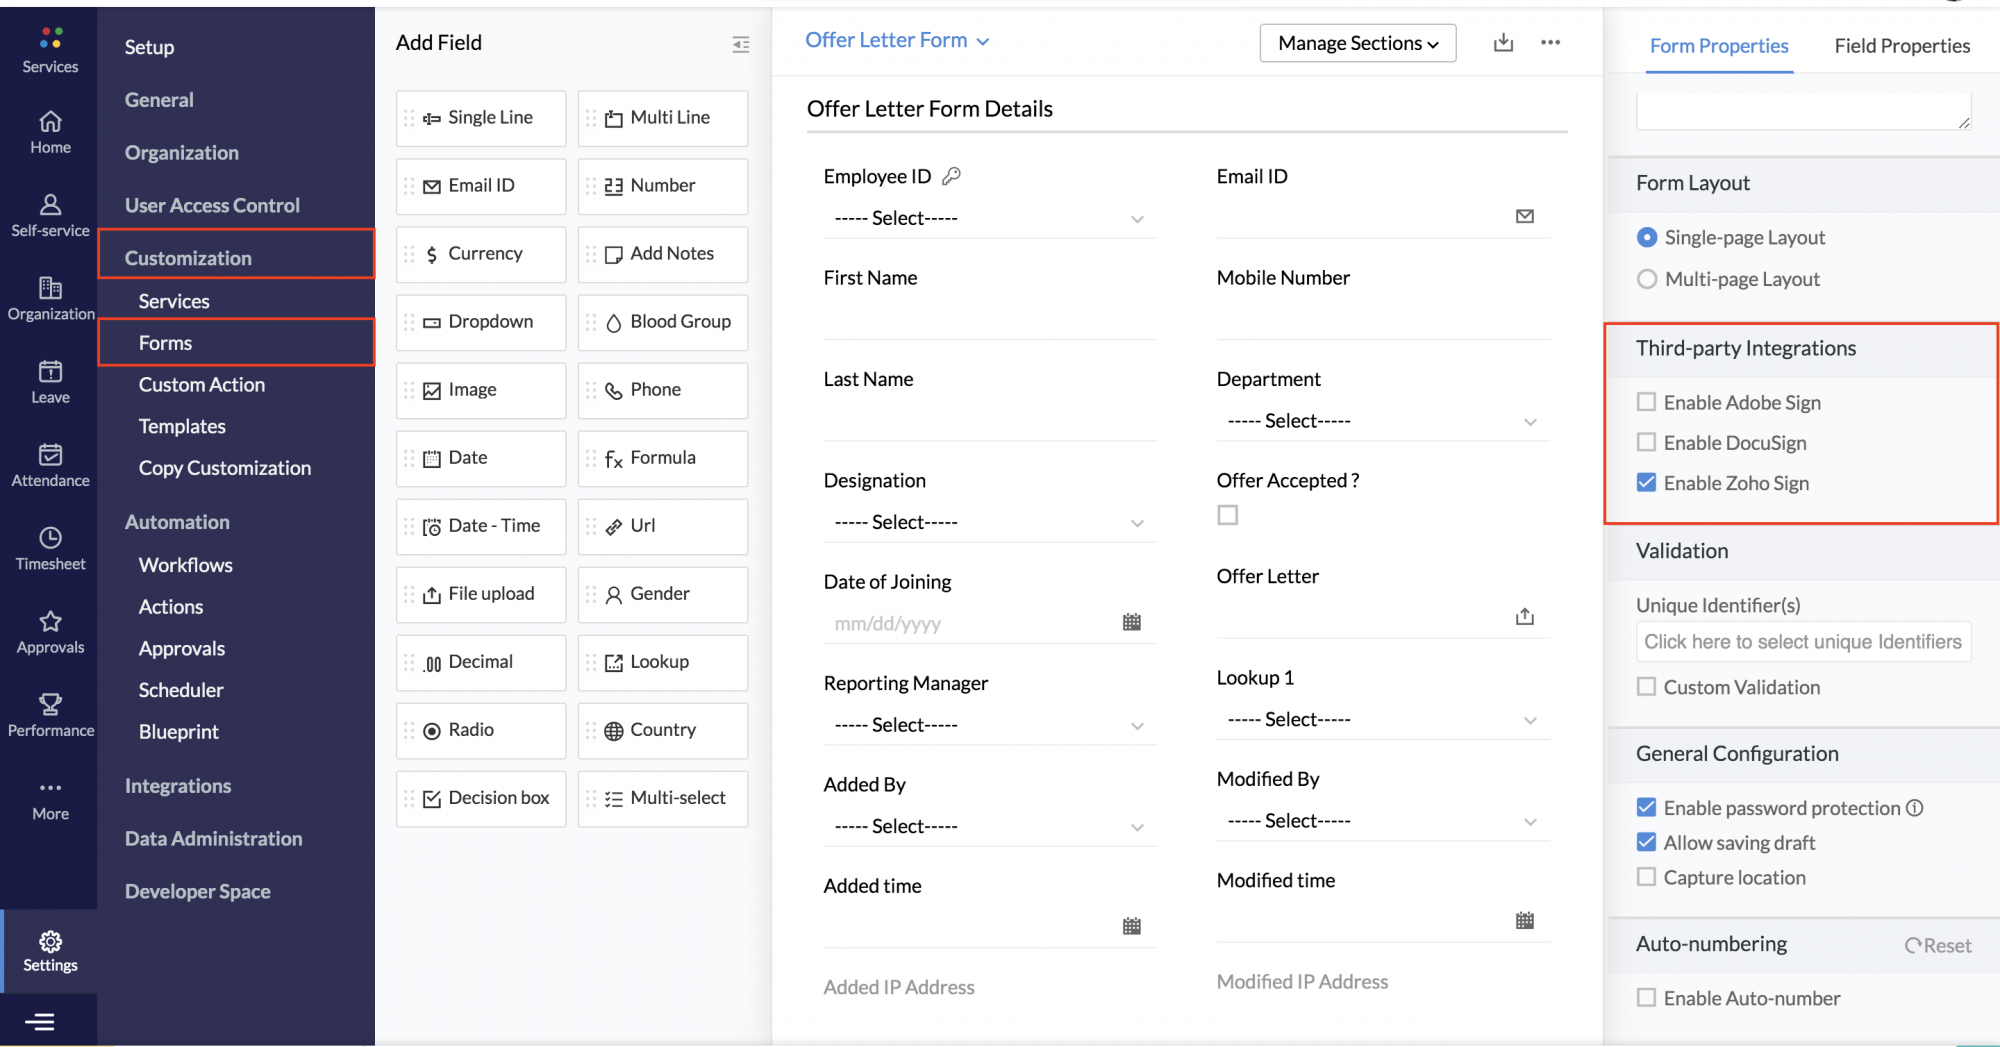
Note: The form should have a 'Email ID' field to enable e-signature options.
Configuring an E-signature template
- From your home page, go to Settings > Automation.
- Under Actions, click Electronic Signature.
- Click Configure E-sign.
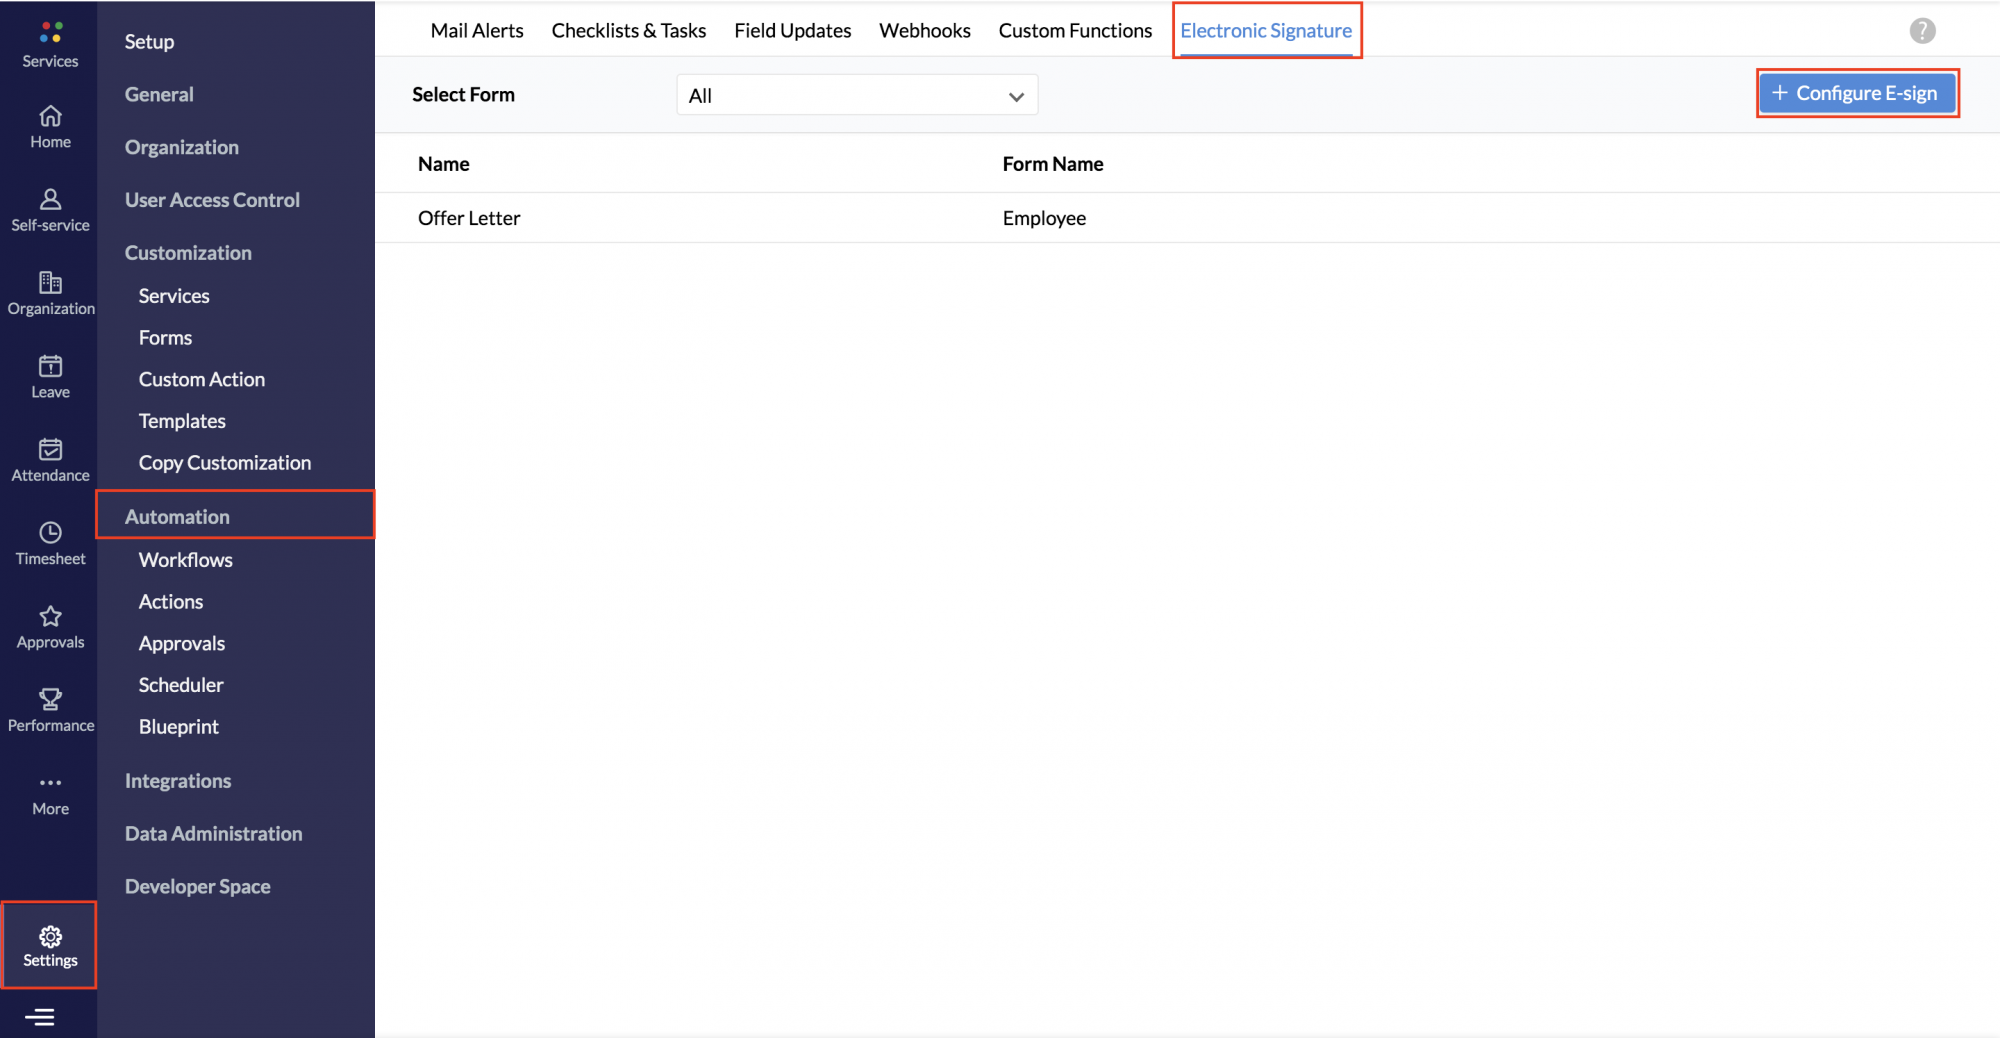
- Select the form for which you would like to have e-signature configured. Ensure that you have enabled electronic signature options i.e Zoho Sign for the particular form.
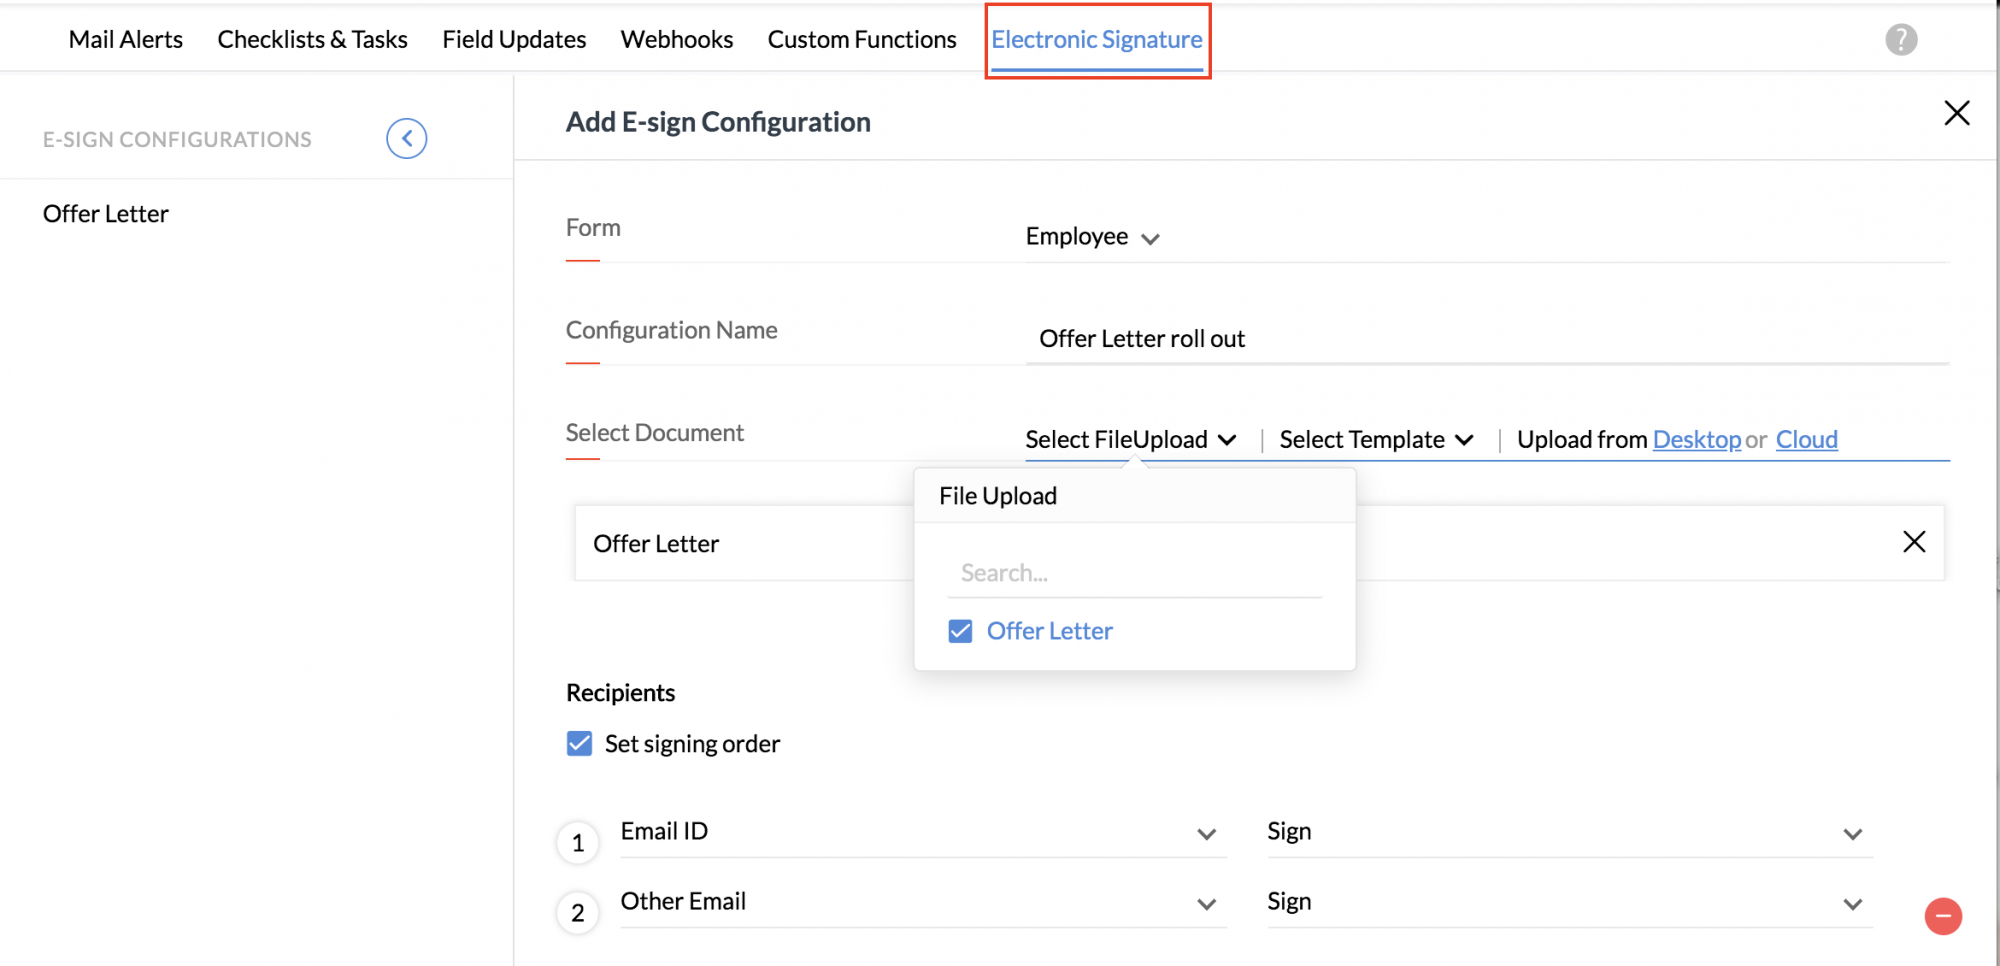
- Provide a name for the configuration.
- Select the document that you would like to send for signing. The document can be from the file upload field of the selected form, a template created or it can be uploaded from your desktop or cloud. You can upload up to 5 files.
![]() Tip: Click here to know about Mail Merge Templates
Tip: Click here to know about Mail Merge Templates
- Select the recipients i.e to select the particular field of the form that contains the mail address of the recipients. You can have multiple recipients in case your form has multiple mail address fields of multiple people.
- Select Sign if you want the recipients to sign the document. If you want recipients to just view the document, select View. Select Approve, if the document is to be approved by the recipient.
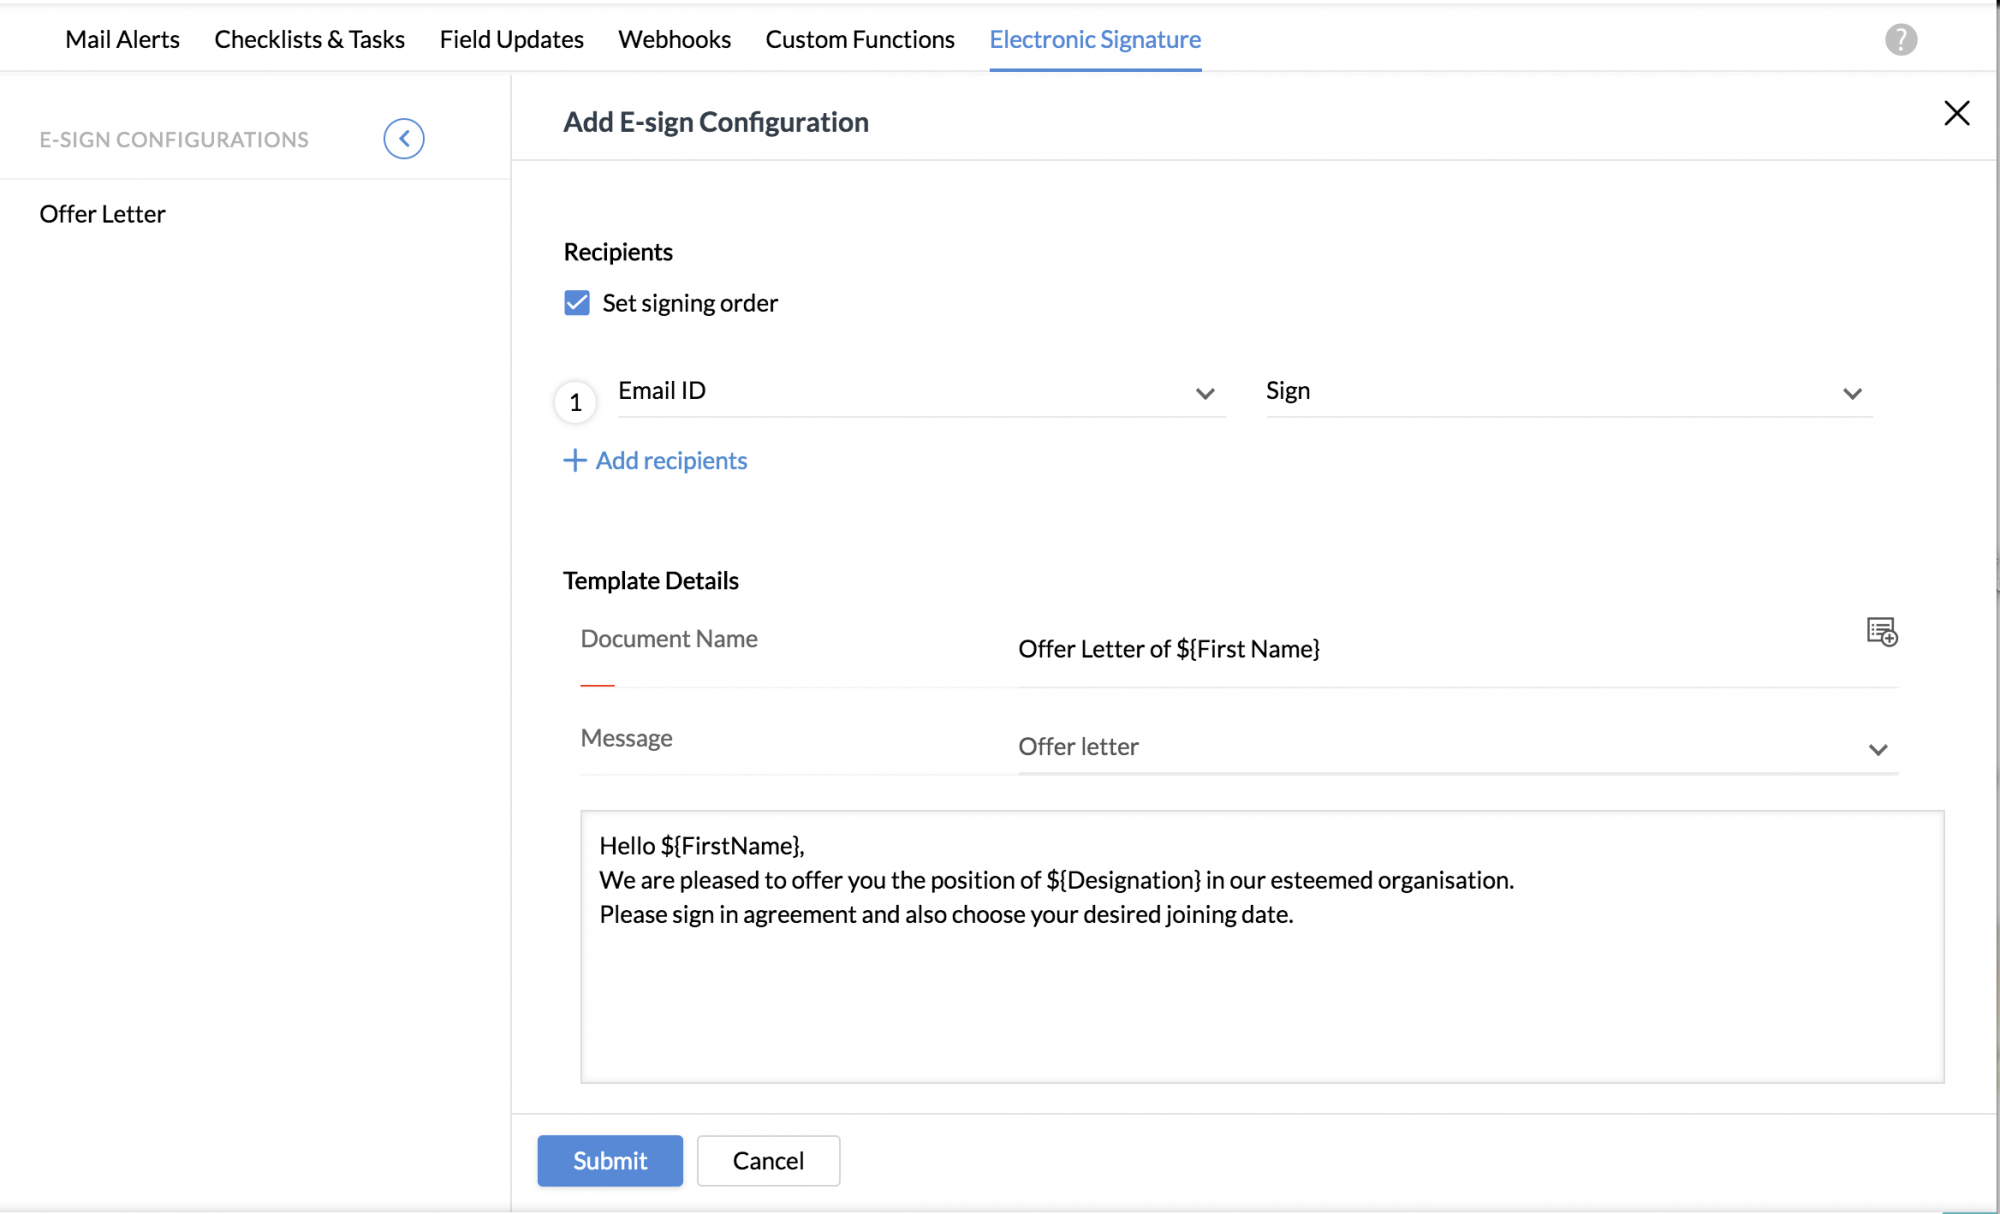
- Enable Set signing order if required.
- Provide a document name. You can also map in fields of the form to provide the name
- Select an email template created for the selected form to serve as the message.
- Select any existing category or add a new category.
- Under More Options, set expiry date, and reminder as required.
- Check Add signed copy in employee files if needed. Select either Record Owner or Employee Lookup. If Employee Lookup is chosen, select the appropriate lookup field.

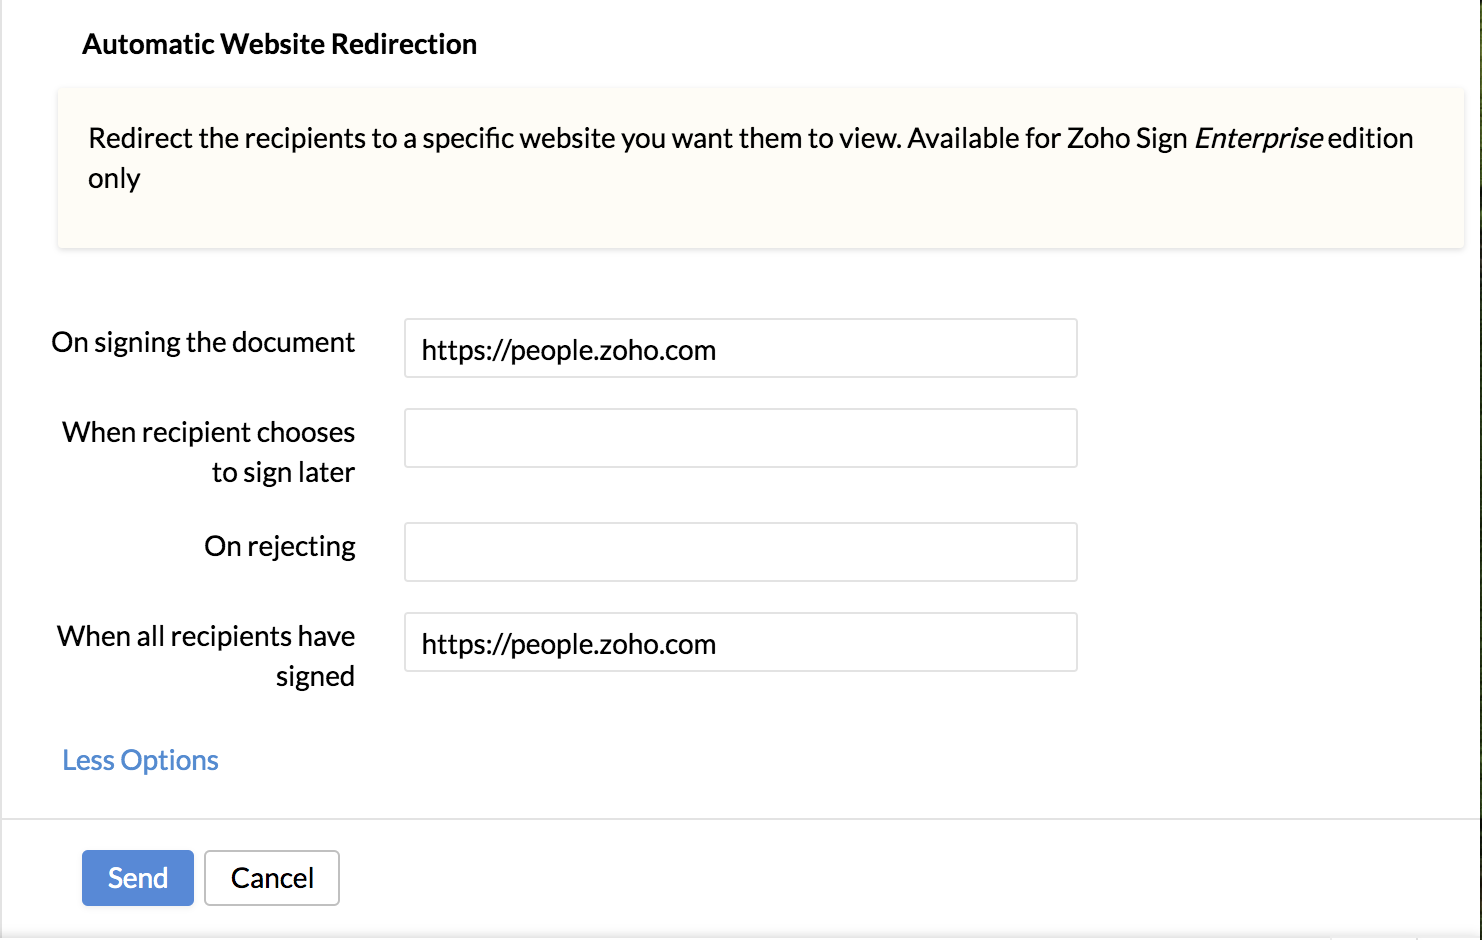
- Under Automatic Website Redirection, enter the pages you want to redirect your recipients to, for the applicable scenarios: On signing the document, When recipient chooses to sign later, On rejecting, When all recipients have signed.
- Click Submit.
You have now successfully configured an e-signature template for the selected form.
Setup Signature template and Send for signature - Organization files
A signature template can be configured for Organization files and sent for signature to specific set of employees or to all employees all in one go.
To configure the signature template,
- Go to Files > Organization Files.
- Click List on the right hand side to view the file list.
- Hover on the right hand side of the file you want to create a template for.
- Click on the ellipsis icon.
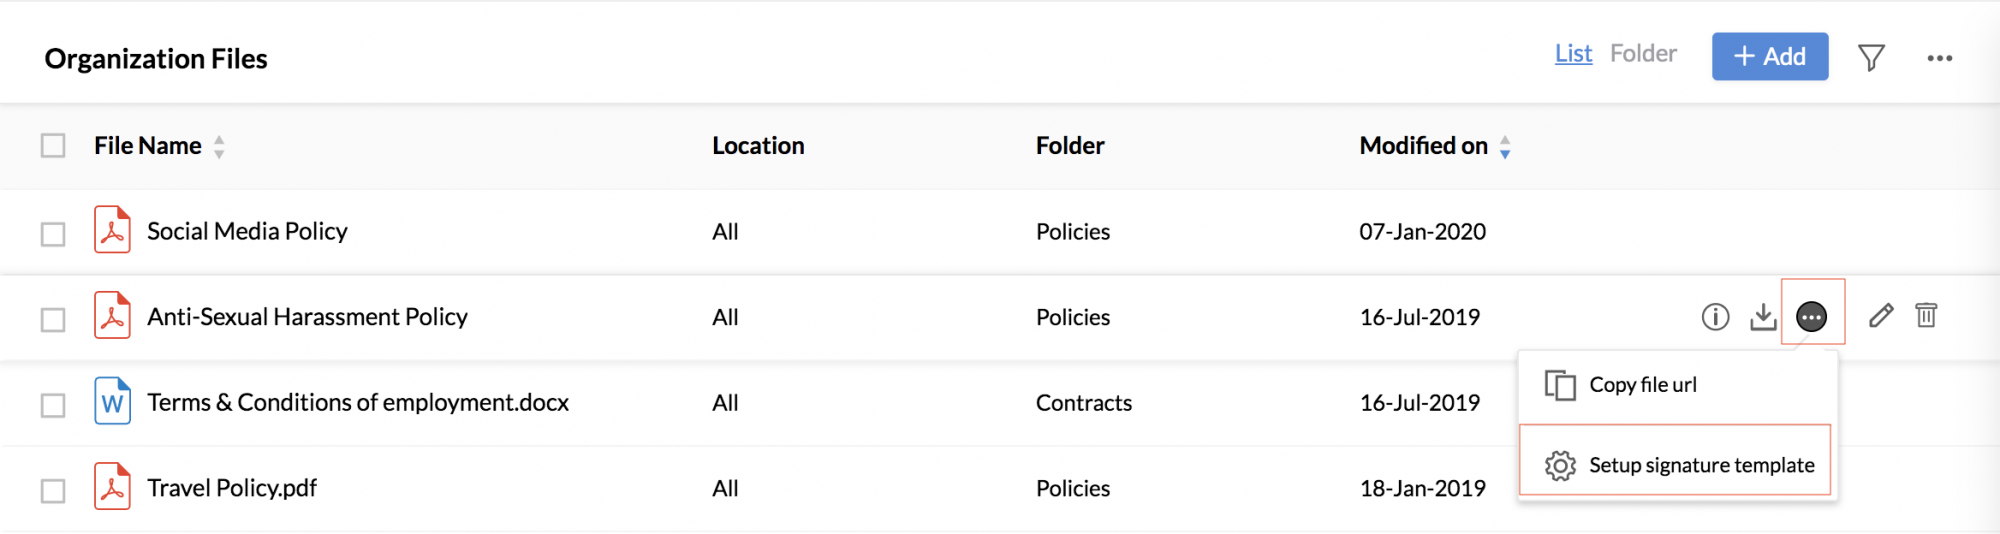
- Click Setup signature template.
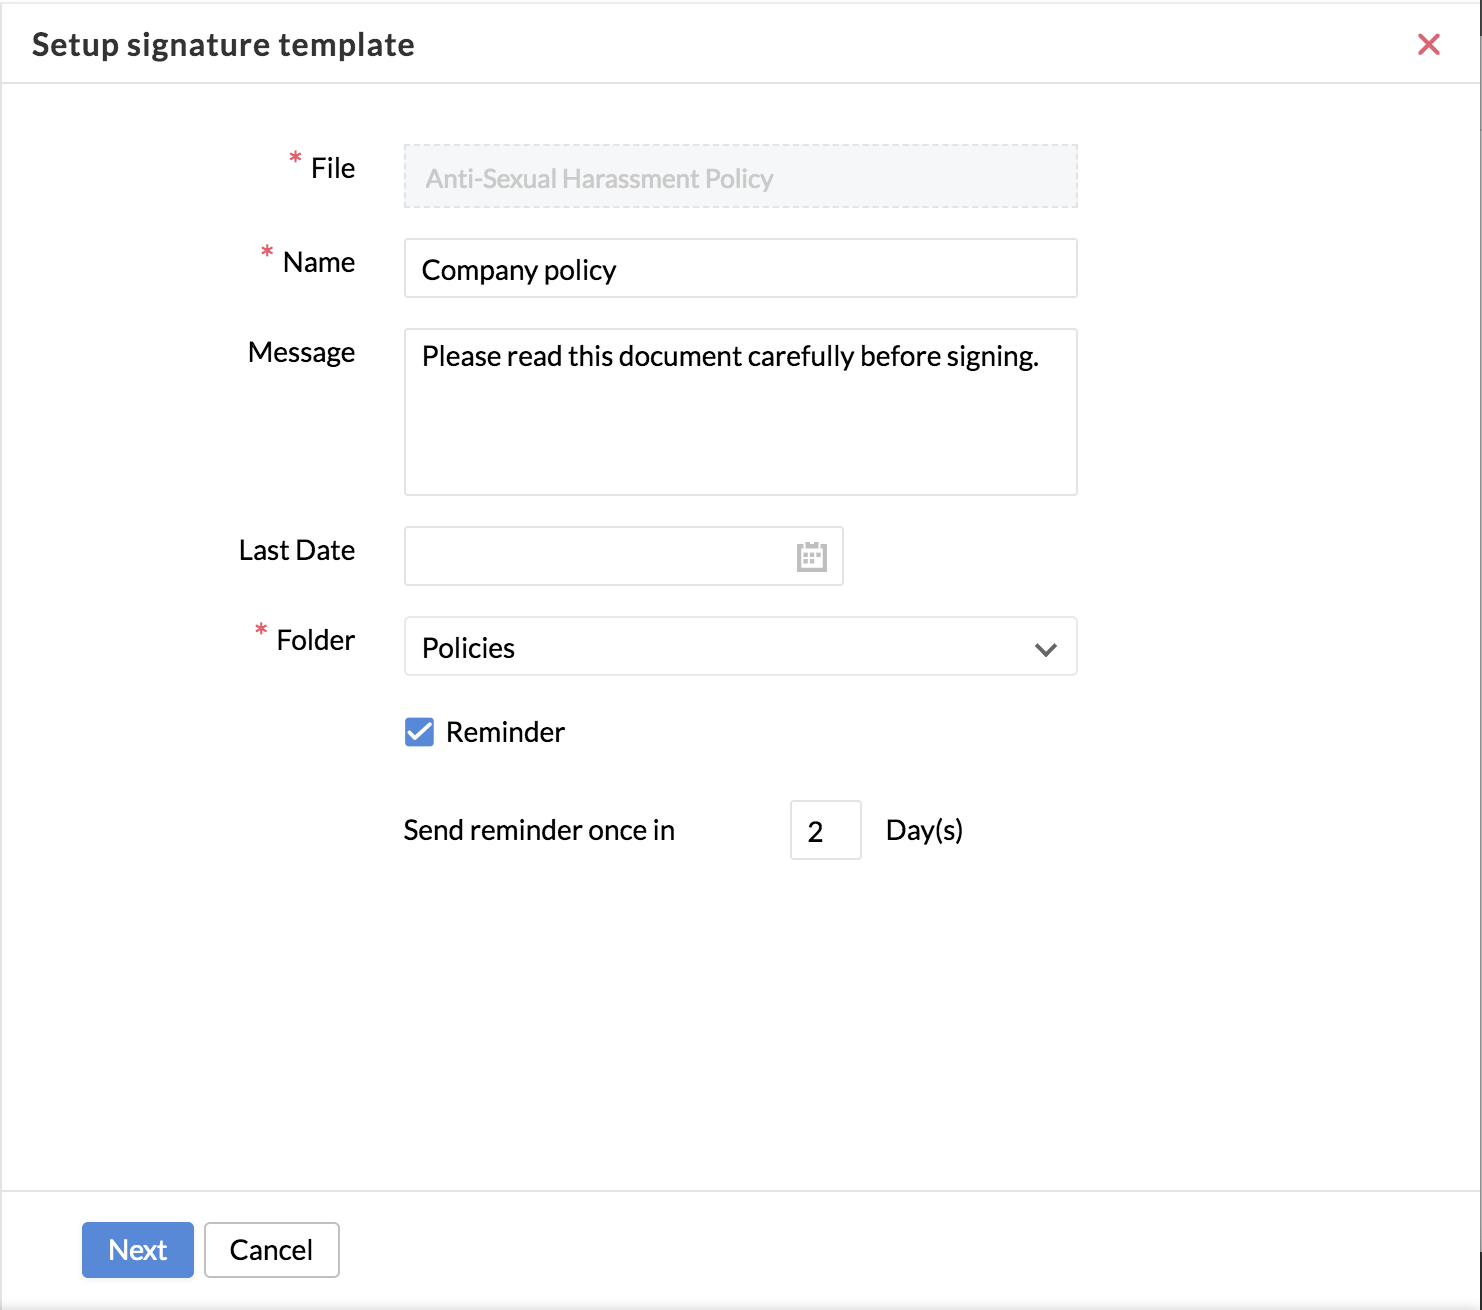
- Enter the required details and click Next.
- Insert the required fields in the document in Zoho Sign and click Save.
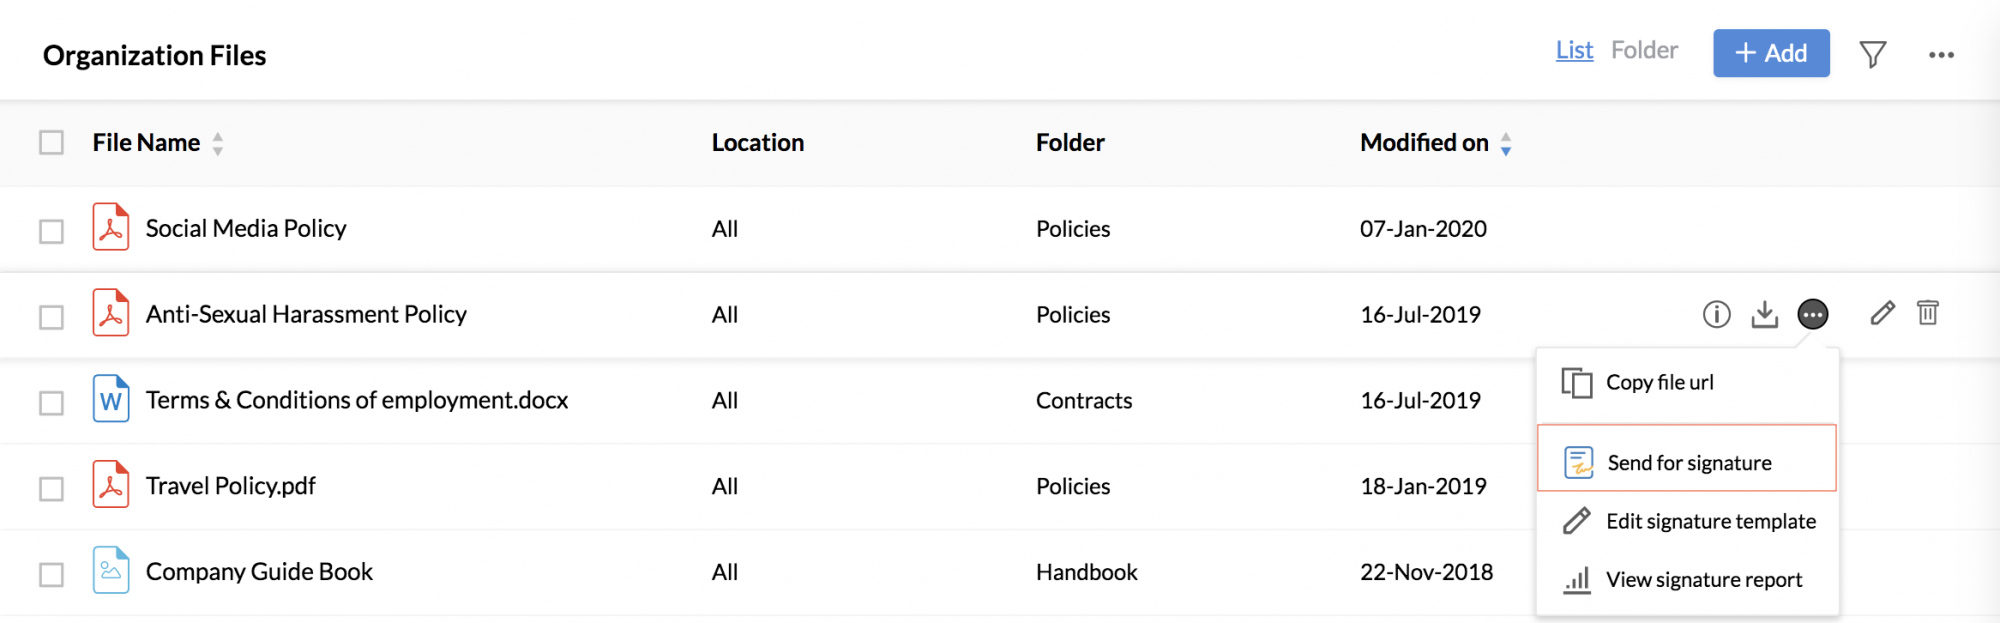
- Click the ellipsis icon again and now select Send for Signature.
- Select the employees in the drop-down if you want to send the file to only specific employees. To send to all employees, check Send to all employees.

- Click Send.
- To make any changes to the signature template, click Edit Signature template in the ellipsis icon.
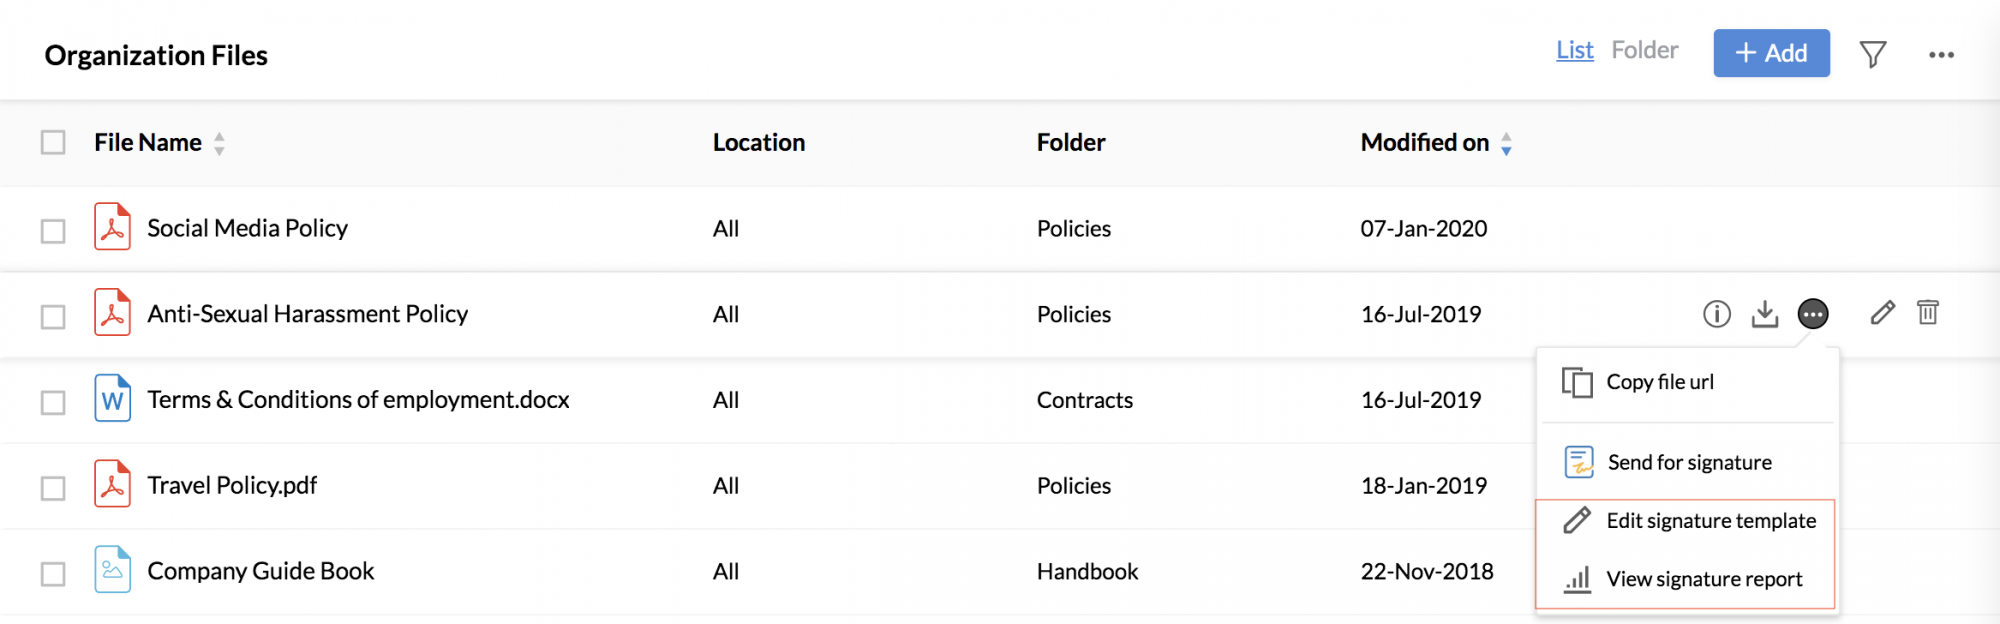
- Once a document has been sent for signature, click View signature report to check the status of completion.
Mapping the E-signature template to a workflow
Now, the configured template should be mapped to a workflow, for documents to be sent automatically for e-signing.
- From your home page, go to Settings > Automation > Workflow.
- Select a particular form.
- Provide a name for the workflow.
- Set the status to be active and provide an apt description as needed.
- Select Execute based in action i.e the workflow will get triggered when the selected action is done. Select a particular action.
- Set criteria if required. The workflow will get into execution only if the criteria are satisfied.
- Under the action, select Electronic Signature.
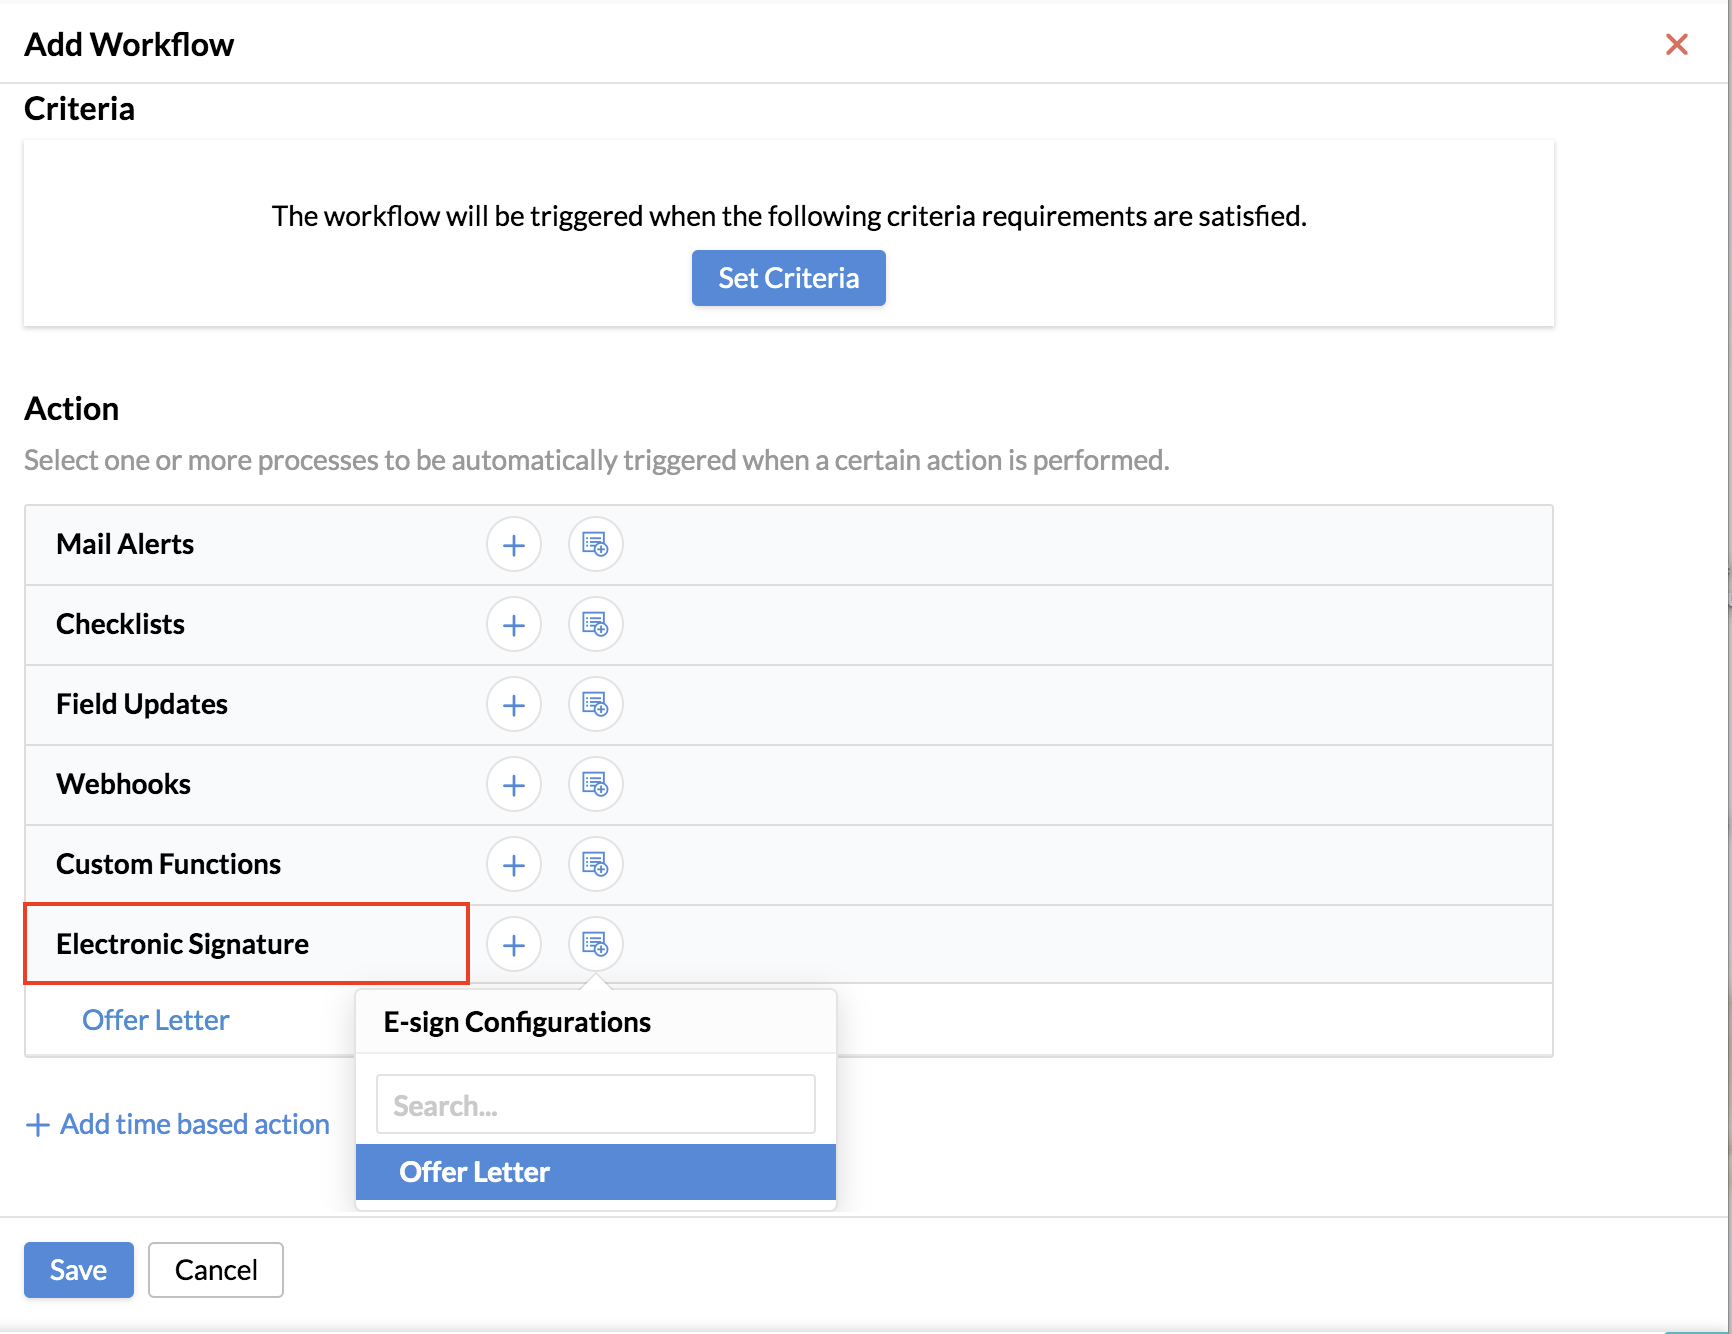
- Click on the folder icon to select the created e-signature template or create a new e-signature template for the respective form.
- Click Save.
You have now mapped the created e-signature template to the workflow.